Share your knowledge & learn from experts
Because prepping and community go hand in hand
How to prevent injury, illness or death while cleaning up after a disaster
On the thread “The second survival – How to go on after the crisis is over“, hikermor made a significant comment regarding the fatalities and serious accidents that can occur after the disaster during the clean up and recovery process.
What hikermor introduced on that thread warrants it’s own topic and thanks to Gideon who suggested the new topic title above, we now have a new topic started.
This is the quote from hikermor: ”Perhaps it is worth mentioning that fatalities and serious accidents resulting from clean up efforts following a hurricane, etc. typically are equal to the total rug up during the storm.”
The second survival thread deals with the emotional/psychological aspects of recovery after crisis.
This thread is so we can examine safety issues of recovery after the crisis.
What kind of safety issues could we potentially face?
How do you safely deal with matters of downed power lines or other electrical hazards? How do you prevent a fall from a roof when attempting to repair it?
What kind of tools or gear can help keep us safe?
What should we do with wet damaged debris? What about mould? How do we prevent infections or waterborne disease because of contaminated surfaces or sewage infested water?
This could be an excellent way to share first hand information on how we coped safely in the aftermath of a disaster, or what lessons we learned when we didn’t cope safely.
The following is my post from the second survival thread which deals with how to stay safe around electrical hazards.
Begin Quote:
hikermor and Bob – Excellent points.
One should also know how to deal safely with electrical hazards such as downed power lines. Or, if trapped in vehicle and a fire starts, how to safely exit a vehicle where there is risk of electrical hazard.
Electrical Safety
Also, keep contaminated footwear and gloves out of the house. End Quote
Bob also made several excellent comments on safety issues on the second survival thread.
I was going to wait longer for hikermor to start this thread, but wasn’t sure how long that would be, so with credit to hikermor for introducing the topic, Bob for his comments on the other thread and to Gideon for the title, I’d like to offer it now.
Read MoreBest considerations for an evacuation or bug-out vehicle
With recent discussion of evacuation events, I realized we could be evacuated despite our plans to SIP. In that scenario we would need shelter and accomodations which may not be available or affordable if prices go up. We would also need to consider a range of time frames.
I can see the wisdom of modifying my existing Chev Astro van into a BOV that can handle all season events. It still must function for normal use. The van sits on a truck chassis so it sits higher and can handle certain terrain that a lower vehicle might not fare so well upon.
Seasonal studded tires alread in place. I need to add a set of cable tire chains to carry in the vehicle to handle a winter event. We always have a full tank of fuel plus extra jerry cans.
The known gas mileage can be used to calculate the radius that we can travel. It is possible then to pinpoint areas that could be safe to stay until it is safe to return home. I want to calculate a radius as the evacuation event could come from any direction.
Currently the van has front bucket seats and two removable bench seats plus floor space behind the last bench seat. I want to set up items in a way that won’t draw attention as a target for a break in. Under the bench seats would work for some of the items.
I want to equip a rudimentary sleep area (rolled up foam or sleeping bags). Pail (already in van) and toilet seat ready to use. Kelly kettle and camp gear. Food items/MRE’s in sturdy bags ready to grab and go with BOB. Fishing gear in case it goes longer.
Currently the van is white, but if I am not mistaken are there not tarps or nets that can be thrown over a parked vehicle to disguise it? Anything shiny needs to be covered as well. I am looking to keep costs down.
I want to be very low key if on the move.
Read MoreDo you duplicate your every day carry in bags?
I’m planning my first Go Bag, and trying to consider how much to duplicate from my every day carry. Do you duplicate essentials that you carry with you everywhere like a multitool and lighter in your Go Bags? I’m thinking about things I carry in my pockets/on my belt, not things I carry in my “every day carry bag” (a day hiking bag I keep in the car and bring on short hikes).
Obviously throwing an extra Bic lighter or pack of matches in is cheap, but it starts to add up when you talk about multitools, knives, and the like.
Read MoreThe second survival – How to go on after the crisis is over
I answered the insistent knocking of the sun and opened my den window today.
The fickle prairie weather has shifted again, from a wind chill that can destroy flesh in minutes to sun warmed air, melting snow and the “soon but not yet” promise of Spring.
The one constant about weather and life is: change.
We practice preparedness as a way to cope with change in our circumstance, regardless of how or when that change may come.
Everything can change in a heartbeat. It could be natural or man-made. It could affect our home or our global home.
There is an aftermath to a crisis, be it personal or large scale. It is a time when we assess the damage sustained during the crisis, grieve our loss, and find a way to go on.
I have never discussed how to go on after the crisis is over with anyone who preps.
Instead of a scenario, I would like to offer this subject in the context of lessons learned from personal experience. And yes, there is probably going to be a grandmother story in here somewhere.
I believe the following example is timely, given the issues of post viral complications from Covid-19.
It illustrates that we can’t pick the timing for when difficult life events happen.
I was rebuilding my life and assets when I contracted what I thought was a flu virus in the early 2000’s. It wasn’t typical and left me with long term health effects. It was like suddenly becoming brain injured. It affected my ability to walk, read, and think, among other symptoms, and delivered it all with a substantial amount of pain.
My doctor and specialists had theories, but no one could tell me what was wrong. There was a diagnosis for fibromyalgia and a theory that maybe I had Multiple Sclerosis or Rheumatoid Arthritis, but nothing beyond that.
My doctor told me that I could no longer work. The trap door opened and the bottom fell out of my world.
Regardless of diagnosis or the lack of one, I still had to learn how to live with the symptoms.
I learned that life isn’t like an episode of House. There isn’t always a diagnosis or a cure. The crisis, in this case a health crisis, was technically over. I had to find a way to go on.I assessed the situation:
I had no preps because during the pack and run move from my ex, there had been no time to get them out. Finances were depleted helping my Mom and Aunt. There was a property boom and rents were rising. I now had a disabled fiance and my Mom who were depending on me.
We had to move, back across Canada where the cost of living was lower. I had to buy time until I could sort out my health and my life.
I identified the challenge of the health symptoms: The biggest challenge was pain. Pain exists to help protect us from harm. It is not a normal state to be pain free. If we work or exercise hard, our muscles may become sore and hurt – that is normal.
The absence of pain is not normal and seeking a pain free state as part of chronic pain management is dangerous. It isn’t palliative pain which is managed differently.
Pain medication is sometimes necessary for chronic pain, but it is wise to employ other non-medication techniques in conjunction with it.
There were non-medication pain management techniques that I began to employ: breathing, distraction and visualization. I realized the pain wasn’t killing me, so I could reduce the stress I felt about it. I had to learn to live with it and I did.
Then there was the grief. I had always been athletic and active. A 60-80 hour week was nothing for me. I was superwoman. And, then I wasn’t.
At my lowest point, I felt worthless. I focussed on my fiance and Mom. They needed me and I couldn’t give up.
I let myself feel the grief, the loss of the person I used to be. I told myself “it’s ok to cry.”
Then I told myself, it’s ok to accept who I am today.
This is a very condensed version of what happened. I went on to rebuild my life and achieve goals, including more physical recovery, than I thought possible during the crisis. I was blessed with the opportunity to serve my community again when I was asked to volunteer to teach other people to learn how to manage chronic conditions.
I learned how important my preps were when I couldn’t get them out. It was awful and very hard not to have anything in reserve when the crisis hit.
I learned that regardless of the disaster or crisis, whether it happens to you or society on a larger scale, you must journey your way through it. Keep going. Don’t give up. Just take one step at a time and one task at a time.
Don’t borrow problems during the crisis. Stay focussed on what is actually happening and not on what hasn’t happened.
If you suffer loss, any kind of loss, allow yourself to grieve. You are not crazy. It is ok to feel sad or angry or any other emotion. Never let anyone tell you otherwise.
Talk to a trusted person or call a crisis line. If that isn’t possible, then journal your grief, draw it, howl at the moon or chop wood. Do whatever is healthy that helps you to externalize and work through your feelings.
To understand the process of grief, I recommend the writing of Dr. Elisabeth Kubler-Ross who is considered the pioneer in this field.
What about you? Have you thought about how to journey through the aftermath of a crisis or disaster? How can you prepare for that part of survival? What kind of coping strategies would you use?
Read MoreWhich roads are safest for travel?
Hi! I’m new to prepping but feel I am making good progress. I’ve got a good start on medical supplies, food, water (including a Berkey) but can’t get my mind wrapped around bugging out. Part of my stress lies with the topic here. The apocalyptic books I am addicted to always talk about roadblocks and stopped traffic that makes travel impossible. So two questions really. First, is that overly dramatic? Second, are interstates or back roads better? I live in a rural area, have good neighbors who know how to handle weapons, have a well and creek, and have room to garden. My hope is to be the spot where people can bug out too but I know I need to prepare for that eventuality. As I write this I realize there’s one other question. Any idea in a shtf situation will travel become bad as in dangerous? Sorry for the length of this.
Read MorePractice, simulations and drills
When we actually practice with our preps, or run drills and simulations, we take the visualization component out of prepping. There is a lot of mental work in prepping. This creates a shift into real time, hands on practice. For simulations and drills, there is still some imagination required, but you are still in engaged in doing rather than planning or acquiring.
Practice with our preps can build confidence and take some of the stress out of preparing.
Familiarity with our gear and preps becomes a new skill acquired, and more than just putting items into storage or onto a shelf.
Running a drill or simulation is also a way to know that you can handle certain items comfortably and with skill. Is the knife you bought right for you after repeated use? Or, do you need a different one that you can handle better? Do your boots cause discomfort? Do you remember how to purify water safely? Can you bake a loaf of bread?
What about various scenarios as drills? How about a no tech weekend challenge in your home or apartment? Survive with manual or non powered items only. Candles. Navigate with a map. Cook as if there is no power. Try to do everything as if you are off grid.
Take it outdoors, whether you live in the city or a rural area, and practice your covert skills. Challenge yourself to find the most undetectable ways to navigate to certain areas or places that you might need to get to.
Drill down on survival. Earthquake. Now. Go. Get to a designated point. How long did it take you? Did you discover any challenges on the way?
You can make that challenge more difficult by throwing yourself a curved ball in the form of a route closure or other obstacle necessitating the need to navigate differently. Some preppers have items that were purchased long ago. Are those items still relevant? Or, are there better items now available?
Try running a health impaired simulation. Eye injury and vision impaired. Someone was careless and broke a leg. First aid required. Now you have to manoeuver on crutches or you are one person down.
Or, someone is ill with the flu complete with all the symptoms. You have to care safely for them. You need to set up a clean room to prevent the rest of the household contracting the flu. You have your duct tape, plastic and zip strips to create a door in the plastic ready, right?
I knew people who practised that scenario for a weekend. It was an eye opener for the caregiver and for the person in the role of patient. We are lay people. Nurses are trained to care for the many needs of patients. It’s not as easy as they make it look because of their training.
Ease of use is not just the realm of the aged. People of any age can develop tendon, joint or muscle conditions or injury like carpal tunnel or arthritis.
I developed osteoarthritis young, as did some other family members. All of us had to learn how to adapt to living with it. What if you suddenly developed arthritis in your hands? How are you going to get that pail of rice open? Carry water? Imagine severe pain in your hands and wrist, now how are you going to accomplish your goal?
Even strained, sore muscles, from activities from chopping wood or other physical labour can affect how well you can use other items in your preps. The right tools can help you during those times.
There are longer types of practice such as grow a small raised bed garden in your back yard. Or, if you are in an apartment, challenge yourself to grow some food items.
I grew tomatoes on my balcony in BC. I wanted to see how much I could grow and if it would be successful with the light conditions. It worked great, except for the neighbours calling the police because they thought my tomato plants were something else.
Do you have your local edible plant book yet? Scenario: long term disaster. You now have to forage for food. Where do you go? How do know what to pick? Twinkies at 7-11 don’t count for this one.
Then journal or make notes about your experiences. What did you learn from it? Are there red flags about your preps or skill sets that need to be addressed? How did you fare in non physical ways? Do you need items or training to manage issues like stress or anxiety?
I enjoy doing drills and practice because I learn something valuable each time. How about you? Do you do regular drills and practice or run simulations? What has your experience(s) been like? What did you learn?
Read MoreActivated charcoal – A great item to keep on hand, especially with concerns over water purity.
If you have any concerns over your stored water having an off taste or maybe having become contaminated, this discussion is for you. And yes, I keep several Sawyer Mini water filters, at home & in my get home bag. Such items are great for purifying water. Yes, you can drink pond water thru one of these, but the water will smell & taste nasty.
With all the current discussion over water storage, due to the extreme weather conditions many are experiencing, I thought I might suggest a solution to those concerned with the purity of stored water. That would be storing bulk quantities of granular activated charcoal (also referred to as carbon). Granular Activated Charcoal removes harmful elements from water including copper, chlorine, carbohydrates and other dissolved organic materials. It also takes out sulfa drugs, antibiotics, and other medications.
I keep a 5 gallon pail, or 15 lbs of this in storage. Keep in mind activated charcoal is a completely different item than regular charcoal. Activated carbon, also called activated charcoal, is a form of carbon processed to have small, low-volume pores that increase the surface area available for adsorption or chemical reactions. It is this extra processing of the charcoal that makes this product so adsorbent. Yes, adsorb… not absorb. Absorption is the process in which a fluid is dissolved by a liquid or a solid (absorbent). Adsorption is the process in which atoms, ions or molecules from a substance (it could be gas, liquid or dissolved solid) adhere to a surface of the adsorbent.
Our typical water filtration devices, such as Sawyer do a good job of removing harmful things from the water but don’t usually remove the foul smell sometimes associated with standing water. If you add activated charcoal filtration, that will make the water smell better and also helps remove some additional toxins from the water. I keep some of these cartridges on hand, as they are refillable and can easily be attached to your portable water filters. https://www.amazon.com/gp/product/B0007U0184/ref=oh_aui_detailpage_o01_s00?ie=UTF8&psc=1&tag=prepperforumsconvert-20
I get my 5 gallon pail of the activated charcoal here. That site is loaded with great info.
https://buyactivatedcharcoal.com/buy-bulk-activated-charcoal/granular-activated-charcoal.html
Read More
An introduction to threat modeling
Preface
This isn’t an ‘ultimate guide’ -not by any stretch of the imagination. It is a work in progress and, as I see it, the concept of threat modeling underpins all we discuss here on The Prepared’s forums. I welcome any and all comments and constructive criticisms. Okay, here we go. Here’s my conversation starter about threat modeling.
An Introduction to Threat Modeling
Although it has its roots in IT security, threat modeling is, at its core, the foundation for the mindset that you and I call prepping.
The purpose of a threat model is to examine your preparedness by identifying assets, threats, defenses, and vulnerabilities. In short, the process answers the questions, “What am I preparing for?”, “What do I have?”, “How can I protect it? “, “What could go wrong?”, and “What am I missing, overlooking, or not seeing?”.
As we identify the various aspects of threat modeling -this way of thinking and prepping- use this opportunity to re-examine your planned scenario and responses. Take this opportunity to correct any potential issues, shortcomings, or vulnerabilities.
Identifying Assets
Assets are people, places, property, equipment, skills, and other resources you have access to or at your disposal. An asset might the med kit you have in your GO bag; it could be the pistol you keep at your side; an asset can be a person with a specialized set of skills (eg., medical training, combat experience -who can be a member of your team or can train you); an asset could also be place such as a bug-out location, a series of fallback positions; egress routes and transportation; or assets can be your significant stockpile of rations, water, weapons, ammunition, skills; or, items for trade and barter.
Identifying Threats
Threats are people, places, events, or conditions that have the very real potential to impact, disrupt, obstruct, impede, undermine, injure, maim, damage, or destroy assets and objectives. Below are some sample categories and their corresponding threats, which I’ve drawn from a few of my personal models. By specifically identifying threats, we can better bolster our defenses while help us to prepare smarter, not harder.
Natural: earthquakes, tsunamis, tornadoes, fire, flooding, landslide, blizzard, stellar flare, etc. Biological: injury, illness, disease, outbreak, pandemic, abuse, rape, murder Environmental: polluted resources, water scarcity, breathable air Infrastructure: electricity, water, gas, cellular communications, gps Chemical: pollution from manufacturing, plant accident/failure Socio-Economic: financial collapse, civil unrest, theft Radiological: fallout, power plant accident/failure Political: discrimination, inequity, inequality, polarization, radicalized ideologies Wartime/Insurrection: biological, chemical, & nuclear weapons, munitions, artillery, unexploded ordinance, terrorism, dirty bombsThreats EVERYWHERE
Thinking about threats can be especially easy if you have a low threshold for what you might consider a threat. It can also be downright daunting -almost to the point of paralysis- if you’re not careful. Threats can be found everywhere, if you look hard enough. The trick, as it were, is to abide by the sane prepper mantra and be sane and rational. Prioritizing is additional way to mitigate a runaway list of threats.
Prioritizing Threats
Probably the simplest way to keep yourself sane and from being overwhelmed by all these threats is to put them into one of two basic categories: low-risk or high-risk. Some of you may decide to go with risk levels that resemble something like our current Terror Threat Levels. How you prioritize is ultimately up to you, just do it. Doing so will force you to closely examine situational reality versus possibility and probability.
For example, those living on the west coast of the US (or along the ring of fire) are right to consider earthquakes, tsunami, or volcanic activity (along with the threats to life, safety, and infrastructure that come with those events) high risk threats. Although it’s not out of the realm of possibility, someone living in the middle of the US (for example) might not consider these high-risk threats. Instead, they’d likely list tornadoes.
By prioritizing threats you can prioritize your preparedness and, when that threat appears, you can prioritize your response(s).
What does a threat model look like?
A threat model can be as simple as simple as a Word document, as complex as spreadsheet, or as visual as an illustration. In creating an actual model, not only do you get it out of your head, but you can share this information with members of your household, trusted team, or community.
Below are a few examples of threat models to help familiarize you with the concept of threat modeling:
[See? Even Batman has a threat model. Classic IT security threat modeling. A sample of my consolidated threat modeling spreadsheet (a perpetual work-in-progress).]
That’s All I’ve Got
The time you invest in developing, understanding, and evaluating your threat model(s) is time you’re investing in your own preparedness and, ultimately, your success.
Read More
Leather care
My wife has a conceal carry purse by a company called Gun Tote’n Mamas. While the design is great, the build quality is not the best. She got the purse two years ago and the leather faded extremely quickly and didn’t even look a nice worn look, but just looks ugly. The zipper is also a weak point on the bag and the zip keeps coming apart. All this within a year. We called them up and they sent us a new one.
The new bag had the same issues of poor zipper quality and leather fading quickly after just a year. This time we have contacted them multiple times and they won’t get back to us. So we are trying to make due the best that we can with what we have.
I used some pliers and crimped the zipper and it now zips shut properly, so that problem is solved, but we still have some really ugly faded leather.
What do you do for your leather gear? Gun holsters, knife sheaths, purses, belts, etc… How do you keep it hydrated, prevent cracking, and keeping it look nice?
-Be Prepared-
Read More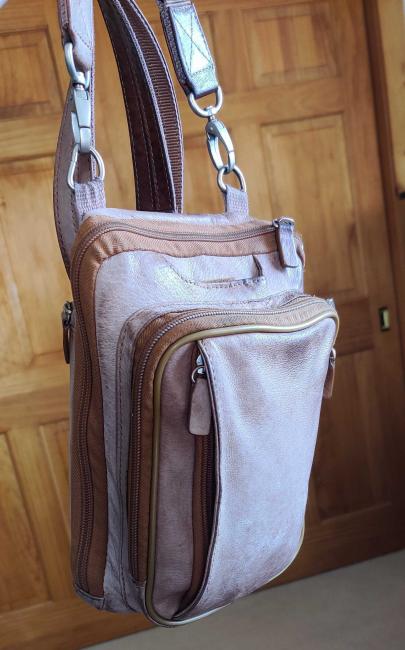
Fit feel and familiarity (Getting to know your kit)
FIT, FEEL AND FAMILIARITY (Getting to know your kit)
So you have done the research, bought the kit, developed your plans and stockpiled everything including the assault systems kitchen sink. Now what are you going to do Wait for Armageddon? I hope not.
It’s no good at all having a great piece of kit if you are not totally familiar with its feel and fit, and you need to be very comfortable about using it. Why buy an all singing all dancing tactical folding knife then put it away until it is needed? Does it open and close smoothly, can you cut a rope, fillet a rabbit, defend yourself with it, sharpen it or is it too big or to lightweight for the task?
Does it sit comfortably on your hip or in your pocket now? What about after 8 hours with your rucksack pressing it into your hip, can you unleash it, open it and use it with cold, wet, tired hands?
Your expensive flashlight with its lifetime warranty, can you strip and replace the self-cleaning switch, Is it big enough powerful enough to do the job for a full evening in your blacked out camp site or retreat, or is it always getting in the way, pulling your belt down, and eating batteries faster than a kids toy?
Be honest, if you were stressed out, scared stupid and fleeing for your life along with your family, Could you put your hand straight to your compass, flashlight, map, knife or whatever in your bug out vest or bag without having to unpack or rummage about for it. What about the vest / bag itself Is the vest up to the job? Is it comfortable? not going to slide up or down, ride up into a knot or disintegrate at the first time its put to use.
It’s the same with the BOV’s super duper tyres you paid a premium rate for, and what about the PV unit or wind generator you have obtained, will the tyres give the traction you seek or are you going to end up with terminal wheel spin in the inevitable piece of swamp along the route to your destination. Or the PV and turbine working flat out simply don’t provide enough energy to stop your freezer from thawing out. What if for example the turbine produces so much noise it lets the residents of the next county home in on your secluded retreat?
You have the will, you have the need, and now you have the kit to enable you to survive, so get familiar with it use it, get comfortable with it, reassure yourself that it will be up to the task, Why not for example wear your vest for a few days at a time partially loaded, so you get used to it, let it find its shape, find out the best way to load it with your kit. You don’t need to go into town looking like you are ready to start a war, but it will do you no harm at all to use your vest as a gillet carrying your knife, flashlight, compass, first aid kit, Para cord, wallet etc for a few days. Perhaps you could make it your car coat or your dog walking jacket. It’s the same care that is needed with the new boots you have recently invested in.
Now you have realised that bugging out in a vehicle is going to be almost impossible and have purchased those 200 dollar boots, are they up to the job? To stiff? Poor fit? Not broken in? Not water resistant? Do they take forever to dry out etc?
You need your bug out boots, clothes and kit to be snug, comfortable and familiar at hand, and up to the job.
I got myself what I thought would be an ideal garment to use as a bug out vest, I bought it, loaded it up, then put it away whilst I waited for Armageddon. Then one day I thought I would take the mutt for a good long hard walk and decided to try out the vest…………………………. It is now into its third set of alterations and modifications to make it more comfortable and better suited to the task I designed it for.
Read MoreRural preparing – manual well pump backup?
I’m newer to prepping (starting lurking on The Prepared in March 2020 after realizing I was woefully underprepared when COVID lockdowns hit). I’m looking for advice on prepping in a rural location.
We already live in a rural area in Minnesota, which is great, so I don’t have to worry as much about bugging out. But, I’m trying to figure out what steps to take to bolster our shelter-in-place plan.
We already have a dual-fuel generator that is wired to our house to run core services like septic/well pump/appliances/HVAC/etc., large on-site propane stores, spare fuel for the generator, a bunch of 5-7 gallon Reliance water containers, extra food stores, personal/home protection gear/supplies, and some moderately equipped bug out bags in case we do need to leave.
I have a question that I haven’t yet been able to resolve. We have a private well on our property that uses an electric pump to draw water into the house. The well pump is set up to be able to run on the backup generator, so we’d certainly be able to grab a bunch of fresh water if we lost power for any length of time. Is a manual pump necessary as a fail-safe? I’m semi-handy, so I feel like I could figure out setting up the manual pump as a backup, but is that overengineering it? Is it worth the effort?
Thanks in advance!!
Read MoreWhat to consider when buying an acreage?
Because I was raised on a farm, I related mostly to farming and larger sections of land and didn’t consider smaller holdings. Then I acquired a copy of “Living off the Land – A handbook for survival” by John H. Tobe and his words lit a fire in me.
I live in a small rural town, but have been searching for acreage since I moved to the region.
There was a property several years ago. It was in a hilled area with property access off one entry point via a driveway from a secondary highway. The property was situated on a bit of a curve and not readily seen from the highway. The driveway was suitable for a gate and cattle guard to discourage intrusion.
The home was positioned on land that dropped off to a deep gully on one side. This made access from that side extremely difficult and the property more defensible.
The price was right, but I didn’t buy it for one reason: the driveway was shared with another house. The layout was a bit too close for comfort. The person or persons in the other house could have been great neighbours and an ally in a crisis, but what if they sold their home or passed away?
I’ve learned from my current community that when houses change hands, the community changes and not always for the best.
Today, when I thought about that property, I realized that lately, I have been chasing price in the acreage hunt and not paying attention to other criteria.
I also believe that if one has clarity and detail about a goal, it is more achievable. I don’t want to make the wrong choice either from a prepping or personal standpoint.
I questioned if my criteria needed to change or be revised. It’s been awhile since I laid out what I wanted. So, for those looking for property, I ask what is your criteria for acreage selection? If we take price out of the equation, what are you looking for in an acreage? And for those who have acreage, may I ask how did you know it was the right property?
Read MoreFire! Heh! Heh. Fire’s cool.
Other than baiting you here to relive the glory that was Beavis and Butthead, I also wanted to share another tip:
Balls o’ Fire
Supplies:
gloves petroleum jelly cotton balls (or dryer lint) containerMethod 1
Mash vaseline into cottonball (or gathered dryer lint). Store in container (zip loc, old prescription bottle, etc). Bits of paper in the dryer lint help inflammability.
Method 2
Ever melted chocolate in a double-boiler? No? Place one pan on the stove, add water. Place a smaller pan in the water. Put on low heat. Add $ingredient (stir occassionally) until melted. In this case, petroleum jelly. Once the jelly has melted, allow to cool enough that you can drop a cottonball into it and remove it. Set the cottonball aside to cool completely.
Using Method 1, the cottonballs burned for approx. 6 minutes.
Using Method 2, the cottonballs burned for approx. 10 minutes.
In either case, these can come in pretty handy in a BOB or for camping.
You could also consider incorporating excelsior, also known as wood wool (a product made of wood slivers used in packaging, for cooling pads in home evaporative cooling systems), into your fire preps (or cottonball recipes).
Read More
Family emergency plans?
I just finished reading a new preparedness book* that, like all preparedness how-to books, talks about family emergency plans— you know, the whole, “Have a meeting place outside the neighborhood” advice. And you know what? I’ve never done that prep. Moreover, I don’t get it. Maybe it’s because my household is small (fewer people to scatter), or because my house is very small (it’s not like we’d flee a structure fire from separate wings and then lose one another on the expansive grounds, ffs), or because Covid has broken my brain (“We are always together. There is nothing other than together.”), but I just can’t envision a meet-up plan that is simple enough to actually remember but also versatile enough to serve 80% of scenarios in which we would need it. In the most likely 80% of scenarios, we are bugging in, so the house is our meeting place. In any case where we have to bug out, well, which direction we go and how far we can go depends entirely on the nature of the threat.
Can anyone articulate for me how they’ve approached or operationalized this (presumably good) guidance? What does your family emergency plan look like? Which scenarios do you use it for? Do I not get it because of where I live and the kinds of things it makes sense to prep for here? For example, if you live in the WUI in the Western U.S., it seems clear to me that you should figure out multiple driving and walking routes out of your neighborhood in the event of a wildfire; there are probably limited options, memorizing all of them is both possible and sensible, and it makes sense to come up with a place out of harm’s way to which all routes lead. But I live in the middle of a city, the odds of a wildfire sweeping through are vanishingly small, and there are literally a gazillion ways out of the neighborhood. If you live in hurricane country I can see trying to figure out a way out of your neighborhood that doesn’t direct your through low-lying, flood-prone areas, but our big disaster threat here is an earthquake, and I don’t really see an analog there.
Anyway, any thoughts or anecdotes to help me make this practice make sense for my household would be much appreciated.
* The book was David Pogue’s How to Prepare for Climate Change, and I really only skimmed it, since I’ve read a lot about both preparedness and climate change. Most of the information wasn’t new to me, but it was really interesting to have see those two subjects woven together. The book seems like a particularly valuable resource for anyone in flood-, hurricane-, or wildfire-prone areas, since it goes into how to understand your insurance policy and get assistance from your insurer and the federal government post-disaster— a very unsexy, bureaucratic side of prepping that probably characterizes the reality of post-disaster life better than what we see in apocalypse and survival movies!
Read MoreA bug out bag that is constantly in use…looking for organization tips
Hello, I am new here. Hopefully I can organize my thoughts well. I live in California and have a bag that reflects that, but I also carry it when we travel. We are divers and travel to, shall we say, many destinations that are not exactly developed, usually in Asia and the South Pacific. So I have a bag that is very overbuilt with regard to specialized first aid (I carry liquid prednisone and tons of things for respiratory illness because my son is a severe asthmatic and tons of things for emergencies when diving), as well as water filtration (we’ve visited a few islands where the water isn’t safe to drink). We take about three fairly long overseas trips per year.
I also carry a fairly robust hygiene kit and my own 2p big Agnes tent and a bivy for when that tool shed of an airport in Fiji cancels our flight and we are stuck overnight (We have slept in a tent in a terminal in the Bangkok airport) I’m also taking the bag on 5-15 flights per trip where I have to remove all of the tools and some liquids and place them in my checked bag.
I’m thinking about just taking all of the disparate items I can’t take in a carry on, like my knife, multi tool, handsaw and liquids and placing them in their own ziploc I can just place in my checked luggage (which means they’d be in their own ziplock in the emergency bag I guess?). I also don’t necessarily need all of the first aid items I’d carry on a dive trip in my bag at home when we go in our RV.
does anyone have a good system for rotating items in and out as needed? I’m afraid an emergency will occur at home and I’ll be stuck without my knife or my gravity bag.
Read MoreStand ‘n Plant Seeder – an easy way to plant your garden
I love to garden, but due to a bad back & arthritic knees, I don’t get up & down so well anymore. This is especially a factor when I plant my garden seed. When I do so, I plant many extra seed, so as opposed to planting say the recommended 6-8″ apart, I plant seed every 2-3 ” apart. That gives me a safety net if some don’t germinate. It is easy to thin once they have grown a bit plus if I have a section where few plants don’t come up, I can transplant from one section to the bare section… using my Hori-Hori knife. That is a lot of up & down, so a few years ago I purchased the Stand ‘n Plant seeder, which costs $55 and it is worth every penny. It is simple but effective. https://www.standnplant.com/index.php/seeder
Here is a pic of it standing in my corn bed. Notice I run a string to keep the rows straight.
To operate, you plunge it into the ground, drop a seed into the top, squeeze the handle to open up the bottom & release the seed, lift up, cover the hole with your foot… and repeat. I find it easier on the mechanism to pull the unit out of the ground a bit before squeezing the handle. That way there is less tension on the strap, as it doesn’t have to push aside the soil.
Drop the seed into the top.
Here is the squeeze handle. Not really a handle, as you are just squeezing the strap.
When you squeeze, it opens the hinged bottom. Note, you can also put in small plants as opposed to just seed.
Here is a video from their website
Read More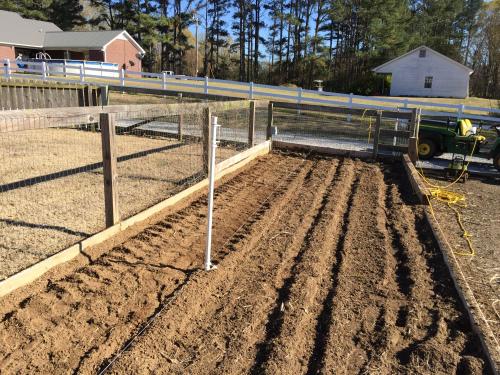
People who have taken a course from the prepared, was it worth it?
I’ve been eyeing the courses that The Prepared has been putting out and am interested in taking them. But before I do, I want to make sure it is worth the money.
Has anyone taken the knife sharpening or water course?
Did you learn something new that you didn’t know before or was it things that most people know about?
Do you feel like you got your money’s worth?
Read MoreLightweight/small water containers
I’m a beginner and researching water containers for my home. I have a compromised back and can not lift more than 20 lbs, which seems to be approx 2.5 gallons of water. Most like the Rhino seem to start at 5 gallons.
Read MoreRaising fish – Great recreation & a great survival resource.
In another discussion I mentioned I feed catfish, and I was asked to provide more info.
My farmstead did not have a pond when I bought it, so in the spring of 2013 I decided to put one in. I love fishing… even in small farm ponds. But as a prepper, I realized even a small, one acre pond could contain thousands of pounds of fresh meat that could be sustained indefinitely due to natural reproduction, as long as I fed the fish. Feeding them accomplishes two things. First it allows for a much larger population of fish than a normal pond could sustain naturally. Second, grain fed catfish are far superior to natural fish. The flesh is pure white, firm & has no fishy flavor.
My problem was, I didn’t have a ravine or gully that would allow me to simply, and cheaply, put across a dam. My only choice was to dig out the whole pond in a corner of my bottom pasture, where rain runoff naturally flowed. Then that created a new issue… what to do with all that dirt. Being an avid shooter, I had them build a large berm next to the pond, where I could set up targets. Then the rest of the dirt was spread out across the pasture in a way where any rain runoff funneled to the middle of the pasture & then would flow into the pond. Here are some pics & a rather poor video showing the construction.
In the following pic, notice the trees that were knocked down & stacked in the pond. Also note where the trackhoe dug a bunch of holes and mounded that dirt. That is all structure to provide different habitats underwater & to provide safe areas for fish to hide. Also the pond is dug with different elevations where in spots it is pretty deep & then tapers to a water depth of 2 feet.
https://videos.files.wordpress.com/cQHi2mvV/img_0606_mpeg1video_std.mp4
Below is the shooting berm.
Added a small dock a bit later.
At our local farm supply, you can order fish from a company that comes a few times each summer. They put the fish in clear bags and then you rush them to your pond. The next spring, 2014, I brought in channel catfish, hybrid bream & fathead minnows.
I then added an aeration system using Vertex bubblers to improve water quality. I put in two of the dual units pictured below. They sit on the bottom of the pond & put out millions of micro bubbles. This adds oxygen directly to the bottom of the pond & keeps the water circulating throughout the whole pond. I put a small compressor in the tack room of the horse brn & ran the pvc piper out to the edge of the pond.
This pic was taken in July 2016. These fish are two years old.
Read More
Beginning the journey
I live and work in the SW corner of AZ. My work area can range from the Colorado river west and the Gila River north about 50 miles each way. It’s a 30-ish mile drive one way from home to work. The area is low-elevation desert, with huge tracts of agriculture in between chunks of barrenness. The ag means the areas closer to town and the rivers are criss-crossed with canals. Farther away, though, there’s just the dirt, sagebrush, and cholla.
I’m just starting my “preparedness” journey, where I’m actually thinking about how vulnerable I am if my comfort zones collapsed. I bought my first gun a year ago (M&P full-size 9mm), and recently a second one (Ruger PC Charger), and had security screens installed on my house. Anticipating a possible grocery shortage, I also bought two 3-day boxes of Mountain House from Amazon. I almost feel foolish thinking like this – but I have seat belts, fire extinguishers, and AAA towing for the same reason: just in case! (AAA has saved my bacon a few times!)
Now I’m starting to think about scenarios where I can’t drive down the highway to get home for more than 24 hours. It’s the only main road between the city and any point north. It would probably be one of three scenarios:
— One of the ag chemical plants had a blowout, contaminating the region – including the road – for an extended period of time
— A military exercise (we have two bases in the area, and both utilize live explosives and various weapon systems) went awry and has rendered the highway unsafe to travel
— The most likely is a weather event – probably a heavier-than-anticipated storm with high winds and heavy rain. Flash floods are uncommon, but we do have some washes that will fill quickly and run for more than 12 hours, leaving the roads either washed out or covered in dirt and debris. There are alternate routes home from some points, but they would become unpassable before the highway did.
In any case, I’m banking on being able to at least shelter in my vehicle overnight – perhaps two nights if I get caught farther up north. If I’m working (which is the only reason I’d be up there), I’ll have my lunch box and water cooler. But those are only good for that work day. So what I’m thinking of is a shelter-in-place bag with essentials that anticipate a maximum 48-hour ordeal. So far, my list includes:
— Fire-making
— Food rations
— Water purification
— Keeping warm
— Emergency first aid
— Comms other than cell phone
— Maps of the vicinity (area and topographical)
— Defense (Firearms not allowed: work policies will not let me have one in my personal vehicle on company property, and 30 years long into the job and 3 years short of retirement, it’s not worth it to sneak around it.)
Anything else y’all might recommend?
Ed
Read MoreAre five-gallon water dispensers good for water storage?
Hi everyone- I am so happy I stumbled upon this page. I am new to all of this and just starting my prepping journey. COVID was a major eye opener. When the shut downs started, there was nothing at our local grocery stores and I felt like I could not provide what was needed for my family and I NEVER want to feel like that again.
My current question is in regards to water storage. I read the blog post on the emergency water containers but are those what is best to store water at home or are the 5 gallon water dispensers a good option too?
Thanks in advance for the input!
CC.
Read MoreHow to pack a BOB
I’m new to this forum so please bear with me. I have been following the BOB by priority kit, working all the way through to level 3. I am new to prepping so I am having trouble figuring out how to pack everything in. I’d appreciate advice or even better a tutorial or guide. If this has been asked before I do apologize.
Read MoreNeed bug out bag packing tips
As a terrible packer, I thought I’d start this thread to collect best practices for how to maximize space in our packs. Specific tips welcome! To start us off, here is my current challenge. I bought a nice fleece as my top layer. Very comfy. But I’m a large person and the fleece is thick. It takes up a ton of room! I’ve been wondering if there is a way to compress clothing for storage in the BOB?
Read MorePrepping my computer
I have all of my documents, family pictures, videos, songs, and more between my two devices, my desktop computer and my phone. I really want to prepare for the eventual computer crash, lightening surge, burglary, or virus that can affect my computer and phone and would take out my family memories, tax documents, recipes, etc…
What are some things I can do to prevent me from having my devices crash, and if they do crash should I have some sort of back up on another hard drive or on the cloud?
Read MoreEmergency lighting
Hi. I’m Ron Brown, author of “The Non-Electric Lighting Series” on Amazon. Emergency lighting is my area of expertise but I’m brand new to The Prepared. In this write-up, I’d like to share a few ideas on the topic of emergency lighting. I’m not here to sell anything. Or editorialize. I just want to share some ideas.
Let’s say you’re at home and the lights go out. Sure, you have a flashlight. But the batteries are dim and getting dimmer. You scrounge through the kids toys, the toothbrush, and the carving knife and find a few batteries. But they don’t fit your light. Or you need two and can only find one.
May I suggest a collection of cheap flashlights — $20 total for the whole bunch — that will run on any battery you can find. And let’s make that any battery SINGULAR. One D. One AAA. Etc. Here’s a link to a YouTube article I wrote that specifies, by brand and part number, flashlights requiring just one battery. The listing starts at 2:18. It’s worth a look-see. https://www.youtube.com/watch?v=kv7Bx6usT-g&t=1s
Next topic. Vegetable-oil lamps. They produce a candle-size flame and have been around since biblical times. Call it proven technology. You can Google for them and get how-to information. Or search YouTube for them. Or read “Olive Oil Lamps &c.” by yours truly. It’s Book 2 in “The Non-Electric Lighting Series.” The beauty of vegetable-oil lamps is that they require ingredients you already have on hand. Good stuff to know if you’re away from home when the Big Blackout occurs.
Let me offer a few tips. First, the wick in a vegetable-oil lamp needs to be cotton (a natural fiber). Oil is fed to the flame by capillary action. Polyester is a man-made fiber. Polyester will melt in the heat of a flame. Melting kills the capillary action. That means no lamp. The fluff in the top of your vitamin bottle might be cotton or it might be polyester. Who knows? But you really can’t trust it to make a reliable wick. That much we do know.
Second, vegetable oil can be fiendishly difficult to light. But a drop of flammable liquid (cigarette lighter fluid or gasoline) will solve the problem. And how to get one drop with no eyedropper? Off the tip of a teaspoon. One drop of gasoline, BTW, is not going to explode and blow the windows out of your house.
Third, that same characteristic of being difficult to light makes vegetable-oil lamps very safe lamps. If you drop and spill a lit kerosene lamp, odds are you’ll start a house fire. But if you drop and spill a lit vegetable-oil lamp you will for sure make a heck of a mess but a fire is extremely unlikely.
Fourth, try to make one. Experiment. See what works for you. Don’t wait until the lights go out. It’s like sex. Reading about it and doing it are two different things. You need to know, ahead of time, what works.
Last topic for today, diesel fuel. This is info that’s really hard to come by. There are pressure lanterns with mantles that burn white gas (Coleman fuel). And others that burn kerosene. Pressure lanterns can produce a couple hundred watts-worth of light. But diesel? Are there any lanterns that burn diesel fuel?
Yes. Although they’re not sold or advertised for that. Most kerosene pressure lanterns will NOT burn diesel fuel. But a few will. IF you know what lantern model to use. And what lantern generator to use. And which cloth mantle to use. Book 6 of “The Non-Electric Lighting Series” is entitled “Kerosene Pressure Lanterns” and lists eight lantern models, originally designed for kerosene, that will burn diesel. I know they will because, in every case, I’ve done it.
And these lanterns are being sold on eBay as we speak. Can you picture a highway lined with abandoned tractor trailers, each one loaded with diesel fuel, and yourself (sitting in the dark) with no way to use it? IMHO, this is precious info. Info to tuck away against your time of need. This is prepping.
Read More