Share your knowledge & learn from experts
Because prepping and community go hand in hand
How long could you survive in the wilderness?
Hey guys! I’ve been lurking on this forum for the past two months and finally have something to share so I created an account.
Came across this article titled: Average person thinks they can survive for 2 weeks in the wilderness — but most can’t start a fire
Like the title says, the average American thinks they can survive for 16 days in the wilderness. But out of 2000 American’s surveyed only 17% felt very confident about their ability to start a fire with flint.
52% felt confident that they could identify different plants, but when challenged and shown pictures of plants like poison ivy, few were actually able to correctly identify plants.
Interesting survey. I wonder what the numbers would be like with the prepping crowd. Are we more confident in our skills and abilities and think we can survive longer? Or are we more aware of what it would take and are realistic that we wouldn’t be able to even survive 16 days.
What they don’t go over is what gear if any are these people provided with. So lets assume that it’s what the average person would have on them on a day hike when they might get lost. Maybe a fanny pack, two granola bars, bag of jerky, water bottle, small cheap LED flashlight, and maybe a small cheap multitool.
So lets figure out what preppers think. How long do you think you can survive in the wilderness? What factors are you putting into your answer?
Read MoreWhen to offer aid to the unprepared
Not everyone has prepping as a hobby or a way of life. Not many have gone through a major disaster or trial in their lifetime that would encourage them to be prepared. But those disasters do happen, and if it does, what is your thought process behind offering aid, help, and assistance to others?
It will greatly depend on the situation, where your preps are at the time, and many other contributing factors, but lets have a discussion of some possible scenarios.
Here are some arguments for giving aid: I believe that most people would like to offer assistance to others and help when they can. This can help grow and strengthen your prepping community and many hands makes light work.
Here are some arguments against giving aid: Your house gets to be known as the new hand-out place. Once you give help to one person, they tell others and you have many people on your doorstep. You become a target because you have supplies and resources when others do not.
Another user on here, Matt Black, made a really great forum post about making Mercy Bags for the unprepared. I think this is a great idea and my family is going to make some to help out others.
Read MoreAmaranth – My #1 Survival Crop
Just joined yesterday and wanted to contribute. I’m a long time prepper, living in north Mississippi. I love to garden. I live on a 20 acre farmstead where we have 4 horses and 9 dogs. My orchard has over 150 trees… mostly apples with some peaches. I also grow blackberries, blueberries & muscadine grapes. I am by no means self sufficient but most of what I grow is what we like to eat & what I would grow in a crisis, if I did ever have to become self sufficient.
IMO, the #1 survival crop is amaranth. It is easy to grow, as for some it is a weed (Pigweed, Palmer amaranth). It handles drought extremely well & needs little, if any fertilizer. Farmers struggle to get rid of it. It was a staple food item of the Aztecs & Incas. It is a dual use plant, in that you can eat the leaves & young stems, plus each plant can produce up to a pound of nutritious seed that can be ground into flour or made into porridge. It is considered a super food, as it is absolutely loaded with protein, fiber, vitamins & minerals. The plants can grow up to 10′ tall. It loves the hot weather and in my garden, I grow it as a summer green. You can use it in most any recipe for spinach or greens. IMO, greens are great crops for survival so I grow them the whole growing season. In cool season I grow collards & kale. In the summer, I grow amaranth.
But what really makes amaranth shine as a survival food has to do with its reproduction. Each plant can produce hundreds of thousands of seeds. I will say that again… hundreds of thousands of seed. So imagine we are in a SHTF crisis and we needs lots of food fast. What other nutritious plant could produce so much food so fast and which crop could provide enough seed to feed a town within 1 generation? Just one pound of seed contains around a half million seed, so anyone can store this seed for possible use.
Yes, I grow and store all sorts of garden seed. For me, my go to survival garden crop is the three sisters… a native American way of growing corn, pole beans & winter squash. Sister corn provides support for the sister pole bean. Sister pole bean, being a legume, puts nitrogen back into the soil for the corn to use. Sister squash provides ground cover to control grass/weeds & to hold moisture in the soil. But during a crisis, when so many would be starving, I think it would be smart to provide seed for others to grow their own food. I can’t afford to provide corn or other seed for lots of families… but could sure offer amaranth.
This summer, once my amaranth plants were around 4′ tall, I harvested a bunch of leaves for my callaloo pictured above. To harvest, I cut off the top half of the plant, where the newest, most tender leaves are located. I wanted to test that if you cut such a mature plant, that new growth would arise. And yes, within a week, vigous new growth started replacing what was cut. In the pic below, you can see where the stalk was cut and see the new shoots. As I said, it only took a week to get all that new growth.
Read More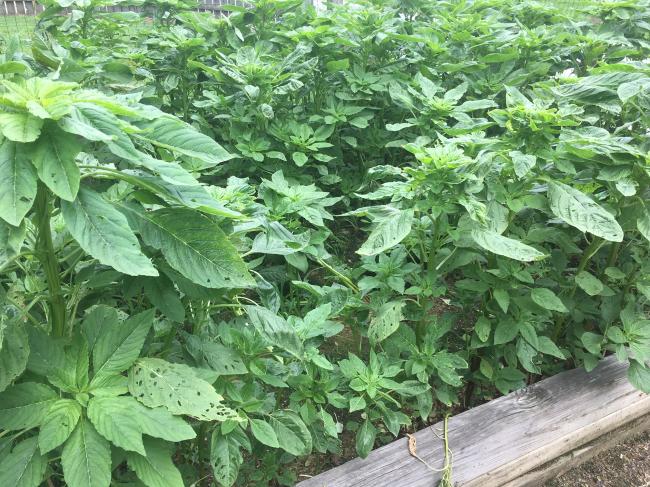
My main worries to end the week (Prices/CPI and other stuff)
My main worries to end the week are:
The economic models the Fed was using in December for predicting inflation don’t seem like they’re suited for the current economic situation. The Fed needs to seriously investigate why these models are wrong and make sure unwarranted assumptions are not sticking around or leading the Fed to be less aggressive than it has to be. We really don’t need the Fed to be too optimistic about inflation right now. Interest rates impact the price at which investors are willing to buy stocks (the other main consideration being company profitability or expected profitability), which is part of why raising interest rates slows the economy and inflation. If food and fuel costs/shortages get much more serious (or “go parabolic”), the Fed can’t do much about that but might feel pressured to raise rates more aggressively than it has to and cause a recession (or a worse recession) without a good reason. Interest rate hikes will not magically produce more fuel and food. There are counter-arguments to media reports like this (I hope those counter-arguments are wrong). If an income bracket literally can’t afford food or food is simply not available somewhere, niceties (and more) go out the window. Yes, we produce food domestically but fewer imported products = more people buy a lower supply of domestic products. (Mods: remove if this is too political, I’m trying to keep left vs. right ideology out of it and focus on the correlation between job approval ratings and crises). Biden’s job approval rating is historically low for a president, and lower approval ratings typically go along with recessions or crises like inflation in the 1970s or the 2008 Financial Crisis. Yes, Trump’s job approval rating was also pretty low throughout his presidency but (not to get too political or get into left vs. right) many people, right or wrong, found him offensive, thought he was too ignorant to do his job, thought he was an agent of a foreign power, or thought he did not respect the US Constitution or separation of powers. Therefore, it makes sense to assume that many people perceive current federal-level leadership as weak. Yes, you should be worried about what people are willing to vote for if they decide the government or economic/social/political system can’t fix their problems and those problems get too bad. Political extremists on the far left, far right, and elsewhere often spend their time sitting around and waiting for a crisis.Suggested preps:
Food (at least 2 weeks, more if possible, like a few months or a year). Assume that food prices could double within the next year, though my baseline assumption is that we will face acute rather than chronic food shortages if there are availability issues. Get your finances in order (or try your best). Prepare for possible civil unrest. Humans adapted over hundreds of thousands of years to survive. Something in the news might shock you, but remember that you will not always feel the same way. The world could turn into a place that you don’t think is worth living in, but there’s a lot that has to happen before you know that for certain. Read MoreI’d like to avoid using a cook kit and just carry ready-to-eat meals in my emergency bags
While building my emergency bag in my car and my one at home to evacuate out with, I am faced with the dilemma of including a cook kit or not.
Pros
Ability to cook freeze dried foods Cook anything I might hunt or gather Boil sketchy water and make it safe Heat up water just as a comfort for coffee, tea, or hot chocolateCons
Additional weight, space, cost Slower to prepare a meal and eat it then just grabbing a granola barI can maybe justify having the cook kit in my home bag because I that will be surviving for a longer period of time, but 100% of the time I’ve needed a meal or snack in my car emergency bag, it has been because I don’t want to stop by a McDonalds and would rather just get something quick and cheaper. So up until now I have just stocked some granola bars that I buy by the box.
What other snacks or meals could I possibly add to my car emergency bag that I can quickly grab and consume? Something that can withstand the heat, be filling, and nutritious.
Read MoreHow has rising gas prices influenced you?
I really thought that we would see a small spike in gas prices with the conflict in Ukraine and then level out, but it doesn’t seem to stop.
Chart from Gasbuddy.com and is the national average.
How has the rising gas prices affected everyone? Are you driving less? Have you bought a more fuel efficient vehicle? Did you switch jobs to commute less?
I’ve been driving much less often and combine all my errands into one trip so that I don’t have to go out. It changes the way I prepare because I need to store more items on hand and sometimes just go without something like bread for a couple days until I build up enough reasons to go out again. I don’t visit family or go out for entertainment as much as I used to either. It feels like I am back under quarantine and is starting to affect my mental health like during covid.
I also rotate through my stored gas cans every 6 months so I don’t have to buy fuel stabilizer, but maybe it would be cheaper to stabilize the fuel because 6 months from now it might be much higher.
Stupid me is going to laugh and be wish for $4.90 gas in 2 months time when it’s then around $6.25 or something.
Read More
Ever seen a Blue Heron ?
I am blessed to have a mating pair of bald eagles that visit my farm daily. They like to catch my grain fed catfish down in my small, one acre pond. It might be a small pond but it has a large population of catfish, as I feed them every evening… a bit before dark. Most days I have an eagle sitting in a tree, watching over the pond. It is not unusual for a blue heron to be sitting on the dock, hunting for fish itself… just smaller fish. The eagles seem to take the bigger fish while the blue heron goes for the smaller fish & minnows. The blue heron is an odd looking bird but it is perfectly designed to hunt small fish, especially when wading in shallow water.
Yesterday was no different. As I drove up to the pond to feed fish, an eagle was up in a tree above me and a blue heron was on the dock. That bird has gotten smart lately. It used to fly away but it has learned to come back, as soon as I drive off. Within a few seconds of my driving off, before I can get 50 feet away, it now lands on the dock watching the catfish feed. Soon as they are mostly done, it really perks up to hunt the smaller fish eating the leftover catfish food. I took this video yesterday. It is not the best video in the world and certainly not the best viewing angle, but it still shows what I’m talking about. I just love watching nature.
https://www.youtube.com/watch?v=PvLFaKg-etU
Read MoreHow to survive an active shooter
A few months ago I shared what I learned about how to survive a nuclear attack after the Russian invasion of Ukraine. I want to be prepared and know what to do when disaster strikes. The horrible Uvalde, Texas elementary school shooting on 5/25/22 is the 30th K-12 school shooting just this year alone and many more shootings will probably occur. So to be prepared, I wanted to learn more about them and what I can do. This isn’t the ultimate guide, but just what I learned after a few hours of research. Please correct or add to what I have.
The motive of an active shooter is to kill and maim as many people as possible to draw attention to their cause. They often target theaters, shopping malls, supermarkets, and schools because they are considered soft targets, which means they have low security and can include mass casualties of unarmed citizens including women and children. When attending these locations, be on extra alert of any suspicious activity.
Shootings can just be a spur of the moment heated argument that is unplanned or can be a coordinated attack that has been months in the making. In a worst case scenario, multiple gunmen might chain off exits to trap their victims and increase the casualty count, may deploy explosive devices for more damage, smoke bombs to create confusion, wear body armor to increase the time they have to hurt others before they are stopped, and may use modified and automatic high power rifles and other weapons to cause as much death as quickly as possible.
As soon as you hear gunfire, get down low and seek cover. Hesitation will get you killed. The three natural responses to immense stress like this are fight, flight, or freeze. Freezing is the worst, fighting is the next best option if fleeing is not. To avoid the tendency to freeze, play out scenarios in your mind and what you may do if something were to happen, know what gun fire sounds like and maybe even go to a gun range and just listen to what a gun sounds like in person when you don’t have hearing protection on. If you see people freezing and you wish to be the hero, use basic commands, hand signals, commanding voice, or even physically grab and move them to snap them out of the mental roadblock they are stuck on. If they put up a fight or resist, move on and don’t risk your life.
This may sound a little silly, but playing shooter video games and paintball can be valuable learning experiences against an active shooter situation. In these games you will learn how to hide behind cover and move from location to location without getting shot. The times I have played paintball really did feel like a war zone where you don’t know where the bullets are flying from, you have to constantly be moving, and it even teaches you a little on how to fight back. The adrenaline and pain you will experience by getting hit by a paintball is not lethal but will be a strong reminder that you might have just lost your life if this was real.
Avoid piling up with multiple people (like is commonly taught in schools). This just creates an appealing and larger target for the gunman to fire into. A single bullet can also pierce through multiple bodies. Spread out and be a smaller and harder target. Do not “play dead”, there are so many bullets flying around that you can easily get hit. Get out of there as soon as possible.
When entering a building, familiarize yourself with the layout. Know where are the entrances, exits, and places of cover and concealment. Cover is something that can stop bullets like a brick wall or vehicle. Concealment still hides you from being visible but will not stop a bullet, like a curtain or bush. Move from cover to cover until you are able to exit the building. If you do have to move from one cover to another cover and will be exposed in the open for a while, wait until there is a lull in the firing while they are reloading. When traveling down a hallway or open area, stay at least a foot away from the walls. If there is any shooting in your general direction and the bullets graze off the walls, you won’t get clipped by a ricochet.
Don’t get caught out in the open or huddled down behind something. The shooters will take out as many people as possible within the first few seconds and then sweep the building looking for those who are hiding. You need to get out and away from the building.
If you are in a supermarket or shopping mall, you may want to avoid running out the way that you came in. The gunmen will know that is where everyone will be fleeing and that is everyone’s natural instinct because that is the only way they know. Every store is required by law to have a back door, even the small shops in the mall have a back door leading to a network of fire escape hallways. The gunmen might not know about these or may not be in those areas because they think that no one would go there.
Be aware of some of the warning signs of individuals who may have active shooter tendencies and report them immediately. Each person who has ever become a killer has family and friends who if they were aware and close to the person, might have been able to intervene and prevent the situation from happening. Be brave and report that classmate, co-worker, or even spouse if you feel they may be a danger to themselves or others.
If you are a parent, talk to your kid’s school board or even teacher and know what their policy is. Recommend items such as a door brace that can be quickly deployed and add additional resistance to people entering your child’s classroom. The Desperate Hour is a recent show I watched where a mom hears of an active shooter situation going on in her child’s school as does everything she can to save him. Not the best movie (filmed during covid and social distancing), but definitely makes you think about what you would do in her situation.
Carry a tourniquet, and IFAK. Have your workplace upgrade their $20 first aid kit to one that can handle an actual emergency.
If you carry a concealed weapon, do not go hunting after the gunman. Get out and use that weapon only if the bad guy is between you and the exit. Be ready to drop the gun instantly when you get out so the police don’t think you are the shooter.
Read More
Be aware of infectious disease outbreaks near you with this free map tracker
Wanted to link a resource I was recently introduced to that lets you track health including: animal diseases, environmental disasters, hospital acquired infections, vectorborne diseases, STDs, respiratory infections etc across the world. You can narrow it down to your local area and see what is in your region that you can think about preparing for.
https://www.healthmap.org/en/
Read MoreHow to budget, save money & establish financial health
I see great forum discussions emphasizing that physical health and financial health are two of the key foundations to a good prep. Practicing survival skills and acquiring gadgets are really fun, but I’d argue that they’re the grill lines on the steak.
John Ramey gives solid notes on how to create a simple budget in the article, “Why personal finance is critical for preppers and tips on money management.” I am such an enormous nerd about that topic, though! To me, budgeting is inherently prepping — they’re one in the same. But how? And where can you get started?
So, here’s deep dive about:
how do you actually make a budget that reflects your individual values, needs, and priorities? And once you’ve drafted that budget, how do you stick to it?I’ve found success (at last, after lots of failures and self-doubt) with an app called You Need A Budget, or YNAB (“why-nab”) for short.
I like YNAB because it’s a values-neutral system. Want to spend $10 a day on Starbucks, get a dog, pay off your debt, and plan to live off-the-grid on a homestead in 5 years? Yeah, cool! You can do that. Or anything else that’s important to you, because you’re the boss of your money, not a set of arbitrary rules.
The system helps you be the boss of your money by helping you to discern your financial priorities and achieve clarity about what’s most important for your money to do next before more money arrives. You do this by writing down your priorities, then choosing the most important ones to fund, and assigning your money jobs (e.g., “pay for groceries this week,” “sit there and look pretty in my car emergency fund”) until all your money has been assigned jobs.
There are four rules in YNAB’s system to help you make that happen:
Give every dollar a job. Whenever money arrives, you prioritize what jobs need to happen first before more money arrives. Do you need to pay the electric bill, buy groceries this week, or make sure to have some money set aside for beers with your friends? YNAB helps you discern that choice proactively, then helps you follow the plan that you create. Embrace your true expenses. True expenses are reoccurring, less frequent expenses. Sometimes, they’re things that we know are coming up on a particular future date, like buying Christmas presents or paying for the kids’ summer camp. Other times, you don’t know when they’ll strike, but you can safely assume that someday, you will need money to pay for car repairs. Rule 2 helps you identify what your true expenses are, plan for them, and start setting money aside for them before you need to have it available to spend. Roll with the punches. Did you dine out one too many times? Or maybe you actually need to replace your cell phone after it went for a dip in the lake, but you don’t have money set aside for that? No problem; that’s normal, not a reason to feel guilty or quit budgeting. Circumstances change and your plans change with them. Your budget is no different. If you overspend in one category, Rule 3 tells you to cover that spending with money from another category and keep on trucking. Age your money. Slowly begin setting aside money to spend on next month’s expenses. In time, you’ll reach a point at which you’re spending money today that entered your bank account for the first time last month. (You’ll be able to cover May’s mortgage with dollars from April.) The app helps you to be purposeful in your spending and consistently spend less than you earn. This allows you to break the paycheck-to-paycheck cycle, establish emergency savings, and build a more secure foundation for your prep.Here are a few free places to get started:
Get Started Video Get Started Guide You Need A Budget book by Jesse Mecham — available free on Kindle through my public library, and maybe through yours? Live, Weekly Workshops YNAB Reddit YNAB Podcasts on Spotify, Apple Podcasts, etc. Free 34-Day Trial — you do not have to enter payment info when you create your account to get startedI’m not a YNAB employee, and this isn’t a sponsored post. I really am just a huge fan of this system. I see how much it helps others, and it’s helped me tons. It’s okay if it’s not for you; no budgeting tool is a one-size-fits-all solution. I share this in case someone else reads this who, like me, feels totally underwater and unable to start.
Budgeting, like physical fitness, sounds simple on the surface. When I started to get into it, I learned that it’s actually deeply personal. It often requires education, access to tools, and peer support for people to be successful at it. It’s hard to establish the habit of it, and easy to fall off the wagon. I hope that this post helps others for whom budgeting is a big challenge in your prep.
Drop a note in the comments if you’ve got questions, or if you’ve used other tools that work well for you. I’d love to read more about anything that helps people succeed in the threads below, even if it’s not related to YNAB.
Read MoreShare YOUR social media page/account on prepping/homesteading
Shameless plug, my wife relatively recently started a homestead TikTok page. She covers topics from things we do around the homestead/rural property to the unschooling we do with our kids, and of course prepping. She’s skilled at social media and puts out good information.
@boarsteadhomestead
Not only did I want to share hers but I wanted others to share their prepping/homesteading social media pages/accounts. Do you write a blog, TikTok, YouTube, Instagram, or have a FaceBook page? Share them so we can support each other and see through a small window into our fellow preppers lives. Even if you know it all, there’s still some things that can be learned!
Read MoreDog owners, do you pack poop bags in your BOB?
My BOB has gotten really heavy. Looking for a way to lighten the load I noticed that the roll of doggie bags I have in there is actually pretty heavy. I’m wondering whether I really need to pack it all. I don’t entirely have a good picture of whether my dog would even be staying with me if I have to bug out or whether I would need to have her boarded. On the other hand, if I do have her with me, picking up poop seems like an important part of emergency hygiene.
Read MoreTech security question, having critical docs online safely
So, in reading some interesting posts regarding forced evacuations, etc., mention was made of uploading critical docs, insurance info, and so on to a secure online source. I’m paranoid about online security due to some nightmare stories from friends & coworkers, and don’t want to entrust my info to yet another new source.
Asking techies out there; would saving those kind of things in an attachment to a draft email at a secure email address (like TP’s recommended Proton Mail) be a safe, reasonable spot for such things to be stored? Seems to me that would be easily sourced by me from any browser without having to remember/bring an extra thumb drive, password or other complication during a stressful event, since that’s a product I use daily already. I realize paper copies still have their place, but limitations too (easily lost, damaged or stolen, for starters.)
Prepping for the End of the World (as we knew it)
The title wasn’t meant as click-bait. Sorry. But I do have a question for folks with respect to the mindset one has about…prepping.
Much of this site (and others), are rightly devoted to advising about how one endures an accute disaster. Whether it’s weather (hurricanes, floods), social (economic/societal collapse), or something else, like, a pandemic! And, then there are the outlier scenarios… like zombies.
But, I find myself starting to think about the future not in terms of how my “normal” life may be disrupted by an accute event. Rather, it’s about how we aren’t going back to that normalcy. More importantly, how whatever replaces the old “normal” could be far different and require some new thinking. Indeed, I’m almost convinced this is already the case.
So, a few general articles flew by my feed recently about the billionaire class. These were more specific to individual billionaires, but the theme fits with a lot of other general stories about the [new] state of the world. One article discussed how the conspicuously wealthy (Bezos, Gates, et al) have been investing heavily in residential real estate. Whether it’s REITs, or some new tech-AI that helps investors find/buy property… the fact is residential sector is being squeezed by large investor holding corps. And, to be fair, Warren Buffets made a huge push after the 2008 tanking (note: Berkshire Hathaway, the conglomerate, is now the largest US real estate firm). So, like many things, it’s been happening.
The other article was about how the same class of firms and individuals were not buying up farms. And, on the one hand, you can say that just like buying real estate, farms may be a “good investment”. But, the cynic in me wonders… is it good to have so few people be in charge of everything, including HOUSING and FOOD PRODUCTION??
All of this is to say, my prepping mindset is a bit different. Less about surviving 72 hours after a flood, more about being self-reliant in a world where food/housing security is dwindling.
Read MoreDealing with documents/important info when SHTF
New here to the website and forum, and things look fantastic here!
Relatively new in preparedness, in the process of becoming better prepared for scenarios that are more likely for me in the shorter term (inclement weather, live on the Prairies in Canada, am way better prepared than in the past for winter issues eg: short power outags, a car kit for driving, but am working on getting better prepped for such things as increasing severe winds and summer storms we have had the last number of years and increased risk of tornadoes I sense happening, or for more longer power outages).
Have at least 2 months of food in the house (normal for us anyways), working on more expansive water supply (currently have almost a week’s worth for family of 4), have some battery packs for devices and such, but longer goal is a generator, have first aid supplies/medical supplies, some alternate cooking methods eg: propane campstove, etc and the main things now I am in the process of dealing with getting better set up “grab and go/or OMG-got-a-tornado-warning-get-in-the-basement bags”
*****What is everyone’s approach to dealing with personal documents for bags or for getting out of dodge as they say? *****
I am talking about things like a list of emergency phone contacts both local to you or distant family (just in case), info as to where our bank accounts and wills are, copies of drivers liscence, house insurance, access to things/copies of like birth certificates, Social Insurance numbers, etc. Even things like your safety deposit box key at the bank. I have some things I am wondering about in these regards:
-Where to keep it (we have a “main bag” with things like supplies for the dog, maps, tarp, etc and are working on smaller bags for each family member). Do you duplicate things and then in each bag? Have two very late teen/early young adult in the house who unfortuntely don’t drive yet, as far as getting away (they are working on it). Goal (such as in the case of inclement weather-getting into the basement as an example–is for them to grab the main bag at least, and each of theirs and just leave mom and dad’s alone (such as in a case we are not home with them). Duplicate documents in every single bag?
-some of this info is sensitive eg: birth certificates, SIN number etc. I have seen everything from scanning everything on paper, and keeping in ziplocks bags in your pack, to having on a USB stick, or both. How to keep info like this safe? I think it is fairly unlikely someone would come break in and steal such stuff, (and that may be naive of me perhaps but anyhow), but what do people do to keep that sort of info secure? You can’t just grab a fireproof safe when running out of the house. And what about scenarios of massive natural disaster like no access to a working computer for your USB stick anyways or your cellphone does not work and your battery pack is now dead? Can you encrypt them with a password, but what if you forget it?
-I also am lamenting the fact here that there is such a COMPLEXITY aspect to this nowadays (the paperwork and household affairs). I am an old fart early Gen X’er, who remembers life pretty much completely on paper, no online banking and you logged your info in a chequing ledger for example, and just everything on paper/in the mail. I have never been through any sort of natural disaster, the most I have endured is a 10hr power outage in the winter. What do people do in those circumstances. For example, I may have documentation of everything like where my bank is, but do I indicate account number in my saved info, but then there is the whole issue of a password for example, I do not want others to access that, but then what if I cannot even remember that info myself like my password! How do people who survive massive things like tornadoes flattening a city even do to get on thier feet in regards to stuff like that? I had been thinking lately of all this documentation even in light of prepping my husband for my future demise (have seen the agony my sis in law is going through recently with sorting the household affairs she was clueless about when B-I-L died), but have been thinking of this in line of disaster prep too.
Sorry for the essay! Would love to hear some words of wisdom from you all. Once again very happy to find this place….!
Read MoreOutdoor target shooting can lead to wildfires
Target shooting outdoors can be a fun hobby, family activity, sport, and prep. It is important to get out and be comfortable with your weapons and test the reliability of your gear. But shooting a small piece of metal thousands of feet per second can not only be dangerous if it hits someone by accident (another forum post for another day), but can also cause a wildfire.
It may seem very unlikely, but it does happen and you don’t want to be shooting, cause a fire, not know how to handle it, and cause millions of dollars in damages and have people lose their homes because you were unprepared.
With the climate changing, wildfire numbers are increasing. 58,985 wildfires occurred in 2021, 90% were human-caused, burning 7.1 million acres. No bueno…
Here are some tips:
Avoid shooting when the fire danger risk is high. When traveling to the area, you may see charts on the side of the road informing people of the fire danger risk that day. If you see that there is a fire ban in place, the risk is high, it is a hot and windy day, or there hasn’t been rain in a while, go somewhere else. Bullet shards are hot and you can’t control where they land.
Don’t shoot into the weeds. Place targets on dirt or gravel and away from vegetation. Just like when you build a fire pit at the camp site and clear stuff around you, do the same for where the bullets will be going.
Shoot paper targets, steel targets or hitting rocks can throw sparks. Exploding or flammable targets are cool, or you may have an old printer you want to shoot, but these all can cause fires.
Stick with lead core bullets, they are less likely to cause fires than steel core or solid copper ammo. Also avoid shooting tracer or incendiary rounds where they could ignite nearby brush.
Always bring a shovel and fire extinguisher with you to quickly put out any fire that may start. Without these tools, you will be just kicking dirt onto a growing fire and that won’t do much.
Call 911 immediately if a fire starts. Sure you will probably get in trouble, get a fine, and may have criminal charges put on you, but it’s a small price to pay to own up to your mistake and quickly get the help out to the scene as soon as possible to stop as much destruction as possible. Again, you will feel pretty bad about yourself if you see families displaced on the news because of your negligence. Many of the locations where you will be shooting will not have reception to call emergency services, so be aware on the way to the shooting range where you lose service and where you will need to drive back to to get it again. When calling 911, report where it started, what type of material is burning, how fast is it moving, how tall the flames are, and what is in the path of the fire.
Park your vehicle in a safe place. Hot exhausts systems parked over some dried material can ignite and start a fire before you even start shooting.
When cleaning up after a fun day of shooting (yes, you need to do this and don’t just leave all your junk out there because the 50 people before you did as well), look closely for any smoke, embers, or signs of fire. Do a final sweep of the location and leave it better than when you got there.
This topic just came to mind and I’ve been thinking about it for a while. I have been guilty of violating many of the above rules in the past, but I want to move forward and improve myself and decrease my likelihood of causing a fire.
Read More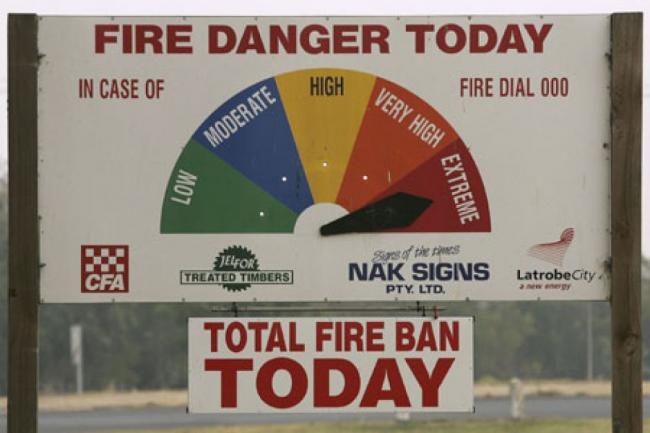
Where’s the ammo!!!!!
I’m seriously getting annoyed with the lack of availability in Ammo. I love to shoot on the weekends and I’m cutting back more and more because I can’t replace Ammo and when I can it’s ridiculously overpriced!! Last year there were tons of Black Friday Federal Black Pack deals and this year you have to sell your kidney to buy a 1000 rounds of 5.56! Ugh!
Read MoreNon-contact and very cheap way to keep bees
Many members of this forum recently voted to support The Bee Conservancy as part of The Prepared’s annual environment donation. In the spirit of continuing to support Team Bee I want to share a neat project that I came across.
The following video shares a person’s experience breeding and raising bees in plastic bottles for practically nothing. He builds many variations of this project in a bottle as small as 1L all the way up to very large plastic keg sized bottles. The video is 30 minutes long, but is well worth it.
This video is just an introduction to this concept of bee keeping in plastic bottles and he will later release an in-depth tutorial on how exactly to build these bottles and more of the tips behind bee keeping in them.
He hopes that this non-contact, safer, cheaper, and interesting way to raise bees will bring more people into the hobby, reduce our dependence on store bought honey, and add more pollinators to our environment.
I like one of the quotes from the video:
“Humans can live without honey but would starve without bees.”
His YouTube channel also covers various creative projects, bushcraft, and outdoor cooking.
Read MoreCost-of-living crisis changes Brits’ shopping habits: Hard-pressed shoppers are bulk buying
https://www.dailymail.co.uk/news/article-10712489/British-shoppers-resorting-bulk-buying-amid-cost-living-crisis.html
Ala Prepping style:)
British shoppers are bulk-buying groceries to save money amid the ongoing cost of living crisis, a new report has suggested.
The Barclaycard consumer survey found that 35 per cent of card users were stocking up on everyday items such as tea and coffee, tinned tuna and hygiene products such as shampoo and hand soap.
Buying in bulk can equal less trips to the supermarket – meaning less money spent on increasingly expensive fuel – while there are often savings to be had in buying products at wholesale.
According to the report, gathered using data from March, 13 per cent of shoppers are stocking up on canned tomatoes, baked beans, tuna, pasta, flour, rice and grains.
Meanwhile, 11 per cent are bulk-buying household supplies such as toilet roll, while 10 per cent are stocking up on laundry detergent and shampoo.
At least 10 per cent are also getting extra supplies of tea and coffee.
Shoppers also admitted to bulk buying over-the-counter painkillers (8 per cent), pet food (7 per cent), fizzy drinks (6 per cent), alcohol (5 per cent), Easter eggs and chocolate (5 per cent) and baby supplies (3 per cent).
José Carvalho, Head of Consumer Products at Barclaycard, said: ‘Many sectors saw strong growth in March compared to the same period in 2019, as sunnier weather encouraged Brits to socialise at pubs and bars, book staycations and update their wardrobes for spring and summer.
‘However, rising fuel prices and household bills are clearly starting to influence consumer behaviour, with many Brits changing their travel and shopping habits to save money.
While this may dampen growth in the months ahead, we shouldn’t overlook the expected heatwave later in April, and the fast-approaching Easter holidays, both of which are likely to boost non-essential spending.’
The data from Barclaycard, which sees nearly half of the nation’s credit and debit card transactions, revealed that spending on essential items grew 18.1 per cent in March, the highest uplift since September 2021.
However this was largely driven by spend on fuel, which soared 26.1 per cent as prices at the pump continued to climb.
Card spending in general grew 17.7 per cent last month compared to the same period in 2019, as Brits took advantage of the sunnier weather and lifting of all remaining Covid restrictions to visit pubs, dine out, and update their wardrobes in preparation for the months ahead.
However, the cost of living is causing increasing concern for most UK adults, with travel plans and shopping preferences changing in response to rising fuel and food prices.
Some two fifths of drivers (41 per cent) said they are changing the way they travel.
Of these, over half (54 per cent) are walking more often, almost two-fifths (38 per cent) are cutting back on long car journeys, and 22 per cent are opting to cycle instead.
Supermarkets saw a 16.9 per cent jump in card spendings – higher than the growth recorded in both January (15.5 per cent) and February (16.0 per cent) this year – but much of this was likely due to inflation and rising food prices.
Spending on essentials was also boosted by a demand for convenience and the popularity of local shopping, with food and drink specialist stores (butchers, bakeries and online meal-kit providers) up by 76.9 per cent compared with three years ago.
Barclaycard made comparisons with three years ago because consumer spending was so heavily affected by the lockdowns in March 2020 and March 2021.
Read MoreUK only. Martin Lewis warns of likely Civil Unrest
OT Martin Lewis fears “civil unrest” due to the ongoing cost of living crisis and spoke of feeling “sick” about having to advise households on how to keep warm without heating.
The MoneySavingExpert founder told the Sunday Telegraph he is “scared for people” as inflation rises. He said: “We need to keep people fed. We need to keep them warm.
I actually 100% agree with this chaps warnings.
Martin Lewis is a very popular British financial adviser who appears on most UK media channels and has his own money saving blog. If folks like him are picking up on rising dissent and tension as are many preppers then I think its time to revisit our (UK) Opsec.
Read MoreAnother article on UK preppers
In the “prepping goes mainstream” series…
Everyone should prep’: the Britons stocking up for hard times
Read MoreHow to get rid of noxious weeds
Help!I am overwhelmed by plantains and Queen Anne’s lace following a compost delivery last spring.
None of the weeds went to seed. I don’t know how to get rid of these pests, and would be grateful for any advice.
Thank you
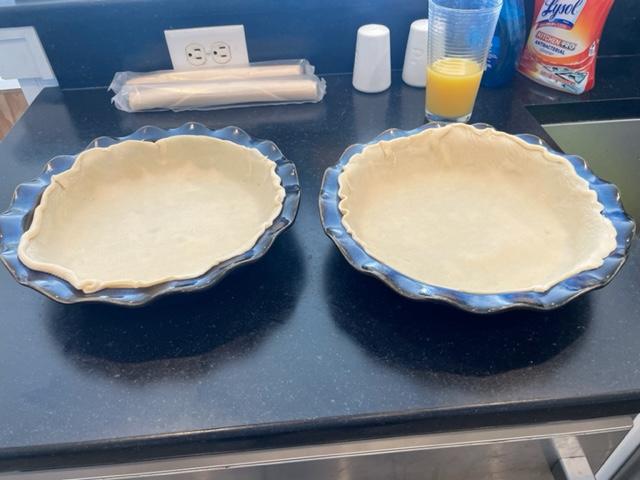
Read MoreChicken Pot Pie
On a lighter note, does anyone here love chicken pot pie too? I grew up eating the ones we bought in the frozen section. Lately, I make my own, mostly following a recipe I got online.
https://www.allrecipes.com/recipe/26317/chicken-pot-pie-ix/
Read More