This beginner’s guide teaches you how to use an emergency tourniquet while busting some of the worst myths about their use. The skills apply to any off-the-shelf product, but we focus on the top models experts recommend in our prepper tourniquet review.
The definitive way to manage bleeding is through the use of “well-aimed direct pressure.” But there are plenty of situations where creating pressure by hand and with bandages isn’t enough. Or there’s such rapid blood loss that you need something to buy you time while getting the hemorrhage under control. That’s when tourniquets come in.
Getting blood loss under control is one of the first steps when treating a wound:
- Learn how to stop bleeding without a tourniquet
- How to clean a wound
- How to close a wound with stitches, staples, or glue
- How to dress and bandage
Use your head. Get professional help if you can.
The Prepared teaches survival medicine: what to do in emergencies when you can’t depend on normal help or supplies. How to make decisions, steps to take, gear to use… there’s a huge difference in the right answers between daily life and a survival situation.
You agree not to hold us responsible if you choose to do something stupid anyway.
Want more free guides from medical and survival experts delivered straight to your inbox?
Tourniquets are used in thousands of emergencies every day. A recent five-year study showed that when civilians used a tourniquet the odds of survival increased a massive 600%.
They’re such a handy and common tool that surgeons use tourniquets to keep blood from contaminating their workspace when performing something like a knee replacement. Blood pressure cuffs and the tubes nurses wrap around your arm when drawing blood are also types of tourniquets, just with different purposes.
The most important things to remember about using an emergency tourniquet:
- Tourniquets are no longer a last resort. If you feel like the amount of blood pouring or spurting out of a limb (tourniquets are only for limbs) is serious, then use a tourniquet. You can always remove it later.
- The point of a tourniquet is to cut off blood flow before it leaks out of a wound, buying time until you get professional help or can control the bleeding with direct pressure. A tourniquet itself does not solve the problem — it just delays it.
- Tourniquets have to be very tight and between the wound and the heart in order to be effective — it’s often one of those “the treatment feels worse than the problem” situations.
- Practice! Properly using a tourniquet is a perishable skill, but it only takes a few minutes every few years to refresh.
Why you should trust me
I professionally teach ‘austere’ medicine (a.k.a. ‘wilderness medicine’ or medical care with limited resources) for hundreds of hours per year to thousands of students ranging from wildland firefighters to law enforcement to ski patrollers. I’m a recently-retired Corpsman (medic) that served with Marine Recon in Iraq, former inner-city paramedic, and have used these skills in the field.
Knowing when to use a tourniquet
In short: It’s better to be safe than sorry, so if you see blood flowing out of a limb from a serious wound but aren’t sure what to do, use a tourniquet. You can remove it later if it was overkill.
The more nuanced answer is that you should first try to control the bleeding with direct pressure and then use a tourniquet if that fails.
However, if you see major arterial bleeding and know right away the wound is deadly serious, you should skip right to the tourniquet.
One or two things will be obvious to you when the wound is so bad you need to apply a tourniquet immediately:
- Blood is forcefully pumping out of the wound to the rhythm of a heartbeat
- The blood is bright red
No longer a last resort
You may still run across people who say “only use a tourniquet as a last resort” — but that outdated thinking was mostly based on the fear of tissue damage (see the amputation myth section below).
It’s a difficult balance to explain. On the one hand, a tourniquet is a serious tool and you don’t want to use one whenever you see red. Tourniquets are not band-aid replacements, and they are often very painful for the injured person.
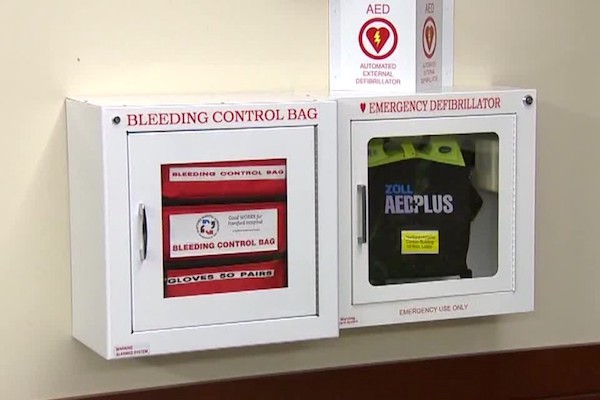
On the other hand, modern research tells us that tourniquets should be used more often than they have been in the past. That’s one the reasons why FEMA is pushing their Stop The Bleed campaign and many governments are putting tourniquets in public places (often next to heart defibrillators on the wall).
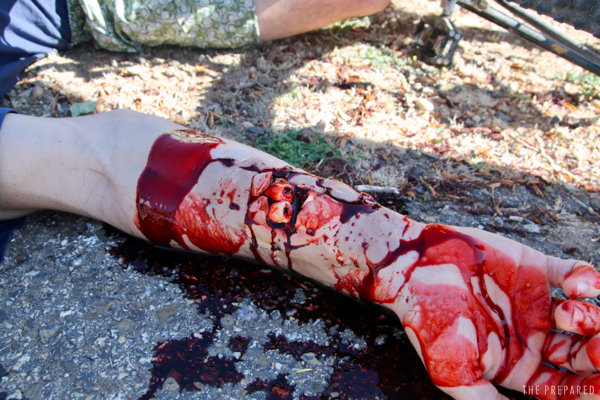
Look for signs of arterial bleeding
You’re more likely to remember that spurting and bright red blood are bad signs if you understand how blood moves.
Arteries carry ‘fresh’ blood away from the heart. Blood leaking from an artery often spurts out in rhythmic pumps because it’s closer to the high pressure created by a heartbeat. Arterial blood is also a bright red color because it was just pumped full of oxygen to carry.
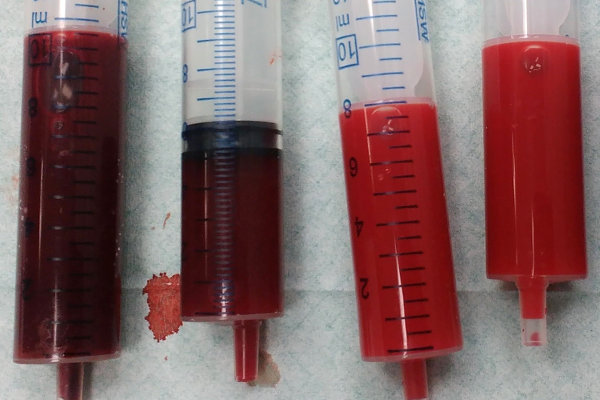
Veins carry ‘used’ blood back to the heart. Bleeding from a vein is often slow and deep red. The slow flow is because it’s further down the pipe from the heartbeat pressure. The deeper red color is because the oxygen that made the artery blood bright red has been used up as it made the loop through the body.
Both types of bleeding can be dangerous. But arterial bleeding can pump out a lot of blood very quickly because of how close it is to the upstream pressure source, the heart.
This video shows a real pig pumping blood from an artery:
Time is critical
It only takes one minute for blood to make a complete round trip through the body. Which means a single cut artery (which only sees a fraction of the total blood per round trip) can dump a lethal amount of blood in just a few minutes.
But it’s not simply a matter of blood volume. In as little as 30 seconds, enough blood can be lost to lower the blood pressure to the point the brain can’t function, causing the injured to get confused, pass out, and so on.
Common examples of when civilians use tourniquets
- Car accidents (do you know what to do if you witness a car accident?)
- Gunshot wounds
- Deep cuts
- Crushing a limb, like an arm stuck in farming equipment
- On the job, particularly in industrial settings
- A limb has been partially or completely amputated
How to apply a tourniquet
Tourniquets are pretty simple. You’re applying enough pressure around the entire limb to collapse blood vessels and stop blood flow — like pinching off a garden hose by squeezing it.
A quick demo of the CAT, one of the winners of the best tourniquet review:
The basics you’d learn in a local tourniquet class:
- Tourniquets are only for limbs, not the core body, neck, or head. You can’t wrap a band around those areas in a way that creates enough pressure to pinch off arteries without doing more harm than good.
- Avoid the groin and armpit joints — those require special “junctional” tourniquets, but they aren’t worth carrying for 99% of preppers.
- If you don’t know where the bleeding is specifically coming from, or the wound is hard to access and time is critical, you can just put the tourniquet on “high and tight”.
- If you do know where the bleeding is and can access the area, put the tourniquet a few inches above the wound (in between the wound and the heart).
- Apply it as close to the skin as possible. Don’t be afraid to cut off clothing.
- Tourniquets need to be tight to work well. In fact, many victims claim the tourniquet was more painful than the original injury.
- Get the tourniquet strap as tight as you can before using the mechanical lever/advantage. Similar to using your fingers to get a screw 90% of the way in, then using a screwdriver to finish it off.
- Using the mechanical advantage (usually a stiff bar you’re twisting by hand) can get physically difficult towards the end as the tension increases.
- But most civilians stop twisting half a turn too loose, so go a little further than you expect.
- Check that arterial blood is no longer leaking — if it is, make the tourniquet tighter.
- Once controlled, work on using direct pressure and bandaging to control the wound while seeking professional help.
- Note the time you applied the tourniquet so you can track how much time has passed.
- If you think you’ve got the bleeding under control without the tourniquet, you can loosen the tourniquet a hair or two to see if the arterial bleeding starts up again — but don’t remove it entirely in case you need to clamp it down quickly.
- It’s fine to remove a tourniquet if you’ve stopped the bleeding using another method.
- It’s fine to use a second tourniquet if needed (obese or muscular legs are the prime candidates), but put it closer to the heart than the first one.
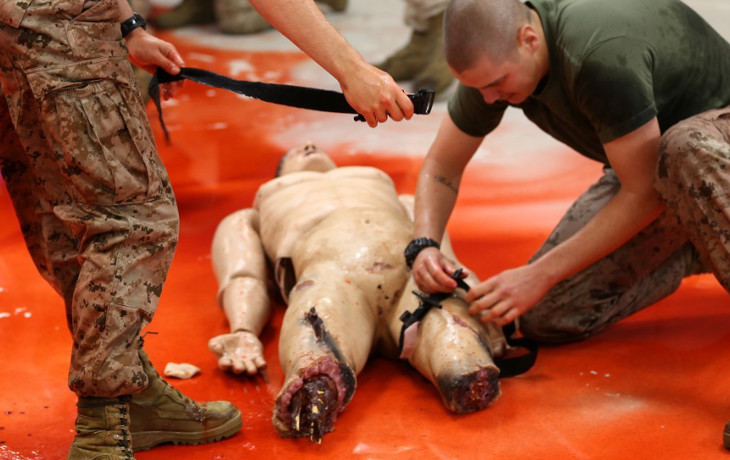
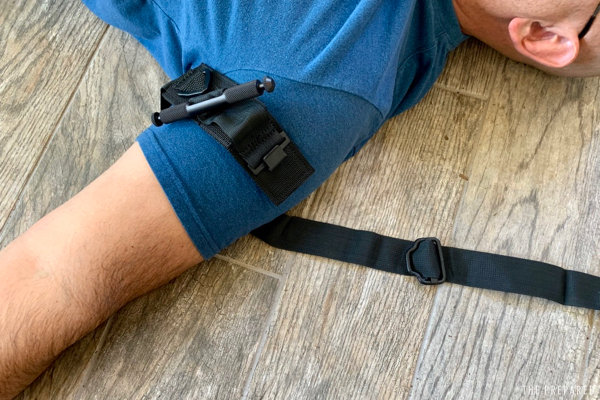
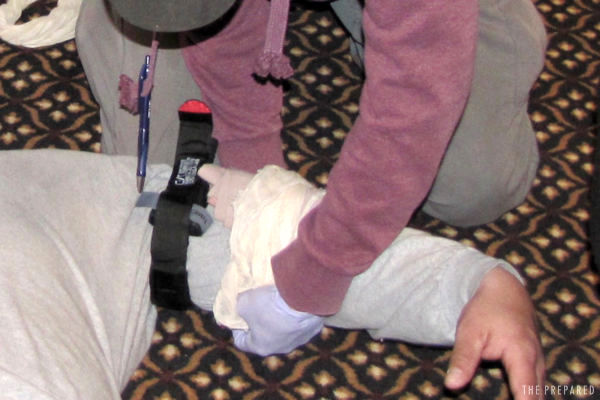
Step-by-step with the SOFTT-W
Using another of our top choices, the SOFTT-W, let’s walk through with pictures:
Locate the injury and decide where you’ll place the tourniquet.
If you can, remove the clothing or other debris so you get close contact with the skin. (When practicing, like in these photos, it’s fine to leave light clothing on.)
Slide or wrap the tourniquet around the right spot.
We recommend practicing the method were you create the loop around the limb, as shown below, then secure the clip attachments together.
It will work either way, but try to orient the strap so that when you go to tighten it by hand, you’re pulling the strap towards you instead of trying to push it away.
Some models, like the CAT, can be stored in a way that the loop is already created, so you just slide the loop up and over the end of a limb until it reaches the right spot. But, in practice, many people find that the pre-made-loop-and-slide method is prone to snagging on clothing, is too awkward, etc. The pre-made loop makes it easier when applying the tourniquet to yourself one handed, but we’d rather optimize for the more likely scenario instead of the unlikely one.
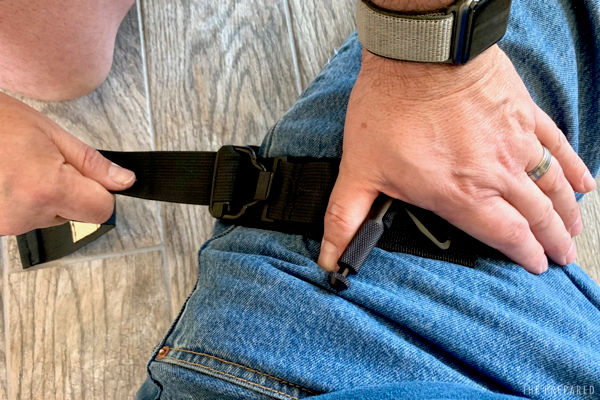
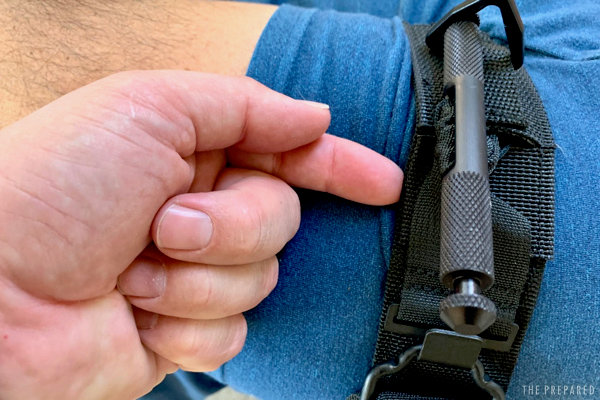
Hand-tighten the tourniquet.
It’s quicker to pull the slack out by hand before you start using the mechanical leverage.
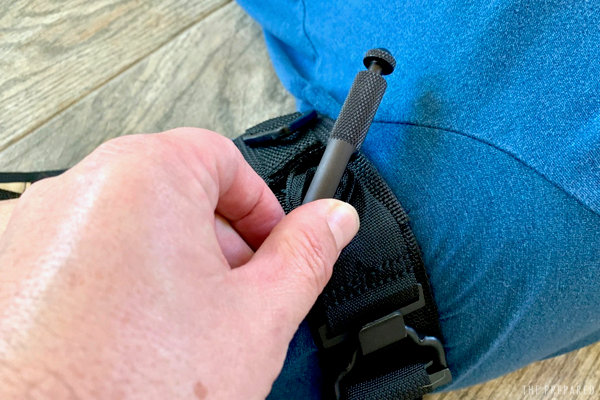
Twist the lever bar as much as you can.
This might be a ratcheting clamp in other models, or you may just be stretching and wrapping a piece of rubber as hard as you can.
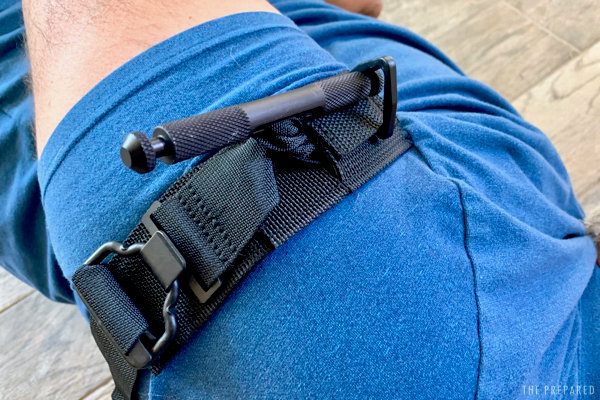
Secure the tension.
Slide the closest end of the bar into the SOFTT-W’s metal triangle, which acts like a trap to hold the bar in place.
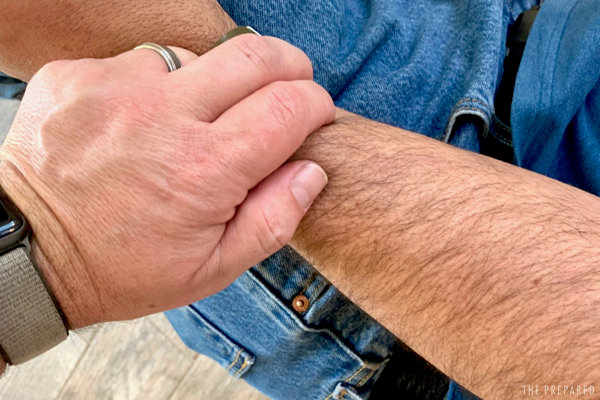
Check your work.
If you can get a few fingertips between the strap and the skin, it’s not tight enough.
Has the blood flow stopped? Is there a distal pulse (the pulse a nurse would check with their fingers on the wrist or ankle)? If you can feel a pulse or still see arterial blood, the tourniquet isn’t tight enough.
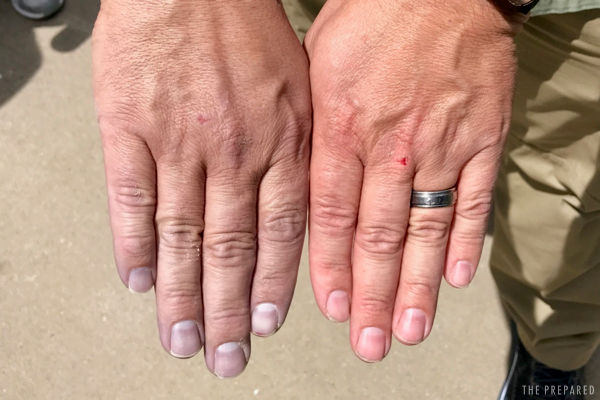
You may also notice a difference in color. One of these hands is attached to an arm that’s been under tourniquet for only a few minutes. Can you tell which?
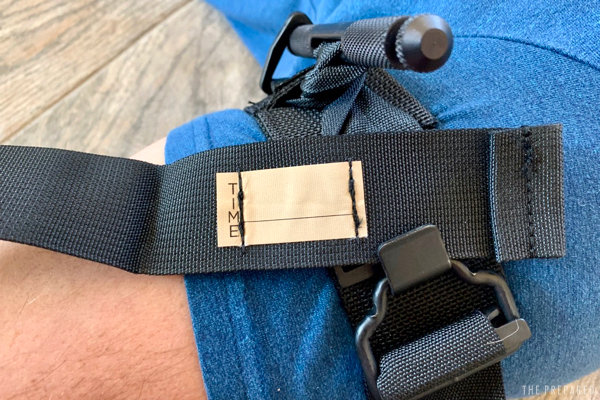
Write down the time.
If you don’t have something that can mark directly on the tourniquet, get creative: use the voice command on your phone to start a stopwatch, text it to yourself, dip your finger in the pool of blood and write on the ground or victim’s forehead, etc.
Contact emergency services (if possible) and work on controlling the wound with direct pressure and bandaging.
High and tight vs. a few inches above the wound
There’s still a bit of a debate about where civilians should place a tourniquet. The official CoTCCC guidelines say to place the tension a few inches above the wound. Yet some people advocate just slapping the tourniquet on as high on the limb as possible, which will cut off anything below it.
It’s not bad to just go “high and tight”, especially when time is critical, although it does cut off blood flow to more tissue than necessary.
The top part of limbs are often thicker (thus harder to compress), which is why some studies show that upper leg or arm applications are only 75-80% effective versus lower leg and arm tourniquets at 92-100%.
There’s also a myth saying you shouldn’t put tourniquets towards the ankle or wrist because the artery runs between the two bones in the lower arms and legs, so you can’t squeeze the artery because it’s protected by those “walls.” But the human body doesn’t work that way, and science has already debunked this myth.
Some people think going high is better because they assume, mostly from movies, that injured arteries can retract way up into the body. In reality, a fully severed artery will only retract a few centimeters, not multiple inches.
There’s a famous scene among medics in the movie Black Hawk Down that dealt with this myth:
The two hour rule and how it changes for preppers
All of the best tourniquets have an area or tab labeled “TIME: ______” so you can write the start time directly on the device. It’s important to keep track of and communicate that info, e.g. when handing off the injured to medical professionals.
Two hours is the standard time limit taught in tourniquet classes. Studies show that in non-disaster settings, the average patient reaches professional medical care 77 minutes after injury.
There are documented cases where casualties were under tourniquet for up to 16 hours without tissue damage. However, in normal scenarios the risk of amputation and tissue damage becomes unacceptable after six hours.
Preppers have to consider that professional medical help won’t be available within two hours. You might be injured when on a backcountry hike, three hours from the trailhead with no cell signal — let alone a major SHTF disaster that overloads emergency responders.
If you face a choice between keeping a tourniquet on for more than two hours or removing it and running a real risk of a bleed out, it’s usually better to keep the tourniquet on.
There may come a point where you just have to accept that the limb will be lost and that’s better than dying.
In an extreme event where you’re just not able to get help and you can’t control the bleeding through direct pressure, you have three options:
- Let the damage from leaving a tourniquet on too long play out — even if it turns into a nasty infection or some other serious problem, it’ll take a few days to kill the injured
- Try to surgically intervene by clamping off the artery directly
- Amputate
Remember Aron Ralston, the hiker who cut off his own arm after being pinned by a rock and was portrayed in the Oscar-nominated film 127 Hours? He used a tourniquet not only to control the bleeding during/after the amputation but by leaving it on for a while beforehand, it helped deaden the tissue and made the procedure easier.
Do tourniquets cause amputation or nerve damage?
No, this is (mostly) a survival myth.
Data from recent years shows that people who had an emergency tourniquet applied in a non-professional setting ended up with an amputation only 0.4% of the time and nerve damage 1.5% of the time.
A large study over 2011-2016 determined that the benefit of civilians using a tourniquet far outweighed the risks from misapplying one.
Part of the myth is that people who needed tourniquets were often injured in a way that led to amputation or nerve and tissue damage anyway. A leg that was crushed in a car accident is likely bad enough to justify a tourniquet to keep the person from bleeding out and dying, but the leg itself will be removed anyway.
However, this is one of those myths that does have some roots in reality. Decades ago, when we knew much less about medicine and how to treat wounded people in the field, some of the methods and products used for tourniquets did cause problems.
Avoid thin straps
There are still problems today with tourniquets that aren’t designed well. Some of the models talked about on other prepper websites and forums use straps that are too thin (to the point they’re more like wires or tubes than straps), or people hack together one with thin materials like shoelaces.
When you decrease the surface area that’s applying pressure you increase the pressure per square inch. That increased PSI increases the likelihood of tissue or nerve damage. Imagine the difference in comfort between a wide rubber band on your wrist vs. a narrow one.
Don’t periodically loosen the tourniquet
You may also see outdated advice to loosen the tourniquet every 15-30 minutes. This was taught back when the fear of tissue damage was higher, so they thought it was helpful to give the tissue a temporary rest.
Not only is that idea invalid, studies found that in practice it did more harm than good because it led to more bleeding than people expected.
Don’t use tourniquets for snake bites
This might seem a little counterintuitive, but you want snake venom to spread around instead of staying in one concentrated spot.
That’s why medics use the rhyme “the solution to pollution is dilution.”
Venom breaks down tissue much more rapidly when concentrated in one spot, causing more long term problems than if it spread around. That tissue breakdown will also cause an enormous amount of swelling, which can lead to a very dangerous problem called “compartment syndrome” and further tissue damage when combined with a tourniquet.
Practice
Do not throw a tourniquet in your bug out bag and assume you’ll figure out how to use it when the need arises. Even if you’re uninjured and helping someone else, seconds matter, and you don’t want to be fumbling around with a critical piece of equipment you don’t know how to use.
I’ve taught thousands of medical students. Without fail, 80% of people — including those who supposedly had prior training — struggle to apply the tourniquet correctly the first few times.
But don’t be intimidated: It’s not difficult, just a little awkward at first, so spend 10 minutes every few years (perhaps during your annual prepper review) to get comfortable with the skill and you’re good to go.
- Practice applying to yourself and to others
- Don’t assume you’ll have both hands free to work on a leg — mix it up
- Try using only your dominant hand
- Then switch to your non-dominant hand
- Practice should include finding and removing your tourniquet from where you store it (like a pouch on your get home bag) so it becomes part of your quick-action muscle memory
- To really challenge yourself, put one palm flat against a wall to simulate being trapped
Be careful not to overuse gear
It’s possible to damage a tourniquet through overuse. Some models rely on stretchy rubber pieces that can degrade if used too often and too aggressively. Most people won’t need to worry about this — it’s more of a risk for models used in emergency training classes or for people who train too much.
You can buy practice models that are typically a blue color.