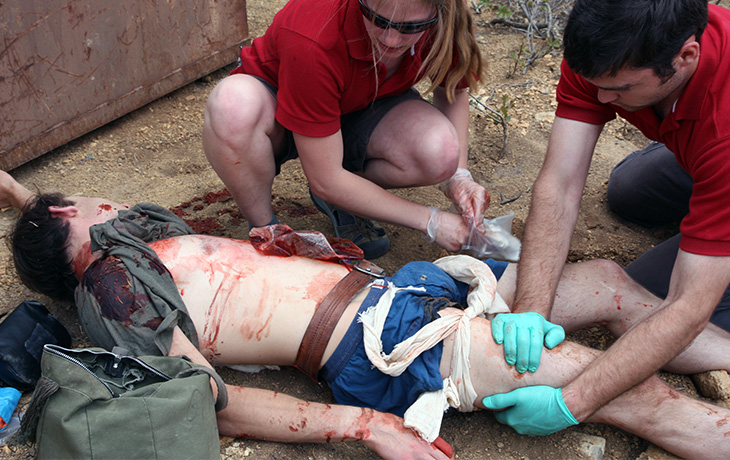
Knowing how to clean a wound is an important wound care skill for preppers — the risks and consequences of an infection go way up during emergencies, but a few simple steps can prevent a small problem from blowing up into a major one that could turn fatal.
The discovery that microorganisms (such as bacteria) cause infections, and that simple steps like hand washing and wound care easily prevent those infections, was one of the most important milestones in medical history. Scientists discovered that little bit of effort saves a ton of lives.
It’s pretty simple: Your skin’s primary purpose is to keep foreign contamination from getting inside your body. When the skin is broken, bacteria and debris get inside.
You want to clean that junk out before covering the injury or letting it scab over on its own, so that you don’t trap the contamination inside.
Cleaning a wound is just one step in the wound care process:
- Get bleeding under control (use a tourniquet if it’s serious)
- Clean the wound
- If it makes sense to, close the wound with sutures, staples, glue, etc.
- Protect the wound with dressings and bandages
Infection risks greatly depend on the situation: what the wound is like, what kind of contamination got inside, and whether the patient has quick access to professional medical care. There are technical medical classifications, but it’s pretty simple to understand the risks of a particular wound if you just use your head.

The big problems happen when infections overwhelm the patient’s defense system and travel throughout the body.
To make matters worse, immune systems tend to get weaker during bad or prolonged emergencies due to disruptions in sleep, food, stress, and so on.
For example, imagine you’re using your survival axe to process downed trees after a hurricane. You fumble a swing and nick your leg. The cut might not seem like a big deal, but flood waters are full of feces and other nasty contaminants, some of which got in the wound.
That superficial wound can blow up into a life-threatening, systemic infection (called sepsis), which is then compounded by all of the other stuff you’re dealing with in that broader emergency and by the lack of professional care.
Use your head. Get professional help if you can.
The Prepared teaches survival medicine: what to do in emergencies when you can’t depend on normal help or supplies. How to make decisions, steps to take, gear to use… there’s a huge difference in the right answers between daily life and a survival situation.
You agree not to hold us responsible if you choose to do something stupid anyway.
Want more free guides from medical and survival experts delivered straight to your inbox?
Summary of how to clean a wound:
- When in doubt, clean it out.
- Flushing is the key step. Use lots of clean, potable water. Don’t put chemicals or more contamination in the wound via dirty water, hydrogen peroxide, or other chemicals.
- If a wound is serious and you can get to professional help, do so.
- Clean the surface area around the outside of a wound before you clean inside so that you don’t recontaminate your work.
- You can spread/open the wound using your fingers or a clean tool, in order to see all the nooks and crannies where debris might be hiding. Just don’t make the wound worse unless you’re in a very serious emergency without help.
- Remove foreign objects (e.g. a nail in the foot) as long as it won’t cause more serious damage or bleeding.
- Pick out any tangible debris before flushing. You may need to loosen it up with a toothbrush if flushing alone won’t remove it.
- Don’t flush deep, narrow puncture wounds (e.g. a nail straight into the thigh) because the flushing just pushes contamination further down. Let the outgoing blood push away what it can.
Why you should trust us
Your three guides have 80 years of combined experience teaching or using these skills:
Most important: flush the wound with clean water
The most important part of wound care is clean drinking water, and lots of it.
You do not need sterile, distilled, or saline water. Any water that’s safe to drink is safe to use to flush a wound: tap water, professional bottled water, tap water that’s been in a hydration bladder or bottle for a few days, the output from your survival water filter or purification tablets, or the potable water stored in your camping or emergency water cans are all fine.
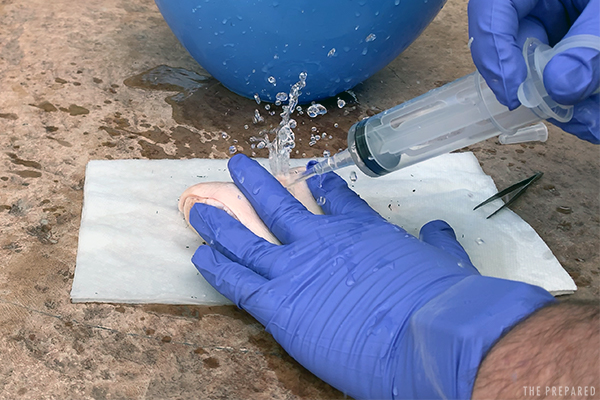
You can flush by simply pouring water from a container. But having some pressure behind the water is helpful because it removes contamination with greater force and speed. Water straight from a normal household tap is usually the right amount of pressure.
This is where a syringe can be helpful because you can push the water out in a focused jet.
Tip: If you don’t have a syringe, you can poke holes in a disposable water bottle cap to make your own squeezable sprinkler.
Can you clean wounds with iodine or hydrogen peroxide?
Short answer: No, don’t put chemicals in open tissue.
Never use hydrogen peroxide — it delays the healing process and damages healthy cells.
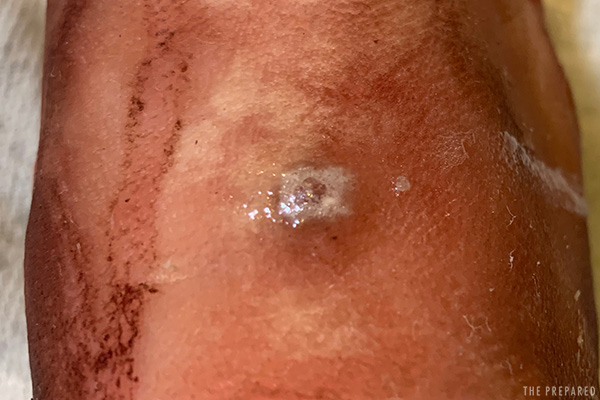
Using iodine depends on whether you’ll have access to professional medical care within 48 hours. When in doubt, assume you won’t get help.
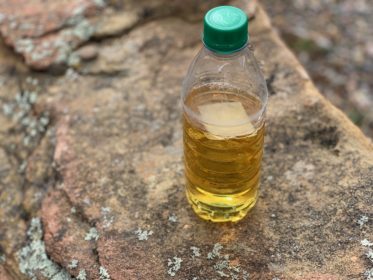
The problem with iodine is that it works well in the short term, but it can do more harm than good if the patient doesn’t get on antibiotics within two days. Recent studies show that bacteria rebounds to higher levels 48 hours after iodine was applied than if there was no iodine used at all. Also, there’s no clear data that iodine flushing works better than clean-water flushing to begin with.
That’s why the pros use iodine in hospitals but wilderness medics don’t use it in the field.
If you don’t have access to enough potable water but feel confident you’ll get to proper care soon, you can create your own flushing solution by mixing iodine with the cleanest (but obviously not gross) water you can find.
Mix enough iodine into the water so that it has the color of weak tea, a faint brown. It doesn’t take much. If you have iodine wipes in your kit, you can drop a couple in the water for the same effect.
Simple wounds
Simple and small wounds in daily life, like slicing your finger with a kitchen knife, are mostly handled by running clean water over the wound to flush out any contamination.
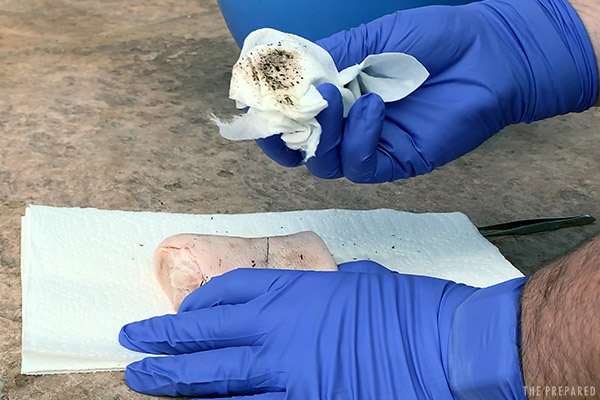
Inspect the wound to see if any visible debris wasn’t removed by flushing, such as food bits from the kitchen knife stuck in a corner.
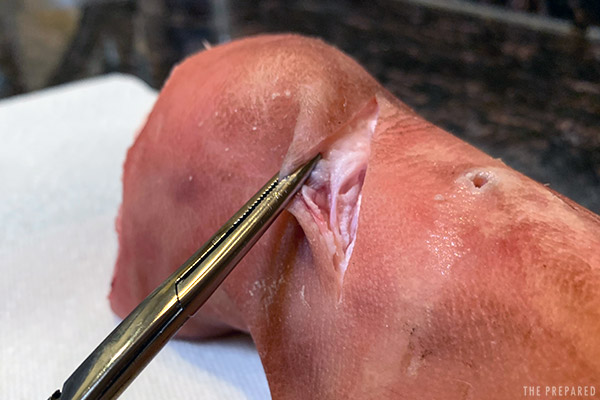
Thin or angled cuts make it hard to see down into the wound. You can spread the opening with your fingers or a tool, but don’t spread it far enough to cause more damage.
That’s it. Just throw on a band-aid once the contamination is removed.
Serious wounds
The risk of infection climbs when the connective tissues (fascia) are penetrated in a deep wound. A compound bone fracture, fish hook through the hand, gunshot wound, or deep gouge on a thigh during a car accident are all examples.
Work fast, but don’t expect a quick fix. Even a 2-3 inch long wound can take upwards of half an hour to clean outside of a hospital environment.
It will also be a pretty uncomfortable process for your patient unless you have done something to numb the area (or numb the patient). Be prepared for them to pass out — place them in a safe position in case they do, and work fast to try and finish before they wake back up.
Start by cleaning the area around the wound
You don’t want surface grime around the wound to find its way in after you’ve cleaned. Serious wounds usually have blood swishing around, or there might be dirt or grease nearby.
Use water, gentle soap, or wet wipes to clean the skin around the wound. Remove or cut clothing if needed. You don’t intentionally use soap inside the wound, just around it, but don’t freak out if a little soapy water gets inside.
Tip: Use medical gloves so you don’t introduce more contamination to the wound.
Tip: If you are concerned about hair on the skin around the wound, remove it with clippers. Do not shave the area as shaving might damage the skin and increase the possibility of infection.
Can you see what you’re doing?
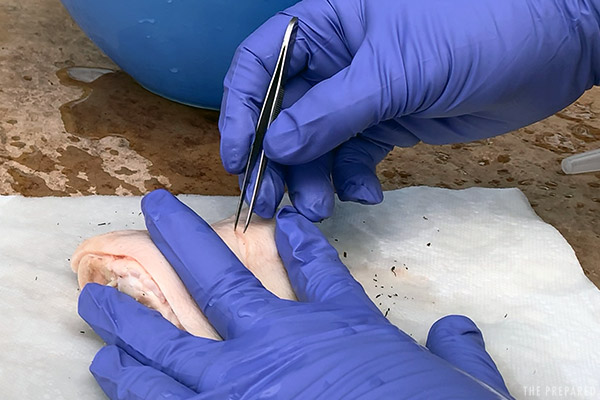
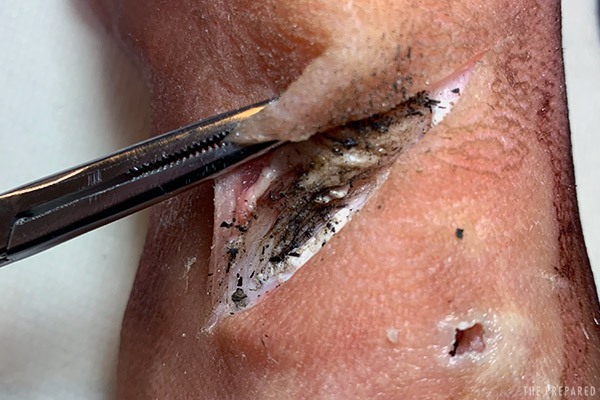
For nasty wounds, you may want to use a tool instead of your fingers to hold the wound open so you can see what you’re doing, directly hit all of the tissue with water, and have both hands to work with.
Forceps work well because you can clamp on the edge of the tissue and the weight of the forceps will keep the wound open. The pliers on your survival multi-tool can work, as well.
If there are avulsed (torn) bits of skin around the edges of the wound, you will need to lift these and irrigate under them.
Tip: Headlamps are perfect for medical kits because they keep both hands free and illuminate what you’re looking at.
Tip: A magnifying glass can help you see small debris and pockets in the wound. Or, if someone else is helping you, they can hold their phone over the wound with the camera mode zoomed in while you watch the screen.
Remove impalements (if appropriate)
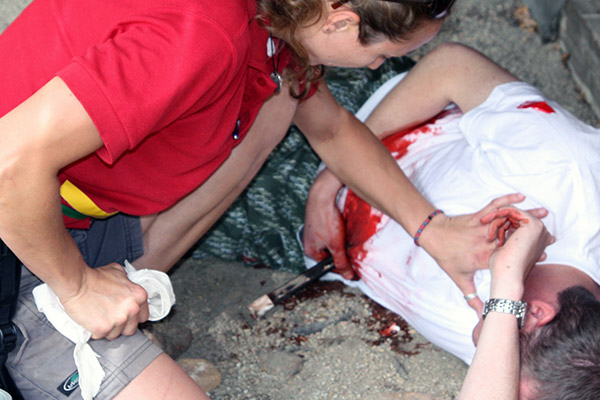
Students in our survival medicine courses frequently ask questions like “Should I remove an arrow shot through a leg?” or “If there’s a nail in someone’s head, should we pull it out?”
In general, yes, you should remove the impalement. It’s hard to clean and care for a wound with a fish hook or nail sticking out, and the object probably brought a lot of contamination with it.
But you don’t want to make things worse by removing the impalement. You should leave an object in:
- If it seems serious — more like a nail through the foot than a staple in the skin — and you can get to professional medical help in 1-2 hours, then leave it in and get to help.
- If removing it will cause massive bleeding or serious injury. Think of a knife in the heart or screwdriver in the brain.
- If it’s in the eyeball.
- If you’ll cause a lot more damage by removing it. Picture a serrated knife blade — those little hooks and crannies are designed to do damage when pulled out.
Sometimes it’s hard to know what you’re dealing with. So if you try to remove the object and it either feels stuck or creates a huge amount of pain for the patient, leave it in.
For example, an instructor we teach with once responded to a snow skier who had a tree branch go through his boot and foot. When they tried removing the branch, it barely budged, and the skier cried out. They later discovered the seemingly-simple branch had a knot inside the foot, wedged between the small foot bones.
Remove big or stubborn debris
Use clean tweezers or something similar on your multitool to remove tangible debris. That may include cutting away obviously-dead skin.
Tip: If you don’t have a tool you think is clean enough to touch the wound, immerse the best option you have in boiling water for 20 minutes or soak it in >70% isopropyl alcohol for 30 minutes.
Some injuries force debris deep into the tissue — like rubbing salt and pepper into a raw steak before searing. A classic example is road rash, where small road ‘pebbles’ are forcefully pushed into the tissue.
If it looks like small debris is lodged in there well enough that the upcoming water pressure alone won’t push it out, this is where you can use a soft toothbrush to scrub it loose. You can use harder scrubbers if needed — just try to make them as clean and soft as possible. Speaking from personal experience: this really sucks as a patient, but it has to be done.
Flush and remove any leftover debris
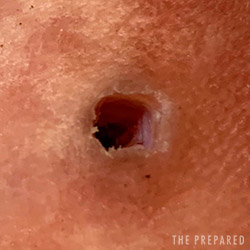
Punctures, such as a long animal tooth bite, are usually harder to flush out because it’s a deep-but-narrow wound. In fact, using a higher pressure flush could actually pack debris further down in the wound.
You might see advice to use iodine as a drop-in disinfectant instead of a flushing solution in this situation. We still don’t recommend using iodine for the reasons discussed above. Instead, better to let (even encourage) bleeding to push contamination out from the inside.
How often should you clean a wound?
Once you’ve finished the previous steps and cleaned the wound, it’s time to (possibly) close it, then bandage it.
If the wound was serious enough where there’s still open tissue (not scabbed over) after a week, just follow the same process as the first time.
How to clean an infected wound
Excessive pus or discolored discharge are signs of a serious (but still localized) infection. Clean the wound again if you can’t get to medical help.
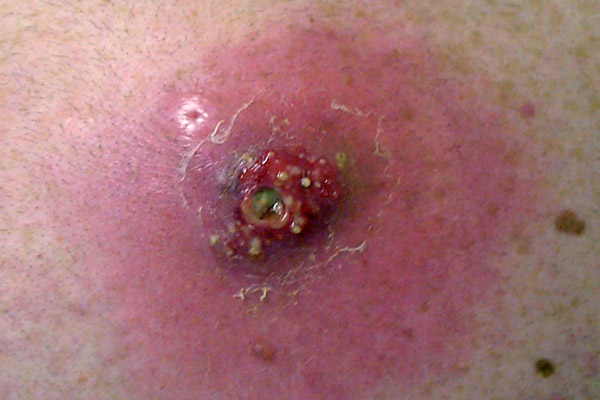
An infected wound is cleaned the same way as a new wound: remove damaged tissue and foreign objects (a process called “debriding”), then flush with copious amounts of clean water.
You may have to push on the wound, squeeze the edges, or puncture the top of an abscess (i.e. boil) to help drain the pus. This will also help relieve localized pain.
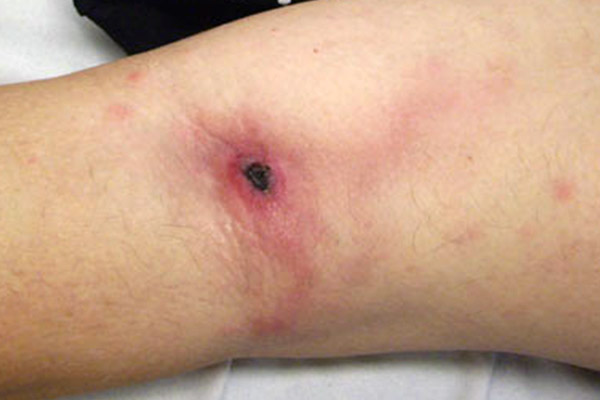
Fever, malaise, or red streaking moving away from the wound are signs of sepsis, a very serious infection. If you can’t get to medical help, clean the wound again and use appropriate antibiotics you may have on hand (ceftriaxone, azithromycin, ciprofloxacin, vancomycin, and piperacillin-tazobactam).
Tetanus infection risk and treatment
Even if the injury seems mild enough to not go to the doctor, Tetanus is a serious infection — with 30-40% mortality rates — caused by Tetanus bacteria in a wound.
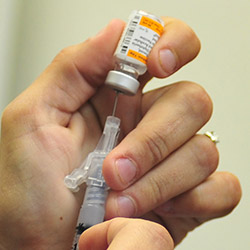
Ask if the patient has had their booster shot within the last 10 years. If the answer is anything but a solid yes, get professional help. The most common treatment is a shot of Tetanus Immune Globulin, but it’s only effective before infection sets in (roughly three days), so don’t delay.
If you can’t get to help, the best way to combat Tetanus is through air exposure on the wound (and luck).
