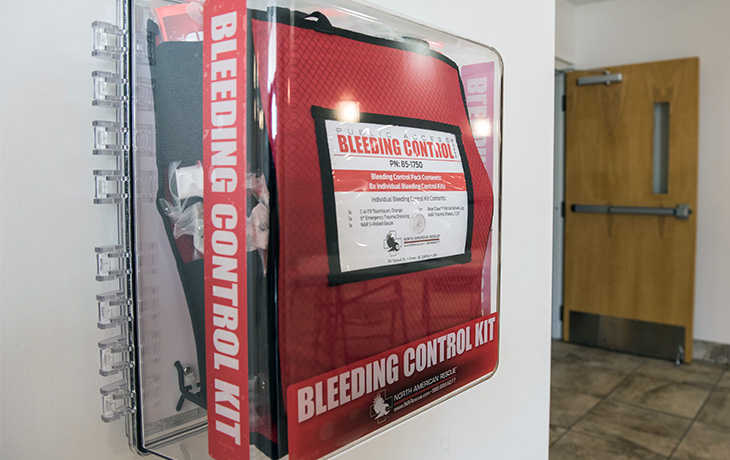
From simple injuries to a cut off fingertip to a bullet wound with severe hemorrhaging, civilians with a little bit of bleeding control knowledge can have a big impact on survival chances in an emergency. That’s why the U.S. government has heavily promoted a “Stop The Bleed” campaign to raise awareness — including placing bleeding kits in public places — and teach more people the basics.
Well-aimed direct pressure is the simplest and best answer to almost every hemorrhage control (medics say ‘hemcon’) scenario. Using your hands, wound packing, and tourniquet use are just different forms of creating pressure.
Controlling bleeding is the required first step when treating a wound:
- Control bleeding
- Clean the wound
- If needed, close the wound with sutures, staples, glue, etc.
- Protect the wound with dressings and bandages
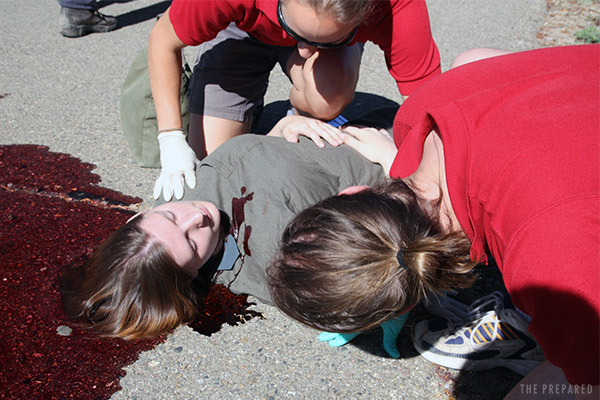
Like any survival skill, it’s important to practice before an emergency. During our in-person classes, we even try to simulate stress by having students sprint 200 yards to a mock patient so that they’re making decisions without a clear head. You can also try practicing in the cold, in the dark, with loud music in the background, and so on.
Summary:
- Well-aimed direct pressure is the definitive way to stop bleeding
- Elevating the wound above the heart is helpful because it reduces blood pressure to the injury
- Serious hemorrhaging can cause someone to bleed out in under a minute — learn the signs and how to use a tourniquet for these life-and-death situations
- Wear gloves and a face shield whenever possible
- The most common error is not holding pressure long enough — hold firm for at least 5-10 minutes
- Resist the urge to peek at the wound, otherwise you might lose your progress
- Don’t let patient discomfort prevent you from doing what you need to do to help them
Use your head. Get professional help if you can.
The Prepared teaches survival medicine: what to do in emergencies when you can’t depend on normal help or supplies. How to make decisions, steps to take, gear to use… there’s a huge difference in the right answers between daily life and a survival situation.
You agree not to hold us responsible if you choose to do something stupid anyway.
Want more free guides from medical and survival experts delivered straight to your inbox?
Why you should trust us
Your three guides have 65 years of combined experience teaching or using these skills:
Act fast for severe bleeding
Major bleeding can cause someone to lose consciousness or die within minutes. That’s why tourniquets exist and why they are kept on the outside of gear (for rapid access).
The products and skills for severe hemorrhage control are different enough that we split them off from this guide. Check out the review of the best tourniquets and learn when and how to use a tourniquet.
If it’s wet and not yours, don’t touch it
You’re probably someone who wants to take action in an emergency. Awesome, high five, we (and hopefully your patient) love you for that.
Although it may feel unnatural, a bloody injury is a good example of when you should pause a moment or three to be thoughtful and careful. In all but the most severe every-second-matters injuries, it’s worth taking a moment to protect yourself by putting on protective gear before exposure to other people’s fluids.
No one wants to pick up a serious illness because they didn’t put gloves on. But consider the patient, too — they might not have the ability to communicate or worry about giving you a disease they may have, or wonder what you might give them in the process.
A good kit has gloves. Use them.
Latex, nitrile, and vinyl gloves are common. Try to avoid latex because many people are allergic and they deteriorate over time.
Those thinner materials are easily torn in the kind of messy survival situations you might face outside of a hospital environment. Dishwashing gloves are useful because they’re tougher (e.g. less likely to rip from an exposed bone end) and you don’t need nimble finger dexterity for these first steps in hemorrhage control.
Mucous membranes, like the inside of your nostrils and corners of your eyes, are easy entrance points for contamination. So protect yourself with sunglasses, medical face shields, disposable or full-face respirator masks, or even a bandana (as a last resort).
How natural blood clotting works
The human body does a pretty decent job at repairing itself. That process kicks off with platelets, tiny disc-shaped cell fragments in the blood that lead the clotting process. Platelets make up around 1% of blood volume, just floating around waiting for a leak to plug.
Collagen is a protein in your skin and soft tissue (you sometimes hear of collagen in skin care advertisements) that normally doesn’t interact with the blood contained in vessels and veins.
An injury ruptures the walls between blood vessels and tissue, allowing the blood to flow over the newly-exposed collagen.
Platelets are attracted to and bind with collagen, using the collagen as an attachment point to build a sort of platelet blood-blocking dam across the wound. After a platelet has bonded, it changes shape from a flat disc to a sphere with little fibers to help catch other platelets.
Think of those morphing platelets like the Nova Corps in Guardians of the Galaxy, when they form up to blockade the Dark Aster:
Why pressure and elevation are key
The platelet dam is not impervious or super strong — especially while it’s forming.
That’s why adding pressure to the area or elevating above the heart aids with the natural clotting process. You make it easier and faster for the body to build that dam when it doesn’t have a flood of blood constantly screwing up the construction site.
Even in advanced situations where you’re using an absorbent material to pack a deep or hard-to-reach wound, the whole point is to create pressure when your fingers alone can’t do the job. You don’t pack a wound simply to absorb blood while waiting for the clot to form.
In 2010, the American Heart Association claimed that limb elevation was not an effective way to stop bleeding and may even be harmful. The AHA argued that there weren’t enough studies proving the effectiveness of elevation — but there weren’t any disproving it, either. They’ve since retracted, because recent studies have proven that elevation is appropriate and useful.
Stop the bleed with well-aimed direct pressure
It’s pretty simple: Find the source of bleeding and apply pressure as directly to that spot as possible. Then, if you can, elevate the wound above the heart while maintaining pressure.
Hold that pressure for 5-10 minutes. Resist the urge to sneak a peek — breaking the platelet barrier too soon can cause you to start over.
That’s all it will take to stop the bleeding in most wounds. Advanced techniques and products are all intended to help you create aimed pressure when it’s too hard to do with your hands.
How to use a pressure dressing
Consider a pressure dressing for simple wounds on the extremities, torso, or head. Pressure dressings are sometimes called “Israeli” dressings — an homage given by US troops to Bernard Bar-Natan, the Israeli Military medic who created the product.
Pressure dressings are an absorptive material combined with an elastic bandage and rigid “pressure bar” that makes it easier to focus pressure directly over the bleeding source.
You can think of Israeli dressings as a middle-ground combo between plain dressings and a tourniquet — although when used for the initial hemcon, they’ll likely need to be changed sooner than a separate dressing/bandage typically would.
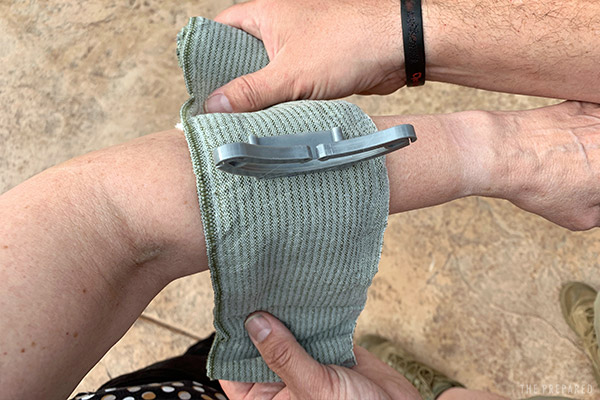
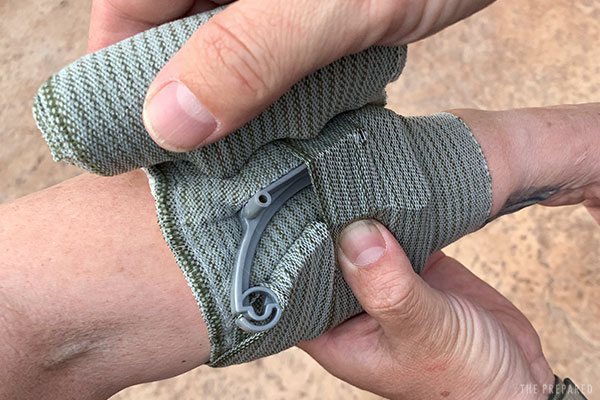
There are variations between pressure dressing products, namely in how they create the focused pressure. Common pressure bars are half-moon shaped or “H” shaped, while some products use a pressure cup. The pictures below use a Recon Medical Elastic Bandage with a half-moon bar.

Take the gauze out of its packaging. Place the dressing and pressure bar directly over the wound. Begin wrapping the elastic.
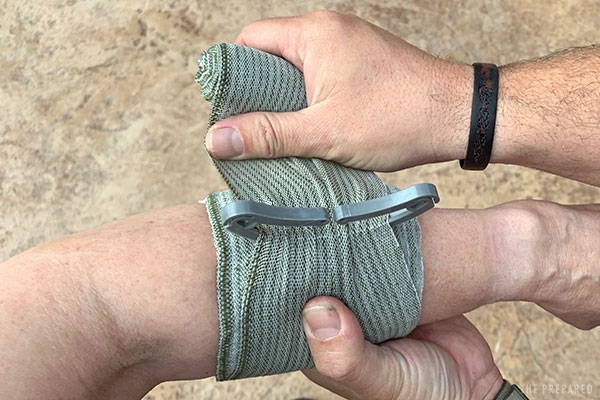
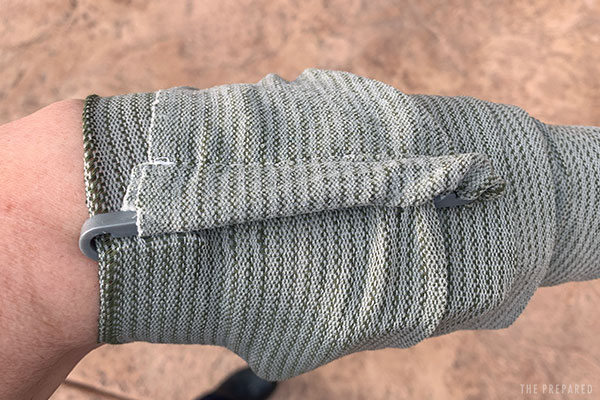
When you get back around to the dressing, wind the elastic bandage around the pressure bar and double back to wrap in the opposite direction.
If you are using the OLAES Bandage or other products with a pressure cup, just go over the top and continue wrapping.
Tip: Don’t pull too tightly — the point isn’t to cut off blood flow to the whole area the way a tourniquet would. Check the patient’s fingers or toes afterwards for proper circulation.
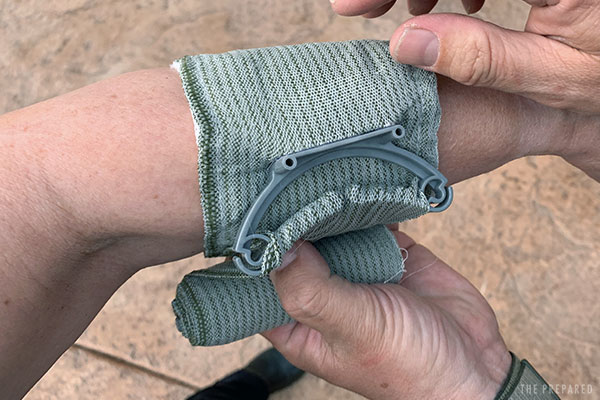
Create overlap on both sides of the dressing to maximize protection.
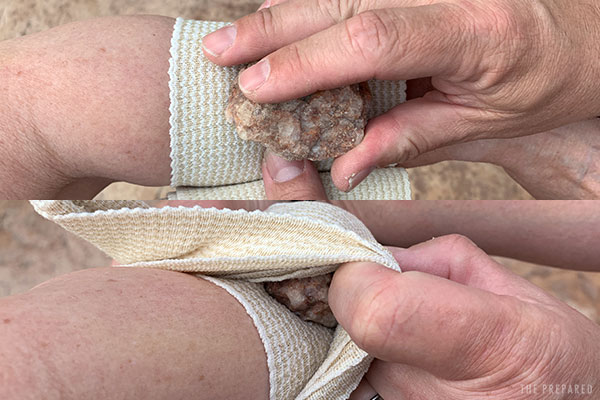
Tip: You can improvise an OLAES-style pressure dressing using gauze, an elastic bandage, and a small rock. Place the dressing against the wound like normal. Begin wrapping the elastic bandage. Part way through the wrap, place the rock directly over the wound. Finish the wrap, wedging the rock in between layers of the somewhat-tight bandaging.
How to pack a wound
There are places on the body — such as the armpit, groin, and neck junctions — that are just too difficult to create well-aimed direct pressure against. Or sometimes a wound is so deep that you can’t push hard enough on the surface to create pressure down at the point of severe hemorrhage.
Packing a wound is the process of building pressure by forcing gauze (or a similar material) into the wound.
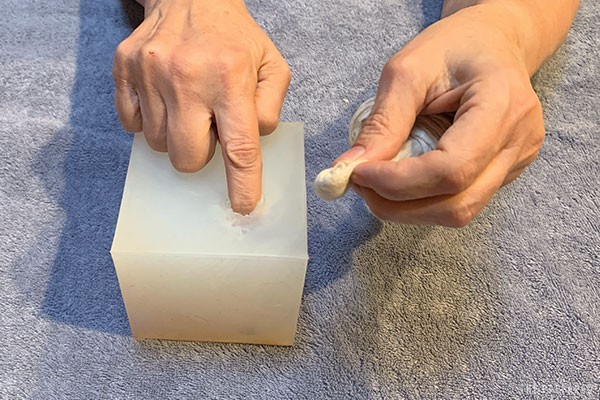
You may have seen war movies where a medic asks someone nearby to stick their finger in a bleeding wound to create direct pressure. That’s one of the rare instances where survival advice shown in movies is correct.
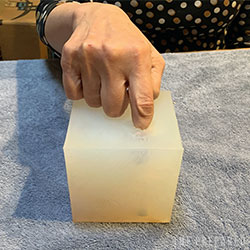
If it’s a serious bleed, stick your finger or thumb into the wound. Try to find the source of bleeding and push against it without making the wound worse.
Take the gauze out of its packaging. Start rolling one end of the gauze into a tight ball (sometimes called a speedball). That ball will be the first thing you push into the wound, so it should be a little smaller than the size of the wound but have enough heft to make the pushing easier.
Tip: If the gauze is rolled, you can poke the tightly-wound middle of the roll out with your fingers and use that as your starting point.
Push the gauze ball into the wound channel alongside the finger you already have inside.
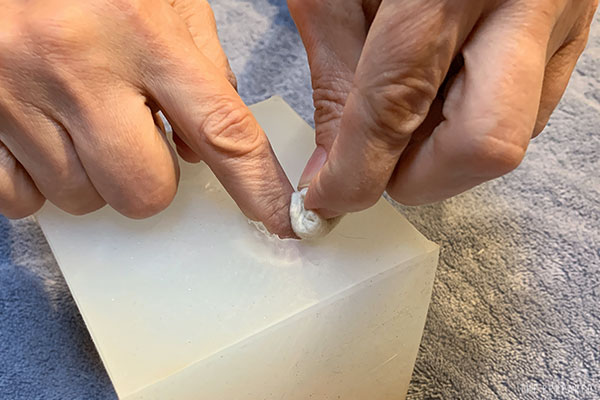
Relax your finger just enough to swap places with the ball, immediately pushing the ball as deep and forcefully as needed.
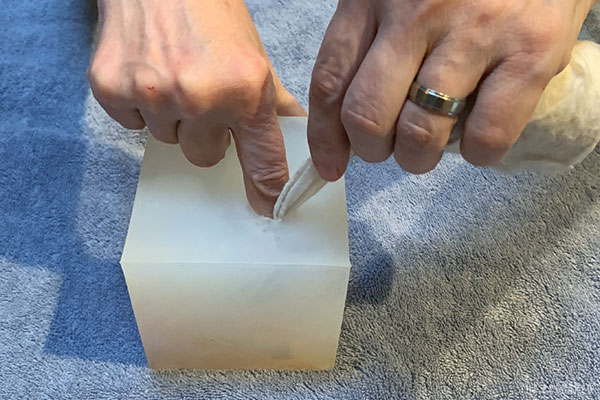
Create another wad in the gauze near the wound entrance. Stuff it down. Repeat.
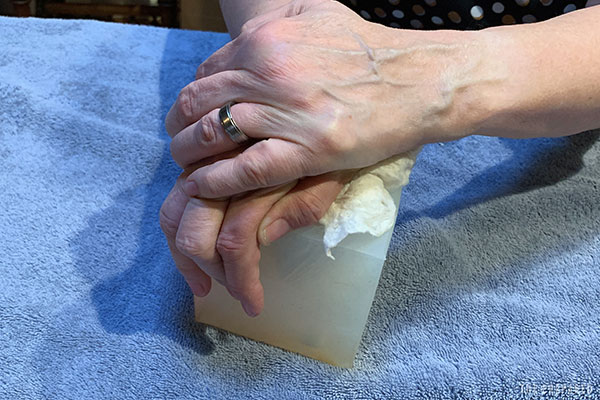
If you have enough material, eventually you’ll build the pack up until it reaches the surface. It’s then much easier to use your fingers to press down on the pack, transferring that pressure down onto the blood source for 10 minutes.
Wound packing sealants
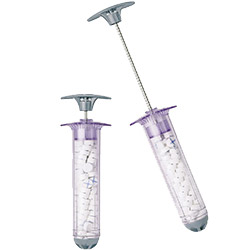
Products like Celox-A and XSTAT look like a large syringe full of granules (or soft pellets) that you push out into the wound instead of gauze.
It’s a neat concept, and we’re happy to see more innovation in this market. A recent (but limited) study concluded that, in the hands of civilians, the XSTAT was more effective than just gauze.
One of the challenges with a powdered hemostatic agent is deploying it where it is needed — the Celox-A solves this by using an applicator to deploy the Celox granules.
However, these applicators have a single purpose and a large price tag. The small version of XSTAT is $100.
So you should still learn how to pack a wound with gauze and keep those basic materials on hand. Any of these injectable sealants are a nice-to-have bonus.
What about internal bleeding?
The short answer: If someone has internal bleeding in a bad survival scenario (no professional help, no grid, etc.), they’re probably going to die.
You just can’t create enough well-aimed direct pressure inside the belly without opening up the patient. Some studies have also shown that trying to create enough pressure on an organ from outside the body can further tear the wound and accelerate blood loss.
The exception would be when the internal bleeding isn’t so … internal. If someone has been torn open in such a way that you can get access to the source, then it might be worth applying pressure if all other hope seems lost.
How to stop a nosebleed
Your old school nurse may have taught you to hold the head back. This doesn’t do anything except potentially make things worse by draining blood through the throat into the stomach, which can lead to nausea.
Pinch both nostrils firmly against the septum, then lean forward. Adjust the pinch location up or down if there’s still bleeding after a minute or two.
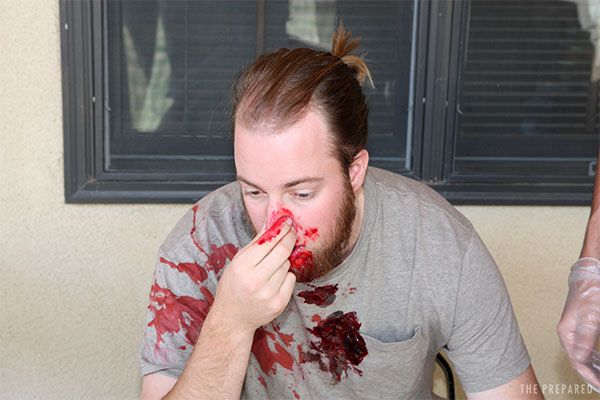
Hold this pressure for at least ten minutes while breathing through the mouth. Once the bleeding has stopped, have the patient gently blow their nose to clear out excess clots.
Tip: If there have been several failed attempts to stop a nosebleed, have the patient blow their nose hard to clear existing clots, and then restart the pinch. The most likely cause for the failure was not holding pressure long enough.
Hemostatic gauze vs. regular gauze
Some products come with a hemostatic agent — chemicals that accelerate clotting — built into the gauze. All of the other steps are the same.
Research shows that hemostatic gauze doesn’t really add more value than plain gauze and well-aimed direct pressure. The exception is wound-packing scenarios that are in really tough spots where every little advantage helps.
There are solid products out there, like $20 QuikClot, $25 Celox Gauze, and $40 Chitogauze.
But hemostatic gauzes are around 40 times more expensive than normal gauze. Plus you’re far more likely to find normal gauze when SHTF than a specialty product.
Pick up a few for your kit if you want the upgrade and have the budget — we carry some in our kits — but you should still practice with and rely on plain gauze.
What about blood stop powder?
We sometimes hear medics joke that the best way to use powdered hemostats is to dump them on the ground and forget you had them.
If you can even find these products anymore, they have a reputation for being difficult to apply correctly (even with two people) and causing significant damage to the surrounding tissues. Some of the side effects even require debriding or surgical removal in a hospital environment.
Products like Celox-A are a notable exception because they’ve addressed the “hard to apply” problem.
Can you use tampons for hemorrhage control?
Using a tampon to plug an injury (e.g. a bullet wound) is such an incorrect-but-still-popular “prepper hack” that it made our list of the worst survival myths.
Tampons are designed to absorb blood. They do that job well. You can even split tampons open and use them as extra gauze (or even fire-starting tinder) if you run out of proper materials.
Tampons and menstrual pads do not expand enough when soaked to apply pressure to a wound. Since bleeding is controlled through direct pressure, even in a bullet hole, a tampon is no more effective than simply putting in a few loose layers of gauze.
If you plug a bullet hole with a tampon, all you’re doing is creating an absorbent dam in the first few inches near the surface. Like a dam on a river, that will create a reservoir pool of blood. That’s not necessarily bad — but it’s definitely not helpful.