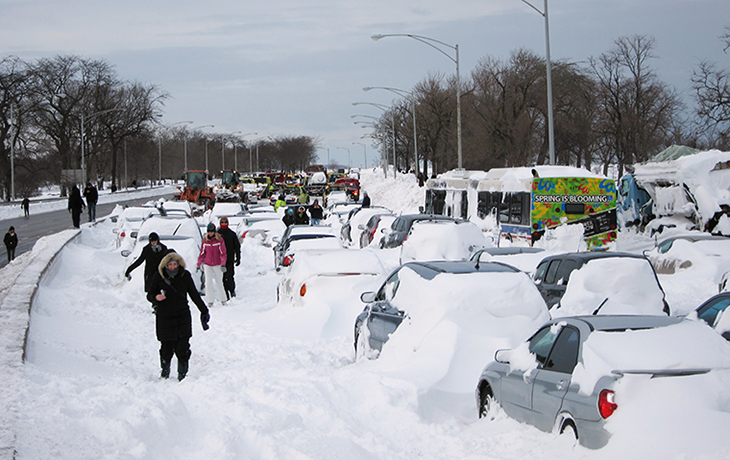
Unfortunately, climate change is making winter and winter storms even worse, with more severe, frequent, and unpredictable events occurring in a wider range of places. Before long, people in northern Texas might need to carry tire chains because of polar vortexes that slingshot Arctic air down into the mainland.
Nasty winter weather can happen as early as September in some parts of the U.S., but winter formally starts on December 21. So if you live in an area where winter is a risk, try doing your annual preparedness review when the leaves start to fall.
Although good emergency preparedness plans cover a wide range of situations at any time of year, there are specific steps and gear that help you handle extreme cold and winter storms.
This guide digs deeper into key areas:
- Last-minute tips in case a storm is headed your way
- Common risks in severe cold and winter storms, like hypothermia
- How to dress appropriately and tips on which clothing to buy
- Swapping/adding winter gear to your normal Bug Out Bags, Get Home Bags
- Swapping/adding winter gear to your normal Vehicle Everyday Carry
- Winterizing your home to prevent common damage
- What steps to take in your home and car as the storm arrives
Check out our separate guide to learn how to survive common winter emergencies, such as falling through ice or building wilderness snow shelters.
- Why you should trust us
- How to prepare last minute for a winter storm
- Prepping basics for every scenario
- Prepare your Bug Out Bag and Get Home Bag for winter
- Prevent hypothermia and frostbite
- The best winter clothing and how to dress for severe cold
- Car survival kit checklist for winter
- Winterizing your car
- Home winter gear checklist
- How to winterize your home
- Basics of severe winter weather
- How severe cold affects electronics and fuel
- Know what to do during a winter storm
- What to do after a winter storm
Why you should trust us
We spent 40 hours on research for this article. The main writer spent 30 years living in both urban and rural areas of Ohio and Illinois, which endure brutal winters.
We talked with medical professionals, an academic who specializes in how cold conditions affect human physiology, outdoor recreation experts, retailers and manufacturers of cold weather gear for people and vehicles, and an HVAC trade association. We pored over countless preparation lists, from FEMA to Reddit, combed white papers, and distilled useful insurance tips.
How to last-minute prepare a winter survival kit
In case you Googled this article as a bomb cyclone or polar vortex is headed your way, here are the best last-minute tips, right up front.
We assume you’re like most people: unprepared, with random/normal stuff around the house and only 1-2 days’ worth of appropriate food and water.
The main goal is to be able to comfortably survive in your home for two weeks without the grid or outside help. A blizzard or polar vortex usually doesn’t last more than a few days, but the aftermath can disrupt life essentials for days and weeks after.
Items to buy:
- Groceries, two weeks of water (15 gallons per person) and food that doesn’t require any/much cooking
- Two weeks of important medications
- Two weeks of pet and baby supplies
- Gas — top off your car, and a spare fuel can
- Snow shovel
- Bags of deicing salt or sand (or kitty litter)
- Ways to heat and light at least one room in your home that doesn’t depend on the grid (space heaters and lanterns for camping that use cheap propane tanks are great)
- (Optional) chapstick, tire chains, window scraper, appropriate clothing
Things to do:
- Have warm clothing, blankets, and space heaters ready.
- If you’re using propane space heaters to keep warm, only use quality indoor-rated products (like the Mr. Heater Buddy’s we recommend below), carbon monoxide detectors, and crack a window for ventilation.
- Make sure your smoke detectors and carbon monoxide detectors work. Home fires happen more in the winter than in any other season, and heating equipment is involved in one of every six reported home fires. Generators can feed carbon monoxide indoors if not properly ventilated.
- Gather all your flashlights and batteries in one location.
- Ready your generator. Keep it in a protected, well-ventilated place, like an enclosed patio. Does it have fuel?
- If you burn things for heat, make sure you have enough fuel stored inside where it’s dry and accessible.
- Close off unused rooms.
- Block drafts with towels under doors.
- Let your faucets drip to prevent pipes from freezing.
- Try to stay inside as much as possible. If you must leave, see our driving tips.
- Shovel important walkways and driveways multiple times throughout large snowstorms. You save overall time and pain compared to doing one big removal.
Winter prepping uses a common foundation
If you’re new to emergency preparedness, start with our Prepping 101 Checklist. It covers two weeks of home supplies, Bug Out Bags, and Get Home Bags (typically kept in your car).
It’s the foundation that everything else is built on, and we don’t repeat it all below. The 80-20 rule is true in prepping, too — that basic foundation will cover you in almost any emergency scenario, including winter.
On top of that foundation are some tweaks or additions specific to severe winter, which we cover below.
Prepare your Bug Out Bag and Get Home Bag for winter
A good emergency bag shouldn’t need constant attention. Outside of an annual prep review where you tear it all apart to check for expired items and so on, a good bag should sit quietly, untouched, waiting to be used.
Ideally, this means that if you live in an area that has a full range of seasons over the year, your bags would have the 80-20 range of climate-appropriate clothing and gear at all times. The less you have to fuss with it, the more prepared you are.
Layering, which is the right way to dress for severe cold anyway, makes this even easier because the inner layers can also work in summertime. So it doesn’t add much bulk to have the winter clothing, too. Our favorite mid-layer jacket, the Arc’teryx Atom Hoody, scrunches up into the size of a large orange.
If you can’t do this because you’re limited in bag space or budget, then plan on swapping the clothing and gear in your bags twice a year, before the summer and winter.
Whether you customize your Bug Out Bag and Get Home Bag for year-round coverage, or you swap out the gear between seasons, if you might deal with extreme cold than you should consider adding these items:
- Clothing layers. Instead of bulky hoodies and wool sweaters, see the section on best winter clothing.
- Extra pair of thick socks. We like Darn Tough.
- Gloves or mittens
- Beanies or winter hats that don’t take much space
- Thermal gaiters are versatile ways to cover your neck / face / head
- Chapstick
- Travel- or purse-sized tissue packs
- Hand warmers
- Compact all-weather blanket as a supplement to normal Mylar blankets
- A BOB/GHB should have them anyway, but sunglasses are just as important in winter as they are in summer. Look for glasses that wrap around your face to block out sun and wind.
- A waterproof bag or extra backpack rain cover. Snow can become a wet nuisance.
How to prevent hypothermia and frostbite
Other than being uncomfortable, the real dangers of severe cold are hypothermia and frostbite. Understanding how they work is key to preventing them.
Hypothermia occurs when your core body temp drops too low (a few degrees below 98 F) and your organs start to fail. Frostbite usually occurs in the areas furthest away from your core, like your toes and ears, when ice forms in the surface tissue.
In both cases, the key to prevention is protecting your body heat. Your body loses heat three ways:
- Radiated heat from unprotected surfaces
- Direct contact with conductive elements like water
- Wind pulling heat off your skin
Which is why the Rochester, Minnesota-based Mayo Clinic recommends the acronym COLD:
- Cover. Wear a hat or other protective covering to prevent heat from escaping from your head, face, and neck. Wear mittens instead of gloves.
- Overexertion. Avoid activities that cause you to sweat a lot. Cold weather plus wet clothing equals faster heat loss.
- Layers. Wear loose-fitting, layered, and lightweight clothing. Wool, silk, or polypropylene inner layers hold body heat better than cotton.
- Dry. Stay as dry as possible.
As is the case with most cold weather emergencies, so much of the battle is in preparation — not much you can do about frostbite if you’re stuck outside without fire, shelter, and proper clothing.
We dig deeper into how hypothermia and frostbite work and how to treat them in our winter survival survival guide.
Best extreme cold weather clothing
The most important things to remember with clothing:
- Use layers.
- Cover as much skin as possible.
- Use base fabrics that keep moisture away from your skin.
- If you’re sweating, let your body vent, or remove layers.
- Clothes shouldn’t be too tight, which slows down warm blood circulation and reduces the trapped insulation air between layers.
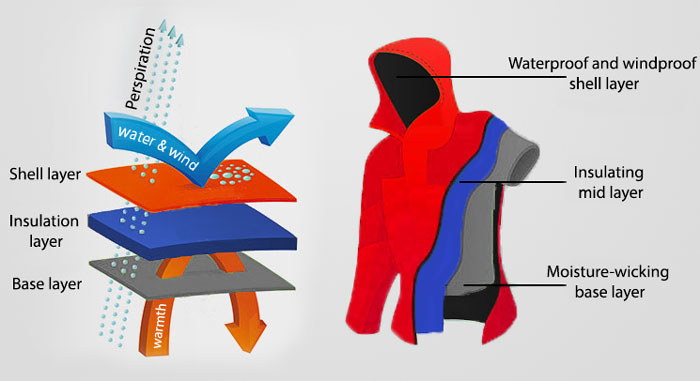
Dress in layers to beat the cold
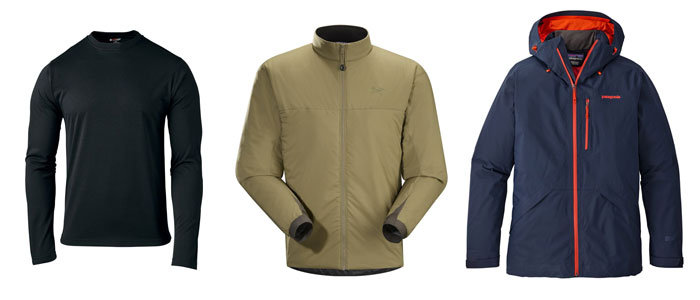
Dress for cold in layers: base layer, insulation layers, and protective shell.
Each layer has a job. A base layer (against your skin) wicks moisture away from your skin, instead of absorbing it. An insulating layer keeps heat close to your body. A shell layer (outer layer) protects you from wind and rain.
The maximum layers we recommend for severe cold is four: a thermal base layer, a mid-layer fleece, a down jacket, and a waterproof shell or down-filled parka.
You might have your normal undershirt and button-down that you wear to work, then an insulating layer, and lastly the shell. Daily undershirts are usually cotton, which is bad for cold emergencies, so think about what you’ll normally be wearing when you pick the right base layers to keep in your Get Home Bag and Vehicle EDC kit.
The point is to keep your body’s heat in, not so much keeping cold out.
This works both ways: if you’re going to be physically active, like digging your stuck car out of the snow, remove layers first to keep from overheating and sweating. Overdressing is a thing. It’s OK to be a little cold when you first go outside. You’ll warm up as those insulating air layers do, too.
It’s a common misunderstanding that the value of multiple layers is simply in the added total thickness of the materials. That helps, but an equally important value is that the air in between each layer warms up, creating insulation.
This is similar to double-paned windows or wetsuits for water. A wetsuit doesn’t keep you warm simply because of the 5 millimeters of neoprene — it’s actually the water trapped between the suit and your body that warms up. Like your own personal, portable hot tub.
The notion of having one thick, waterproof, do-it-all down jacket is misguided. Some people spend upwards of $1,000 on a Canada Goose down jacket that’s suited for fashion, not function. What happens if your car gets stuck and you have to push? You’ll overheat, sweat, and wish you could take it off.
You don’t need to spend a lot on one garment and expect it to perform in every imaginable condition. It’s better to buy a combination of layers that each do the thing they’re designed for very well.
Pay attention to sizing. Some brands, especially the more well-known quality companies, make it easy by standardizing each layer on the same S/M/L/XL sizing — so the L base layer is designed to fit well inside the L middle layer. Read reviews to see what people say about sizing. Many of the cheaper options typically run small, and you may need to buy larger sizes for the outer layers.
Your base layers shouldn’t be too tight, which can cut off circulation of that all-important warm blood. The closest layer to your skin should be just close enough to wick moisture away. Layers on top can be looser.
Ideal materials for winter clothing
There’s a common saying in the outdoor clothing market: Cotton kills.
Cotton is bad as a baselayer. When cotton gets wet, whether from sweat or outside moisture, it loses its ability to insulate you. It’s not a moisture-wicking material to begin with. It can leave you cold, clammy, and work against your body’s ability to produce heat.
Shy away from corduroy, denim, flannel, or duck. These are also made with cotton.
A recent trend is cotton-synthetic blends. It does help compared to plain cotton, but the synthetics are doing all of the work. So you may as well just skip the cotton altogether.
Wool is a classic natural fiber that’s excellent for these situations.
As of 2017, the US Antarctic Research Center at McMurdo Station’s required packing list for extremely cold weather (ECW) breaks down materials by layers:
Lightweight base layer requirements:
- Synthetics (polypropylene, polyester, branded materials) or natural fibers (silk or merino wool)
- Density: about 140-200 grams per square meter (the label might list this as “140 weight” or a number in this range)
Midweight base layer requirements:
- Synthetics (polyester, nylon, non-bulky fleece, branded materials such as PolarTec) and natural fibers (merino wool, down)
- Density: about 260-320 grams per square meter (the label might list this as “260 weight” or a number in this range)
Outer shell (parka) requirements:
- 800+ cubic inches of synthetic or down fill (loft of the insulation = puffiness)
- 250+ grams of insulation (weight of the insulation itself)
- Windproof outer shell
- Attached hood
- Fitted closures at cuffs and bottom
- Covers waistline when bending over
- Must keep you warm when inactive for 12 hours
Below are some ideas to get you thinking about gaps in your wardrobe, which we’ve compiled based on product research, reviews, and guides; the McMurdo Station ECW packing list, and the Army’s FM 31-70 cold weather guide.
Core
Popular synthetic base layers include Smartwool merino wool or Patagonia Capilene.
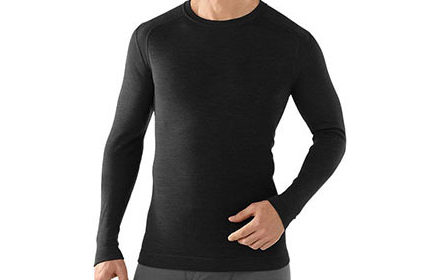
Smartwool Men's Classic Thermal Merino Wool Base Layer
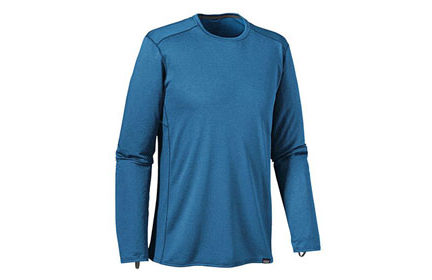
Patagonia Capilene Midweight Crew
For mid layers, check out wool or synthetic wool options like the Mountain Hardwear Stretchdown Light Jacket, or Patagonia Nano-Air Hoody.

Mountain Hardwear Stretchdown Light Jacket

Patagonia Nano-Air Hoody
Look for waterproof, windproof exterior shells. Some outer shells combine an insulation layer with a shell, like a ski jacket. It’s more advantageous to wear a standalone shell, because you’ll have more control over regulating your body heat.
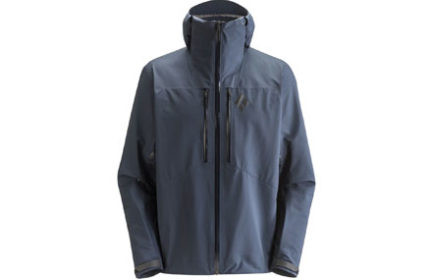
Norrona Falketind GORE-TEX Jacket
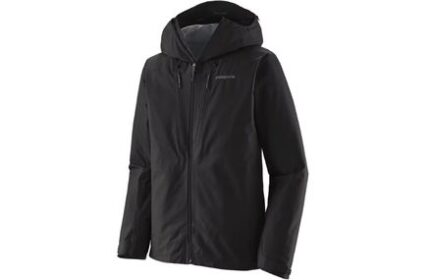
Patagonia Triolet
The shell is your first line of defense against the elements. Examples: Norrona Falketind, Patagonia Triolet Alpine Jacket, or Rab Positron Jacket 800 fill.
Head and face
It’s a myth that the body loses the majority of its heat through the head.
According to WebMD, our head represents about 10% of the body’s total surface area. For the head to lose 75% of the body’s heat, it would have to lose about 40 times as much heat per square inch as every other part of your body. The body doesn’t work that way.
Find a hat with synthetic fibers like polyester and acrylic, which wicks moisture and dries fast. Wool is another warm, wicking material for winter headwear. An example is this Mountain Hardwear DOME PERIGNON KNIT Hat. For full head coverage, a balaclava like REI’s Wind Pro Hinged Balaclava is a good addition. For added neck protection, check out Smartwool’s simple gaiter. Depending on your jacket or scarf, some of these items might be redundant.
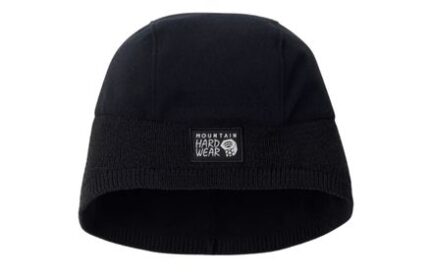
Mountain Hardwear DOME PERIGNON™ KNIT Hat

Wind Pro Hinged Balaclava
Sunglasses and protective eyewear are just as important in winter as in summer. One benefit is shielding your eyes from cold wind. More importantly, snow reflects 85% of the sunlight that hits it, which can make it very hard to see and creates real danger when navigating. You can even sunburn your cornea, a condition called “snow blindness.” Get sunglasses with anti-reflective, polarized, and wraparound lenses that block 100% of UV radiation. If you expect to spend extended periods of time outdoors in winter, consider glacier glasses, which keep light from creeping in the exposed areas around the sides of your eyes.
Legs
Since your bottom half can get just as sweaty as your core, the underwear base layer should be made of synthetic fabric, merino wool, or silk.
Under Armour and ExOfficio make popular men’s and women’s synthetic underwear, and the experts at The Prepared use both every day.
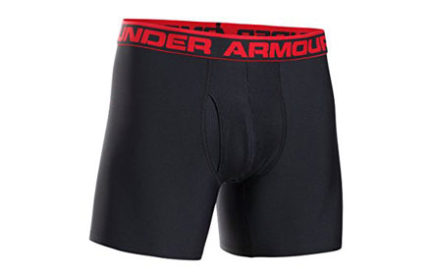
Under Armour Men's Boxerjock

ExOfficio Men's Give-N-Go 2.0 Boxer Brief
For longer trips outside, start with something like Smartwool’s thermal bottoms paired with REI’s Powderbound pants or Marmot’s Precip rain pants as a shell.
We recommend windproof or wind-resistant pants, but with a caveat: they can trap heat as much as they block it. This is where zipper vents come in handy.
For added coverage and warm, check out an insulated bib like Carhartt’s Yukon Insulated Coveralls, which are spec’d by McMurdo Station’s ECW.
Hands
There are four types of gloves, giving you varying levels of dexterity:
- Gloves: Each finger is separate, so it’s easy to work with your hands.
- Mittens: Best for warmth as all your fingers are inside together, but you can still grab a pole, rope, or strap.
- Lobsters: Hybrid of glove and mitten, where your pinky and ring fingers are separated from your middle and index fingers. Good if you’ve found gloves aren’t warm enough and mittens too limiting.
- 3-in-1: Some systems sell a liner, glove, and flip-over mitten all in one.
You can layer gloves, too. We like using flexible gloves with touch-screen capability during normal daily use. But we also keep thicker, waterproof mittens in our BOB/GHB/VEDC that slide right over the base layer.

Black Diamond Mercury Mittens
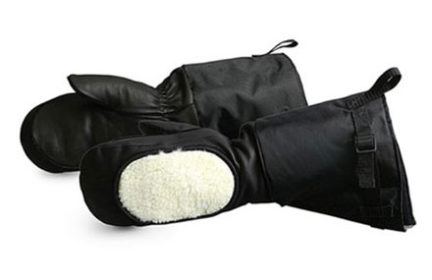
Superior Calfskin Leather Extreme Cold Gloves
It’s a great way to get the best of both worlds — dexterous gloves that don’t get in the way plus thicker mittens that keep you toasty when needed.
For profoundly cold conditions like what you’d find in Antarctica or at 12,000-foot peaks, consider leather mittens with removable liners.
Feet
The right boot for someone in Duluth, Minnesota, where the average low temperature in January is a balmy 2 F, might be overkill for someone in Asheville, North Carolina, where it occasionally snows and the average January low is a more manageable 28 F.
Proper winter boots are waterproof, insulated, and have great traction. The popular and well-reviewed Columbia Bugaboot III and North Face Chilkat 400 are great options for both men and women.
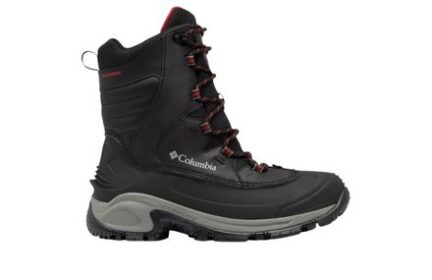
Columbia Men's Bugaboot III

Men’s Chilkat V 400 Waterproof Boots
For extreme cold that you’d encounter in the upper Midwest, Canada, and Arctic, check out the Baffin Snow Monster or Sorel Caribou.
If you might be stomping around in deeper snow or even snowshoeing, consider using waterproof gaiters that slip over your existing boots, rather than keeping an separate set of massive boots around.
For socks, look for labels that describe them as winter weight, or mountaineering use. Mountaineering socks are the thickest, heaviest option for rugged winter conditions. Look for fabrics like merino wool or nylon/lycra blend.
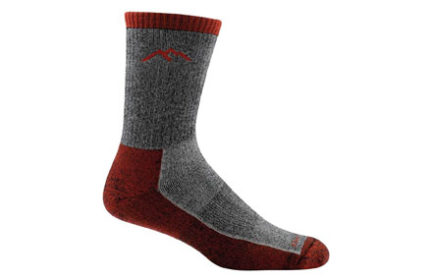
Darn Tough Mountaineering Micro Crew Extra Cushion Socks
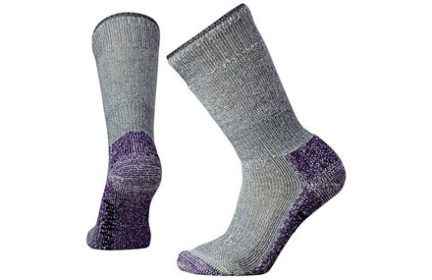
Smartwool Women's Mountaineering Max Cushion Crew Socks
Our favorites are Darn Tough socks or Smartwool Mountaineering socks.
To add a sweat-wicking layer to your feet, look for a liner sock made from merino wool or polypropylene. Smartwool’s hiking liners do the job well.
Winter emergency car kit checklist
Many people keep their Get Home Bag in their vehicle. Which makes sense, especially in car-centric America, because it’s the one storage spot that’s most likely to be with or near you when an emergency happens away from home.
But a Get Home Bag is different than the stuff you keep in your car for car-related emergencies, which is known as Vehicle Everyday Carry (VEDC). Your GHB isn’t directly about your vehicle — it’s about you, such as needing to evacuate on foot in case disaster strikes when you’re away from home.
It’s better not to mess with your GHB too much. The GHB should be roughly the same throughout the year, with some possible minor changes around winter clothing.
However, it doesn’t make sense to keep deicing fluid in your car during the summer (let alone in your GHB). Many preppers have a separate storage bin, like a small footlocker, that holds the winter vehicle gear. Throw it in the trunk or bed, and when winter’s over, put it back in the basement.
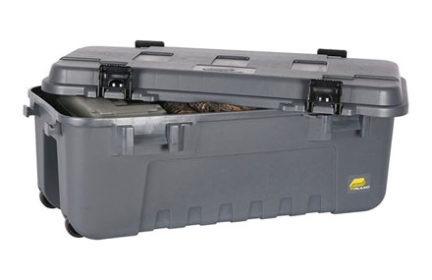
Plano Heavy-Duty Sportsman's Trunk
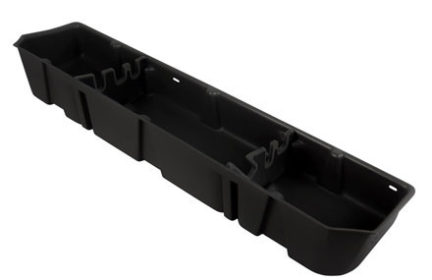
DU-HA Under Seat Storage
The suggestions below may seem redundant between your VEDC and GHB. Duplication of important stuff like warm clothing or fire starters is not only fine, but creates important redundancy.
Winter emergency car kit checklist for VEDC:
- Collapsible shovel (also known as an entrenchment tool) to clear snow or break ice
- Ice scraper with brush
- Extra deicing fluid. Even if you top up your washer fluid during maintenance, some people keep extra in the car because they burn through it in the winter or use it to rub down windows other than the windshield.
- Something for tire traction, like salt, tire traction mats, coarse sand, or even kitty litter
- Tow strap
- Flares or road signals
- Battery jumper cables (ideally 20 feet long), or a battery jump starter if you’re unlikely to be near other people
- Hand warmers, either disposable or rechargeable
- Tire chains (see below)
- Wool blankets, sleeping bags, or emergency Mylar pouches in case you need to sleep in your vehicle or outside in the cold
- Warm clothes: layers, gloves, hat. Even if you have some in your GHB, two is better than one.
- Appropriate footwear. Don’t get caught walking home in a snowstorm in your work heels. A bonus option is Yaktrax cleats that strap onto your shoes.
- For RWD trucks, add weight to the bed of your truck, which could be accomplished with bags of salt or sand.
If you don’t normally keep your Get Home Bag in your car and don’t have a year-round VEDC kit, then you’ll also want to add:
- Stored water and water filter or purifier
- USB charging cable for phone and portable battery backup
- Fire starting tools
- Survival food, like MREs or calorie blocks
- Emergency (Mylar) blankets, bivvy, or cold-rated sleeping bag
- Field knife and/or multitool
- Small medical kit
- Flashlight or headlamp
- Road flares
- Compass
- Maps
- Chapstick
- Sunglasses
How to winterize a car
- Washer fluid: Top up. You don’t want to run out while driving in freezing rain or sleet. Only use fluid that’s cold-weather rated for a minimum -20 F, like Rain-X de-icing additive.
- Tires: Make sure they have plenty of tread. If you aren’t sure how to determine this, get them checked out. Many tire stores will do a tread check for free. Alternatively, place a quarter into several tread grooves across the tire. If part of Washington’s head is always covered by the tread, you have more than 4/32 inch of tread depth left, which is OK.
- Tire pressure: Tires lose pressure in the winter because cold air contracts.
- Brakes: If they’re squeaking or feel soft, get them checked. It’s hard enough to stop on icy roads with proper brakes, let alone worn-out ones.
- Wiper blades: If you’re ready for a replacement, check out Bosch Icons.
- Battery: Don’t be the unlucky person with a dead winter battery. Some brick-and-mortar retailers, like AutoZone, will test your battery for free so you know it can still properly hold a charge.
- Oil: Use 5W-30 weight oil, which is common for year-round use.
- Engine air filter: Remove it and hold a lamp or flashlight to it. If you see light through most of the filter, it’s got plenty of life. But if the light is mostly blocked, replace it.
- Coolant: You want a 50-50 mixture of antifreeze and water in the radiator.
- Gas: Don’t run it until it’s empty. Some say to drive in the “top half” of the tank with more frequent refills, so you’re less likely to be caught with little or no fuel. Having a full tank also helps prevent moisture from freezing in the gas lines.
- Belts and hoses: Especially for older vehicles, make sure drive belts aren’t cracked or frayed. Ensure belt clamps aren’t loose.
- Door weather stripping: Wipe the soft, rubbery black strips inside the doors with Armor All or silicone spray lubricant to keep them from freezing shut.
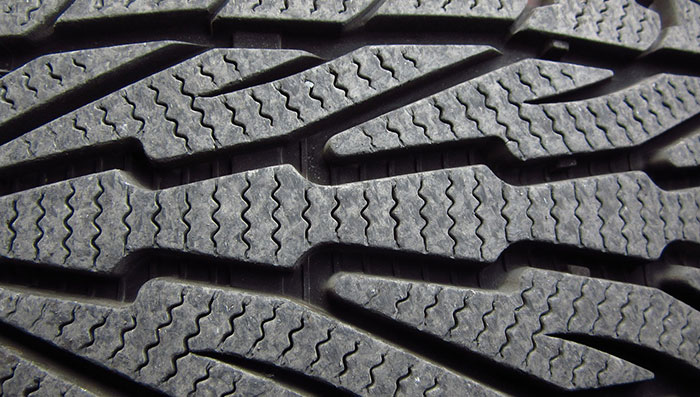
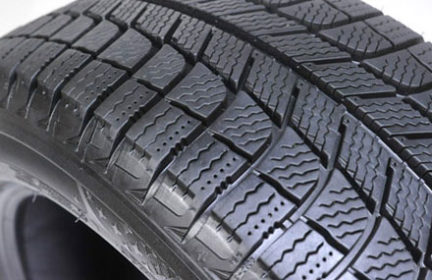
Snow tires
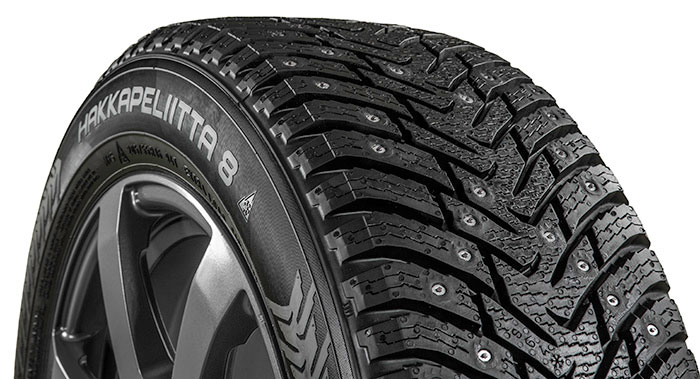
For regions with heavy winter weather, installing snow tires on all four wheels will give you the best winter traction. Winter tires have more tread patterns and softer rubber compounds than all-season tires. Because they’re softer, they’ll wear faster in warmer driving.
In our research, three highly recommended winter tires repeatedly turned up: Michelin X-Ice, Nokian Hakkapeliitta R5, and Bridgestone Blizzak WS90. They start around the $100 mark, depending on size.
Michelin X-Ice Winter Tire
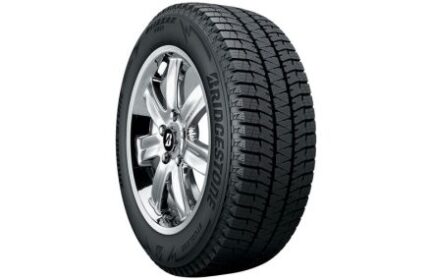
Bridgestone Blizzak WS90 Winter Tire
However, all-season tires, combined with safe driving and healthy tread depth, work well in moderate snow conditions.
If you anticipate driving on snow, consider replacing your tires when they reach about 4/32 inch of remaining tread depth. Healthy tread depth lets the tires compress the snow in their grooves and release it as the wheel spins.
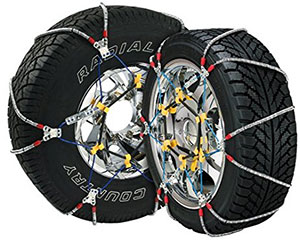
Snow chains
Snow chain systems attach to your vehicle’s drive wheels for traction in snow and ice. Most vehicles are capable of wearing chains. However, some cars and trucks have limited clearance between the tire fender. Check your owner’s manual for specifics on what snow chains your car can accept.
Chains come in two tread patterns: radial and Z-type. Buy Z-type cable chains, because the pattern zigzags across the tire, ensuring there’s always a chain in contact with the road. It’s the best possible traction for winter conditions, and they work better with anti-lock brakes. Radial chains, while cheaper, have a ladder-type pattern, which makes for a bumpier ride and less chain contact with the road.
Chain sizing is based on three measurements indicated on the side of your tire: tire width, tire height ratio (sidewall height as percentage of width), and diameter of the wheel in inches.
There are three classes of chains, differentiated by how much tire-to-fender clearance you need. The majority of passenger vehicles accept Class S chains.
- Class S: Regular (non-reinforced) passenger tire chains and cables for vehicles with restricted wheel well clearances. 1.46 inch clearance on tread face, 0.59 inch clearance on sidewall. This is most common for cars, which typically have limited wheel well clearance.
- Class U: Regular (non-reinforced) and lug reinforced passenger tire chains for vehicles with regular (non-restricted) wheel well clearances. 1.97 inch clearance on tread face, 0.91 inch clearance on sidewall.
- Class W: Passenger tire chains that use light truck components, as well as some light truck chains. 2.50 inch clearance on tread face, 1.50 inch clearance on sidewall.
Reinforced tire chains have extra bits of metal, often welded to the chain, for added traction. Non-reinforced chains get traction from the chain links themselves.
Restrictions and laws vary by state. They spell out when you can, should, and absolutely must use tire chains, as well as when it’s not permitted. Some states, particularly those in the mountainous western US, post signage or will declare a snow emergency to enforce when tire chains are needed.

TireRack’s guidelines for chain use are the most comprehensive we’ve researched, summarized here:
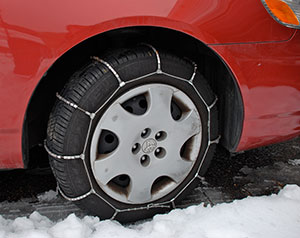
- At the very least, have chains for your drive wheels. It’s best to install tire chains on all four tires, meaning you’d buy two pairs of tire chains.
- Proper fit is key for chains to work. Don’t deflate tires to install them. A correctly sized tire chain will fit over a correctly inflated tire.
- Try them on beforehand so you can practice and test for fit.
- Tire chain installation helpers: these are small ramps that prevent slipping and allow you to lay a cross chain in a pre-formed indentation. Once you drive onto the ramp, the chains are positioned under your tire for easier installation following the manufacturer’s directions.
- When highway signs indicate tire chains are required, a drivers usually have about one mile between the “Chains Required” signs and the passage checkpoint.
- After initial installation, all of the chains should be tightened after you’ve driven forward or backward (slowly!) at least 15 feet. This is a check to ensure chains aren’t loose.
- Accelerate and decelerate gently. Avoid spinning or locking the wheels.
- Drive to the chain manufacturer’s specified speeds. Just because you have chains doesn’t mean you can go the speed limit.
- Do not drive with a broken chain.
- Remove the chains as soon as you reach clear pavement.
Studded tires
Studded tires have small bits of metal or ceramic in the surface tread, intended for grip on icy surfaces. They’re typically paired with special winter tires, although some people add them to normal tires, too.
The stud protrudes from what’s called a jacket, which is embedded in the tire and holds the stud in place. Think of studs and jackets like your teeth and gums, respectively.
Six states allow use of studded tires without restriction: Colorado, Kentucky, New Hampshire, New Mexico, Vermont, and Wyoming. Most of the remaining states allow studded tires between certain dates. TireRack outlines each state’s restrictions here.
Car insurance for winter
There are three types of auto insurance: liability, collision, and comprehensive. Almost everyone has liability coverage since it’s required by law to cover the damage you cause to other cars.
But many skip the extra expense of comprehensive coverage — which is precisely what can save your bacon in a bad winter storm. Comprehensive will cover non-driving weather damage. If hail pockmarks your hood, or a downed tree limb smashes your windshield, comprehensive kicks in.
Collision coverage will pay for weather-related damage, for example, if you slide off an icy road and crash.
Some drivers in areas with severe winters and moderate summers reduce their coverage in warmer months, then add collision and/or comprehensive in the winter.
Home winter emergency kit checklist
As is true in most types of emergencies, your home is likely the best place to ride out severe winter weather. The right gear and prep work will make all the difference.Assuming you have the prepping basics covered, your home supplies should include:
- Blankets and winter clothing for each household member
- Sturdy snow shovel
- Deicing salt, sand, or kitty litter for your sidewalk/driveway
- Alternative heat sources, such as a kerosene or propane space heater
- If you burn things for heat, have enough wood or fuel and a dry place to store it
- Fire extinguisher
- Flashlights with working batteries
- Stored fuel in portable cans
- Bonus: Generator

Mr. Heater MH18B Portable Propane Heater
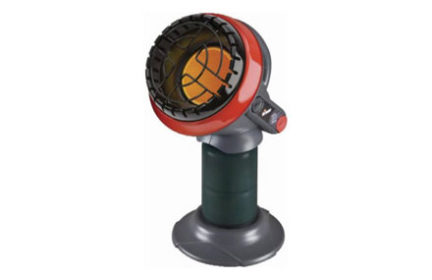
Mr. Heater MH4B Little Buddy Propane Heater
How to winterize a house
Indoor home winterization checklist:
- Smoke and carbon monoxide detectors: Replace batteries and ensure they work.
- Furnace or boiler: Have it serviced once a year.
- HVAC: Clean or replace furnace intake filters. In the fall, spray HVAC unit with a garden hose to remove dirt, dust, bugs, bird poop. It’s not necessary to cover your unit with a tarp.
- Chimney: If you use your fireplace regularly, consider having it inspected and cleaned. Pay attention to removing creosote buildup from wood stove and fireplace chimneys.
- Heating vents: If you burn things for heat, make sure any exhaust valves outside the house are clear of debris or ice. You don’t want gases building up inside the house.
- Attic: Add extra insulation to prevent ice dams. Ice dams are ridges of ice that form at the edge of a roof and prevent melting snow from draining off the roof. If too much heat escapes into the attic, it can warm the ice and snow on the roof. When it refreezes, it can cause an ice dam, which can lead to water damage inside your home or possibly even a roof collapse. If applicable, block the attic stairwell.
- Weather stripping: Add it around doors. Caulk windows to mitigate drafts and heat loss.
- Water pipes: Check for and fix water leaks immediately.
- Insulate pipes: Wrap water piping, including elbows and turns, in UL-Listed heat tape and insulate if exposed in unheated areas like garages, exterior walls or crawl spaces. Use only thermostatically controlled heat tape if your water piping is plastic. Most hardware stores carry inexpensive foam pipe insulation. Pipe insulation will be rated by an R-value which indicates resistance to airflow, so the higher the R-value, the more effective the insulation.
- Water valve: Know how to turn it off. Consider installing an emergency pressure release valve in your plumbing system in case your pipes freeze.
- Combustible items: Move them away from any heat sources that you’ll likely be using.
- Wells: Using well water? Ensure your pressure tank is insulated if it’s in the garage.
- Electronics: To protect your gear during power outages, make sure your gadgets’ power sources are plugged into surge protectors rather than an outlet. Consider getting an Uninterruptible Power Supply (UPS), which can give you 10-30 minutes of power.
- Ceiling fans: Reverse your ceiling fans so they push warm air downwards. Newer models have a switch to run in reverse. On older models, try removing, flipping, and reattaching the fan blades for the same effect.
- Bed canopy: Closing old-school bed canopies can create a heat pocket while you sleep. If you have a four post bed or some other arrangement, consider having thicker canopy sheets ready.
Outdoor home winterization checklist:
- Trees: Trim limbs and remove dead branches. They can damage your home or hurt someone if they fall because of ice, snow, or wind.
- Gutters: Clear them out so melting snow can drain, and ensure downspouts direct water away from the home’s foundation.
- Outdoor vehicles: Winterize for storage your campers, boats, jet skis, and any cabins or properties you may not visit over the winter.
- Driveway: Put up markers if you get your driveway plowed. Plows destroy your yard, landscaping, mailboxes, and such if they go astray
- Garden hose: Disconnect, drain, and store.
- Faucet: Drain, shut off valve (usually inside), and cover with a hard shell.
- Yard: Fertilize your lawn or garden (ideally in the fall) for next season. The idea is to nourish it for winter hibernation, not to make it grow.
- Generator: Ensure it’s working and you have fuel stored.
- Septic: Some people take small steps before winter, like checking lid seals for water leaks. But normal household usage keeps the system flowing fine, so don’t worry about it.
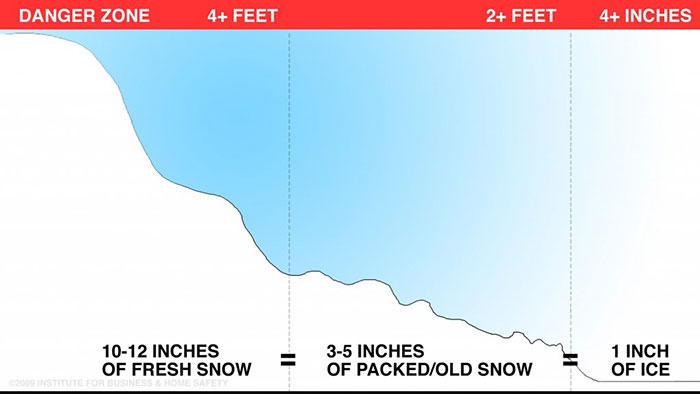
- Roof: If there’s damage to shingles, chimney flashing, or gutters, fix them! An average roof can handle up to four feet of fresh snow before it’s too stressed. See chart:

Estimate how much the snow on your roof weights — IBHS
Home insurance for winter
“Severe winter weather caused 15% of all insured auto, home, and business catastrophe losses in the United States in 2014,” said Dr. Robert Hartwig, president of the Insurance Information Institute, in a 2015 press release. Even when you exclude hail damage, winter storms alone caused $28 billion in damage over the 1997-2016 period.
Inflation-Adjusted U.S. Insured Catastrophe Losses By Cause Of Loss, 1997-2016

There is no specific winter home insurance product like there is for floods or earthquakes. Homeowners and renters insurance usually covers damage from burst pipes, wind-driven rain, and ice dams on your roof. It usually covers a collapsed roof from the weight of snow or ice.
Water that comes from the top down, such as rainfall and burst sprinklers, is typically covered by a standard homeowners policy, according to the III.
But water that rises from the bottom up, such as an overflowing river, is covered by a separate flood policy, usually through the National Flood Insurance Program. Floods are a big risk during winter, caused by sudden snowmelt, ice jams in rivers, and coastal flooding. When the ground is frozen, it can’t absorb water.
Some home policies cover sewage backups. Some don’t. Check with your insurance company. Melting snow can flood and overwhelm sewer systems. Sewage backed up into the drains in your home can cause thousands of dollars in damage to your home and electrical systems.
Make sure you document your home and belongings as part of your annual prep review. It can make the insurance process much easier, faster, and more successful.
HVAC and programmable thermostats
We spoke with Todd Washam, a spokesman for the Air Conditioning Contractors of America (ACCA).
“There’s a 50-50 chance that your HVAC was installed incorrectly,” Washam said, referring to an EPA study claiming nearly half of all HVAC systems are installed incorrectly.
National Institute of Standards and Technology studies indicate those improperly installed HVAC systems lose 30-40% of their efficiency.
Before winter, consider hiring a service provider to test your system. They use blower door tests to determine how airtight your house is, as well as infrared cameras to see where heat escapes.
Replace or clean your furnace air filter. Make sure your furnace burners are clear of major dust. Some will burn off when your heater first kicks on, which you might smell. That’s OK. Uncover your vents. Ensure the outdoor exhaust flue is clear from leaves, animal nests, and other debris.
Install a programmable thermostat to manage the heat, like the popular Nest smart thermostat. The Energy Department and energy company Direct Energy both suggest setting thermostats to 68 F during the day, and 62 F at night for optimal efficiency. Ease into winter. Start off a 72 F during the day, and gradually dial it back 1 degree per week.
Make up for the colder interior temperatures by wearing more layers inside the house — it’s much more cost effective to warm the little bit of air around your body than it is to heat the entire house.
Alternative heat sources
In this guide, we focus on emergency gear such as portable propane heaters and stoves. We’ll write a separate article in the future about the best day-to-day ways to heat your house without the grid. Many preppers rely on wood stoves, pellet stoves, or radiant “in floor” heating to heat their home throughout the winter. They save money and have the huge benefit of running even after a bad storm or grid-down scenario.
Understanding severe winter weather storms
Polar vortex
You might’ve heard of the dreaded polar vortex in recent years, like the January 2014 vortex that set many record low temperatures, disrupted transportation, and caused widespread power outages in the US.
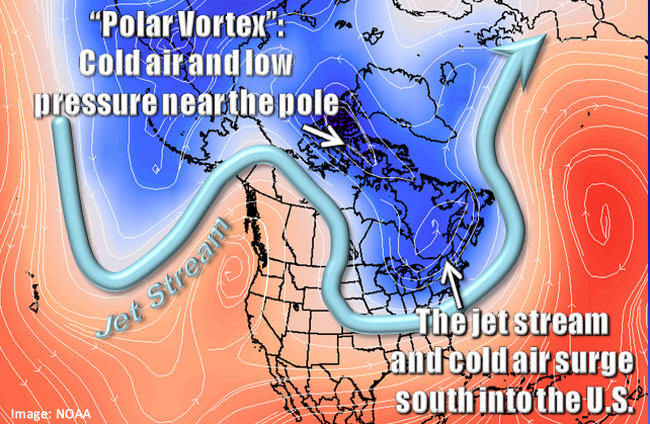
According to NOAA, polar vortexes are low-pressure systems that originate from the earth’s poles. The jet stream sucks frigid polar air further south than normal, touching states as far down as Texas or Georgia.
Bomb cyclone
Many Americans first heard the term bomb cyclone in December 2017 when winter storm Grayson dumped snow as far south as Florida and created frigid temperatures all along the eastern coast.
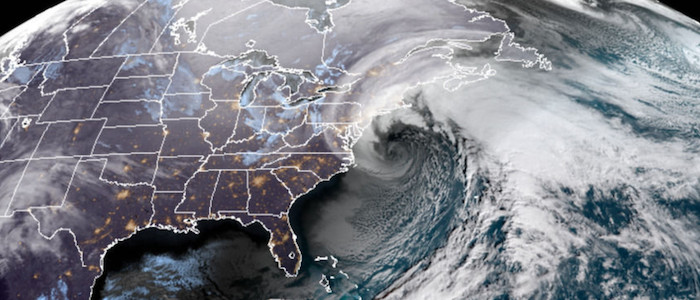
A bomb cyclone is a rapidly developing storm that forms when a mass of cold air, carried from Canada by the jet stream, smashes into a mass of warm air moving inland from the ocean. The collision creates a spinning cyclone motion, which is why some refer to these cyclones as “winter hurricanes.” The bomb label refers to how quickly the atmospheric pressure drops, which causes the storm to form more suddenly than a typical Nor’easter.
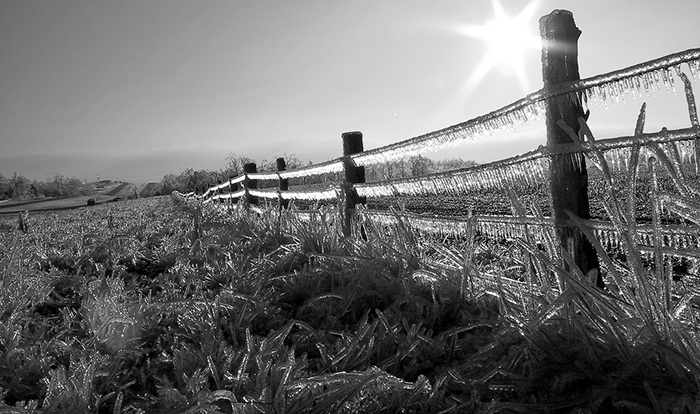
Freezing rain, sleet, and snow

Freezing rain falls when snowflakes melt completely before reaching the ground, and refreeze upon contact with anything that is at or below 32 F. A major accumulation of freezing rain lasting several hours is considered an ice storm.
Sleet is frozen rain that forms when snow partially melts as it falls, and then refreezes before it reaches the ground. It typically comes after freezing rain because the air closer to the ground has gotten colder.
Snow squalls, flurries, and showers refer to varying levels of snowfall intensity. Blizzards have over 35 mph winds, with snow and blowing snow, obscuring visibility to 1/4 mile or less for at least 3 hours.
Lake effect snow occurs when cold air absorbs water vapor from warmer, unfrozen bodies of water, resulting in heavy snowfall on downwind shores. Folks living around the Great Lakes are familiar with heavy lake effect snow.
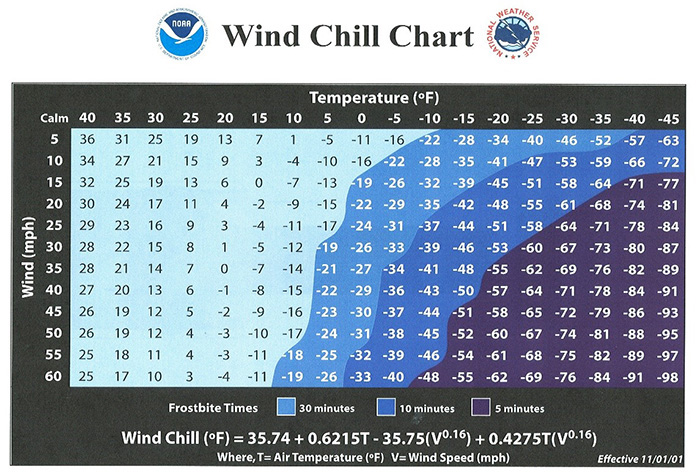
Wind chill
Perhaps the most commonly misunderstood winter condition, wind chill is the effect of wind blowing across exposed skin, which pulls heat away from our bodies. Faster wind pulls heat away more quickly.
That’s why the news will refer to wind chill temperatures or “real feel” temperatures. A 15 mph wind can make 0 F temperatures feel like -20 F, which reduces the time it takes for frostbite from hours to only 30 minutes.
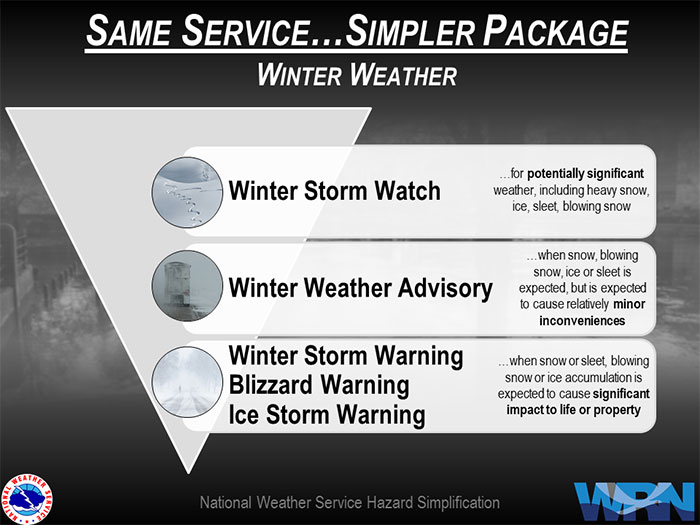
Winter watches, warnings, and advisories
As of October 2017, the National Weather Service simplified its hazardous weather messaging. Before, NWS would issue a confusing mix of 10 watches, warnings, and advisories. Now, many winter weather conditions are combined.
How severe cold affects electronics and fuel
Electronics and batteries
Remember: Warm batteries perform better, and last longer, than cold ones.
Severe cold keeps electrons from getting “excited,” which is how energy is stored and used. Ventev, a wireless charging technology firm, says everything slows down, and the chemicals in batteries can’t hang as long as they usually would.
Thus, cold batteries drain faster than warmer batteries. If you’re dealing with a cold battery, keep it in an interior pocket close to your body to warm it up.
Electronic gadgets vary slightly in how cold they’ll operate. In 2012, PCWorld published a test to see what temperature killed popular smartphones. The most resilient smartphone at the time, the Samsung Galaxy S II, shut down at -40 F. But if you find yourself in such profound cold, you have other priorities than being on your phone.
Apple specifies iOS products are optimal between 32-95 F. The battery can drain faster in colder temperatures, and iPhones will often shut down until they warm up. Most Android phones start to slow down around 20 F.
When does gas freeze and how does cold affect fuel economy?
Gasoline doesn’t have a singular specific freezing temperature. The good news is that most people in most situations don’t need to worry about it.
Ryan Carlisle, an engineer at Chevron, wrote on Quora that freezing point depends on the blend of gas in your engine. There’s no way to tell without knowing the gasoline’s exact composition. And nobody, except the refinery, knows that. Each region and refinery has its own seasonal blends, and the crude oil’s origin factor in.
Gas stations in areas with bad winters typically provide fuel that’s more cold resistant.
The big danger with severe cold is having your gas fuel lines freeze because of water vapor in your gas tank. Keeping your fuel tank full during winter will minimize this, because an empty tank will suck in moisture from the atmosphere.
Gasoline with ethanol (usually 10%) in winter is your friend. It absorbs water the way fuel tank additives do.
Diesel fuel is more sensitive to cold. Below about 40 F, certain hydrocarbons in diesel can start to gel (also known as the “cloud point”). Between -18 F and 20 F is the more common cloud point for #2 diesel fuel. Never add gasoline or alcohol to diesel to assist with cold weather operation, as this could damage the fuel injection system.
Fuel economy tests show a gasoline-fueled car’s gas mileage is about 12% lower at 20 F than it would be at 77 F for city driving. It can drop as much as 22% for very short trips (3-4 miles), according to the Energy Department. Hybrids have it worse: fuel economy can drop about 31% to 34% when the batteries get cold.
Non-exhaustive list of reasons fuel economy is worse in cold and winter weather:
- Engine and transmission friction increases because of cold engine oil and other drivetrain-related fluids.
- 4WD or AWD uses more fuel.
- Cold air is more dense, creating more aerodynamic drag on your vehicle.
- It takes longer for your engine to reach its most fuel-efficient temperature.
- Defrosters, heated seats, and heaters use more power.
- Idling to warm up the vehicle gets you 0 mpg.
Know what to do during a winter storm
Sheltering at home
- Needless to say, stay inside and keep an eye on the news.
- Stay hydrated and fed.
- Dress warmly or be ready to quickly. Even if it’s warm inside, you might have to get outside on short notice, or the power might go out, along with your heat.
- Let your faucets drip so standing water doesn’t freeze inside the pipes.
- Open cabinets with water pipe access to let warm air circulate.
- Shrink your living space, especially if you lose grid heating. Close off unused or poorly-insulated rooms.
- If you need to light a candle, make sure that is secure in a container. Candle-related fires happen the most in December, January, and November in that order.
- Keep shovels accessible.
- Shovel snow off important pathways frequently, rather than all at once.
- Stay dry. Wet clothing, especially cotton, will make you feel colder.
In the wake of the 2016 winter storm that stranded 500 motorists in Pennsylvania, more than 1 million homes lost power, from Arkansas to Massachusetts. Power was restored within a day or two. But it’s a reminder that no power usually means no heat and no water at home.
If all communication is down, use ham radio to communicate and listen for weather updates.
Don’t forget, your car can be a shelter and source of heat.
If your situation becomes dire, consider heading to a shelter if you can get there safely. Text SHELTER + your ZIP code to 43362 (4FEMA) to find the nearest shelter in your area (e.g., SHELTER90210).
Shoveling snow
Shoveling snow sends more than 11,000 people in the US to the hospital each year, according to the Cleveland Clinic. Most suffer orthopedic injuries, and 7 percent have cardiac problems (many of them heart attacks).
Cold temperatures worsen the risk for heart attacks because arteries constrict and this increases blood pressure. If you have heart attack risk factors, don’t shovel. Hire the kid next door, who probably needs the money anyway.
Don’t over-exert yourself when shoveling snow. Take breaks. Push the snow instead of lifting.
It’s better to spend one hour each over three different chunks instead of one big three hour session — which usually turns into a four hour session because the snow froze and got too heavy while you were waiting inside.
Spray your shovel with cooking spray to make shoveling easier.
How to drive in snow
Don’t travel if you can help it. You’ll be safer off the road, and fewer vehicles on the road will let snow plows do their job. Each year, over 1,300 people die and more than 116,800 people are injured in vehicle crashes on snowy, slushy, or icy pavement, according to the Federal Highway Administration.
- Use your head. Check traffic before you go (we like Waze’s Live Map). Be patient and conservative with your time, as you won’t be getting anywhere fast.
- Turn your lights on, always.
- Drive more defensively and keep more space between vehicles. Assume other people are horrible winter drivers.
- Which means keeping an eye behind you, too. You might be stopped at a red light, but the person coming up behind you doesn’t break in time and slides right into your trunk.
- Accelerate gradually. This prevents spinouts and poor traction.
- Brake gradually, and far in advance.
- If your vehicle can turn traction control or ABS on and off, make sure they’re on.
- Minimize lane changes.
- Avoid stopping. No, this doesn’t mean blow stop signs. The idea here is to slow down enough to keep rolling until a traffic light changes.
- Don’t brake through turns.
- Driving a stick? Use the engine to slow the car down.
- If you can’t avoid hills, give descending cars in front of you extra space. Use inertia to help carry you up a hill by getting speed at the base, and avoid accelerating on the hill. Don’t stop going up the hill!
- Never use cruise control.
- Beware of ice. Sometimes it’s invisible, also known as black ice. Unless you have studded tires or chains, there’s little control you have on ice.
- If you see cars in accidents, spun out, or off the road, pull over and call 911. Don’t assist if it poses a safety risk to you. Read our guide, written by emergency responders, about what you should do if you see a car accident.
Learn how to handle a spinout and what to do if you’re stuck in the snow in the How to survive winter emergencies article.
What to do after a winter storm
After the snow stops, it’s tempting to break free of cabin fever. As you should! Grab a beverage and build that snowman while you can.
Before you do, here are some tips and risks you might face after a storm:
- Walk like a penguin on ice.
- If you expect to be outside for a while, apply lip balm and even sunscreen.
- Be aware of boil alerts for water. Water mains break more in colder weather, which can contaminate supplies.
- Conserve your food and water supplies until you know streets are passable.
- If you suspect your pipes have frozen, shut off your home’s water valve and call a plumber to inspect the pipes as soon as possible.
- Take a look around your house for damage. Document it for insurance.
- Snow can melt during the day and refreeze at night, creating a new glaze of ice.