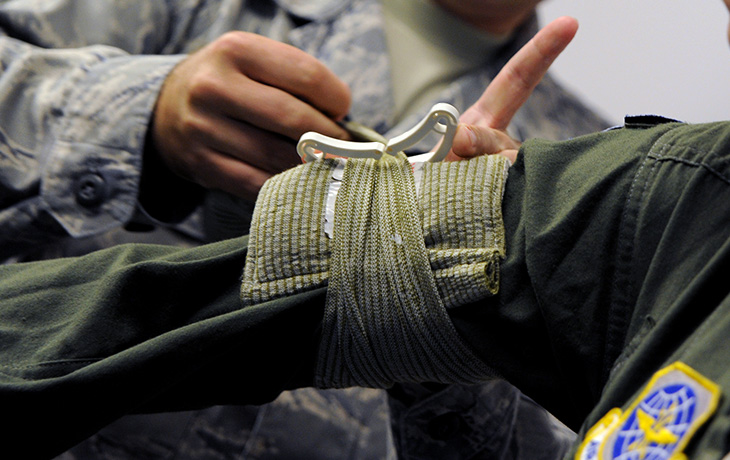
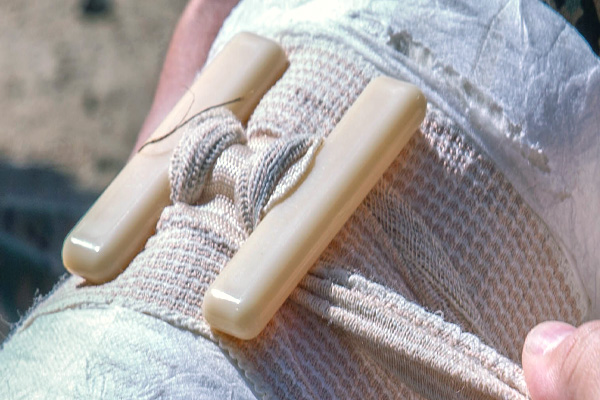
A pressure dressing is one of the most important “someone’s really hurt!” medical products you should have in your preps because major bleeding can’t wait for help. Well-aimed direct pressure is always the best way to handle bleeding, and the pressure dressing does exactly what the name implies. You may see a pressure dressing under other names: Israeli bandage, emergency bandage, emergency trauma dressing, and so on.
That’s why experts include tourniquets and pressure dressings as two of the three most important items when you’re limited in what gear you can carry. (The third being Z-fold gauze for wound packing.)
More: Learn how to use a pressure dressing to stop bleeding, including how to improvise your own out of common materials like an ACE bandage and a rock.
Pressure dressings are used when a tourniquet can’t or shouldn’t be used — trauma to the head, neck, or torso are good examples because you can’t use a tourniquet in those areas. Tourniquets work by cutting off blood flow to an entire limb, where pressure dressings create more targeted and focused pressure that helps clot the blood at the point of injury.
You might use a pressure dressing after some of the earlier wound care steps, such as packing a deep wound hole with gauze. The best pressure dressing even comes with extra wound packing materials since you might be doing both at the same time.
Survival medicine experts recommend that you have at least one pressure dressing in each emergency loadout, including your home supplies, bug out bag / get home bag, car kit, and everyday carry / IFAK.
Best for most people:
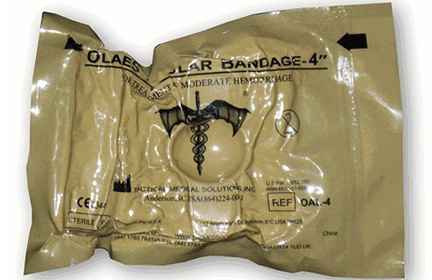
TacMed OLAES 4" Bandage
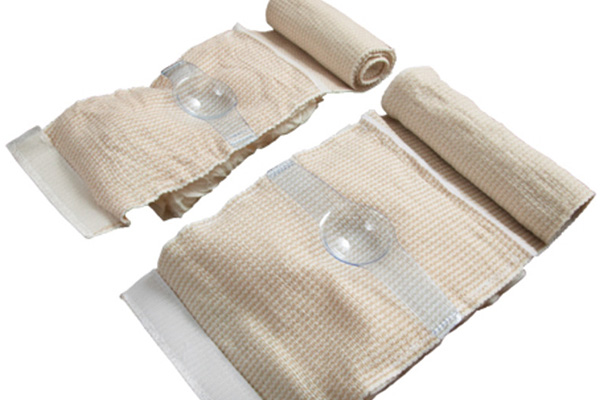
We and many medical experts personally carry the Tactical Medical Solutions 4” OLAES Modular Bandage. TacMed is a trusted brand that also makes one of the best tourniquets, the SOFTT-W.
Besides being a great cup-style pressure dressing that does the core job well, what sets the OLAES apart is that it can be disassembled into other pieces that may be helpful on their own:
- Three meters of “z'”-packed gauze — great for wound packing
- A square plastic sheet, intended to be used as a non-vented chest seal — not as good as your primary vented chest seal, but decent in a pinch
- The pressure bar can be used as an eye cup (a protective hard eye patch)
Since space and weight are always a limiting factor for your prepping, those extra features are a nice way to hit two birds with one stone. Experts consider a pressure dressing in the core “must have” list for when the gear you can carry is limited, but general gauze and an eye cup are in the secondary “nice to have” category. So if you buy the OLAES for basically the same cost and space/weight as other options, you end up covering more of your bases.
More common:
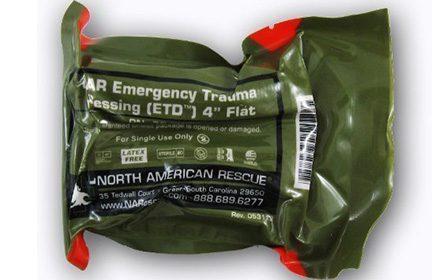
North American Rescue ETD
The North American Rescue Emergency Trauma Dressing (ETD) is more commonly seen than the TacMed OLAES, partly due to NAR’s better marketing. The ETD and OLAES are pretty similar — often within a few dollars of each other — and you’d be fine carrying either. We recommend the OLAES over the ETD due to the extra components described above. But the ETD still has the same handy control strips found on the OLAES that prevent the bandage from accidentally unrolling while you’re fumbling around, a nice feature not found on many other products.
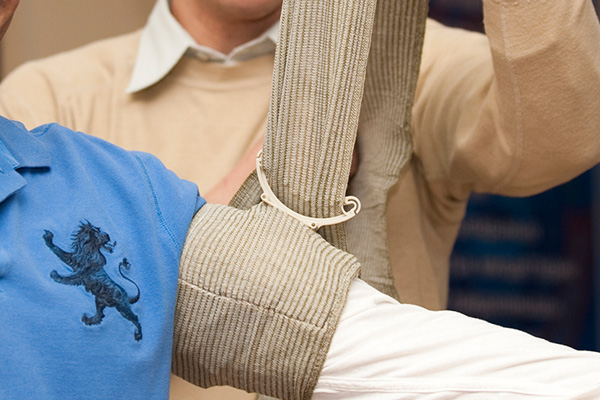
Although the medical effectiveness is the same, the major difference between the TacMed and NAR is the physical mechanism for creating pressure. TacMed uses a cup and NAR uses a crescent bar.
Why you should trust us
We’re field medics (both military and civilian), medical instructors, and active emergency room physicians with 66 combined years of experience. We’ve treated countless medical problems, including in situations like what you’ll face in a disaster.
Use your head. Get professional help if you can.
The Prepared teaches survival medicine: what to do in emergencies when you can’t depend on normal help or supplies. How to make decisions, steps to take, gear to use… there’s a huge difference in the right answers between daily life and a survival situation.
You agree not to hold us responsible if you choose to do something stupid anyway.
Want more free guides from medical and survival experts delivered straight to your inbox?
The competition
Besides the two clear winners, you might run across these popular contenders:
Persys Medical Israeli Bandage: The original. Pressure dressings are often called “Israeli bandages” because they were first designed by Bernard Bar-Natan, an Israeli soldier, in the late 80s / early 90s. This specific product has fallen out of favor as more modern iterations improved on the original design, adding features like retaining strips.
First Care Products The Emergency Bandage: This is the same thing as the Persys Medical product, just with different branding when sold by the American importer.
Persys Medical Tactical Trauma Treatment (T3) Bandage: The in-house improvement over the original design. The T3 includes extra tear-away gauze, similar to the OLAES, but doesn’t include the eye cup. Persys added a retention feature to keep the roll from unraveling, but we find the design inferior to the winners.
H&H H Bandage: One of the first designs issued to the military. Uses a plastic “H” bar, instead of the crescent or cup styles more commonly found today, which does the best job of creating pressure but is a little more awkward and slow to deploy. That’s why you don’t see as many of these classics around today.
RECON Medical Trauma Bandage. RECON has a reputation for waiting until patents expire so they can create a cheaper copy sold with polished marketing. Which isn’t bad, but that means their pressure dressing is very similar to the original Israeli bandage and doesn’t have modern features.
How we reviewed the best pressure dressing
We relied on our experience as medical professionals and teachers, combined with medical research, rather than do a head-to-head bake off just for this review.
Because pressure dressings are designed to manage serious bleeding, the most important criteria is how well a product creates focused pressure in the right spot.
We then judge how easy a pressure dressing is for you to use in an emergency (especially without constant training), the quality of the company selling it, and what kind of convenience features are included (like velcro strips to prevent unraveling).
Sizes are standardized around 4- and 6-inch bandages, which refers to the width, not the length. We generally recommend the 4 inch versions because it’s easier to carry in your medical supplies yet still large enough to handle the majority of injuries you might face.
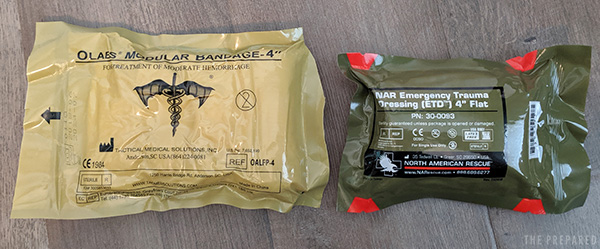
The right packaging makes it easier to carry and deploy. Most of the popular products are vacuum sealed to get the package as small as possible. Some products are “flat folded” while others are “rolled”, which just refers to how the bandage is folded/wrapped inside and can come down to personal preference: flat folded bandages are thinner but wider, while rolled bandages are thicker but narrower.
We explain the different types of pressure mechanics (cups, bars, etc.) below. One type isn’t inherently better than others at creating pressure. Although, we find in our medical classes that people have a harder time with the H-style bars because you have to wrap the elastic in a particular pattern. So we tend to favor the more intuitive cup- and crescent-style bars.
Pressure dressing types
Cup or rounded
The outside surface of the cup (the bottom side in the picture, touching the elastic bandage) is placed directly over the wound. As you wrap the elastic around the patient, each pass pushes more pressure down onto the cup, focusing pressure at the “peak” of the cup. You don’t have to change directions or wrap in certain patterns the way you do with other styles.
The slight downside to cup models is that the cup can shift a little bit during wrapping. But you easily work around this by using your thumb to hold the cup in place:
Crescent
The original design, and still the most common. The elastic is threaded through the inside of the crescent (shown). The next step would be to double back, pulling the elastic back towards the way it came. As the crescent folds over, it creates a pressure point against the skin where the plastic is attached to the elastic.
That process can make aiming the pressure a little awkward. Medical students usually need a practice attempt or three to get the placement right.
“H” bar
Although technically the most secure way to create a pressure dressing, H-bars are easy to over tighten and harder to use than other styles. Instead of simply wrapping in one direction (as you do with cup styles) or making one U-turn to wrap in two directions (as you do with the crescent style), the H has a pattern where you make multiple turns in a particular order.
The wrap pattern doesn’t seem too difficult in the video below, yet we see many students inevitably drop the whole bandage at one point in the process when there’s an awkward handoff around the wrap.
