
I have a confession to make: despite the fact that prepping is my day job, I didn’t really have my go-bag in good working order until this past April. Yeah, I had a go-bag, but it was more aspirational than operational — more “Jon’s bag of survival stuff” than the kind of well-planned and painstakingly assembled emergency resource we promote at The Prepared.
But the experience of walking friends, family, colleagues, and strangers through pandemic-inspired evacuations from major cities motivated me to prioritize the task of really finishing up my go-bag. At this point, I’ve now built my bag and even tested it out, and it’s finally ready. Just as importantly, I have bags ready for my wife and oldest daughter. (My two youngest daughters will just be carrying some stuffies, blankets, snacks, and personal identification, so theirs aren’t as critical.)
Read more: Learn what to look for in a bug-out backpack, and which packs and brands experts recommend.
I gotta tell you, it feels good to have the family’s bags in order. I get a palpable sense of security in the present, chaotic moment just from seeing those bags in the corner of my office, and from knowing that they represent the results of thousands of hours of in-depth product reviews and the consensus of the very best survival experts we could find.
In this article, I’ll walk you through how I built my go-bag — the thought process I went through and the considerations that went into the finished product.
Here’s what you need to know:
- This is a big project. Plan to do it in stages, and to chip away at it. It’s a marathon, not a sprint.
- Collect the essentials first, then build on that foundation
- When in doubt, go with our budget picks. Every budget pick we give is a product we’d absolutely rely on in an emergency. You can always upgrade later if you have extra cash.
- Start by sorting preps into some boxes or bins first. Then move things from the box to your pack in a thoughtful way.
- It’s ok to tailor our recommendations to your needs, as long as your changes are thoughtful and come from a place of rational analysis (and not from a place of survival fantasy.)
- Use a software tool to analyze your go-bag. Weights and prices are key metrics that can serve as an objective, external check on “prepper fantasy” impulses.
Family packs
I’m a husband and a father of three small kids, so I began this project with the needs of my entire family in mind. I decided to start with three bags, broken up mostly as follows:
My bag: This is the main pack containing a customized version of our Level 3 go-bag kit. I focused my pack a bit more on a few areas, e.g. extra power-related stuff, like batteries and adapters, for the kids and their gadgets, or extra tools for myself.
My wife’s bag: My wife’s bag has different versions of the items and picks that are in my bag. I didn’t want to duplicate, because if a particular pick turned out to have a problem in the long-term I wanted to have access to a totally different alternative from a different maker. Her bag also has more hygiene and medical stuff in it, and in general is quite a bit lighter (since she’s a lot smaller than me).
Oldest daughter’s bag: My oldest daughter is about to turn twelve, and she has some wilderness survival skills (firecraft, knifecraft, shooting, etc.) and is into outdoors and survival things. So I focused on filling her much smaller pack with the Five C’s — cut, cover, cordage, container, combustion. I also added some extra food and a few other items. Her bag serves a dual purpose: it’s also the pack I toss in the car for brief family day trips and outings around town.
Finding my focus
Before I joined The Prepared and got serious and sane about prepping, my go-bag amounted to “here’s a giant bag of survival stuff Jon has, all crammed into a tactical 72-hour pack.” When I first revisited the pack about six months into this job, I realized that fully 1/4 of the stuff in it was for starting fires. (I am a redneck and I really like fire.)
After I participated in part of the process that led up to our big go-bag checklist, and then began going through the final list with my own needs in mind, I could see that my bag was badly out-of-whack. Too much of some things, none of some other things, and generally very heavily focused on the classic wilderness survival scenario that preppers often fantasize about.
Realistically, though, my family and I are far more likely to be in a hotel or the home of friends or family in an evacuation or sudden relocation. As cool as the wilderness survival stuff is, a bug-out isn’t a camping trip — it’s an evacuation.
So I completely rebooted the bag in order to focus on the more realistic scenarios I’d likely encounter. While I still have a bunch of the basic outdoorsy, camping type stuff in my go-bag, my current bag is very much for evacuating in a car to a hotel or other place with power, water, and a roof.
Going against the guidelines
Our recommended packing lists will get most people all the way there, and all people most of the way there, but it won’t get all people all the way there. So we’re not dogmatic, and there is definitely room for carefully tailoring the suggestions.
The pack-building process, then, starts with figuring out what’s realistic and likely for you and yours — the particulars of geography, climate, demographics, finances, etc. all matter for this. Once you’ve separated reality from fantasy, and likely from unlikely, then you can begin building your bag.
In the process of putting my own pack together, I ended up thoughtfully and deliberately violating some of the guidelines we laid out in the section of our pack article called “Tips and common mistakes“. I stuck to most of them closely, but let me break down the ones I bent or broke:
“Don’t carry too much weight.” At a little over 34 pounds, my bag isn’t actually that heavy by most preppers’ standards. But it’s far heavier than I’d like for an extended on-foot evacuation. The big problem with a 34-pound pack is that if I’m literally fleeing into the woods, then I’m going to also be carrying a long gun and ammo. So that adds another 12 pounds to my load-out. My boots and clothes are another 8 or so pounds, so all this really adds up.
However, I have a plan for fixing the weight problem in the event of an on-foot evacuation: just toss a bunch of stuff when I hit the road.
I know what I need to ditch and where that stuff is in the bag. And I’m also shopping for an organizing system so that I can easily identify the stuff I’d need to ditch if I’m on foot. I want some kind of color-coded internal packing, where I can grab everything that’s, say, orange, and quickly toss it as I go to save weight.
“Don’t pack a bunch of extras.” The extras — extra battery and power stuff, extra tools, extra clothes — are all things I plan to ditch quickly if I have to walk. So I packed them anyway.
“Don’t assume your predetermined path and bug-out location will work the way you hope.” There are two parts to this warning: the path and the location. I’m making some assumptions about both with my pack.
First, I am assuming a car, bus, or some other form of powered transport will be available to me in an evacuation scenario. If that doesn’t work out, then my aforementioned instant-pack-weight-loss plan goes into effect.
As for the location, I’m assuming a hotel or similar. But I do have the basics to make it work if I end up in the woods. It won’t be awesome, and I’ll really wish I had made some different packing decisions for the sake of comfort and convenience, but we won’t die out there.
Ultimately, the main “sane prepper” principle I followed in building this bag is the very one that led me to bend the rules: “Focus on the 80-20”. This “Pareto prepared” principle is from a different article, but I include it here because I knew that the odds are overwhelming that any evacuating I do will be in a car with my family to a hotel or other dwelling with power and water. So while my pack still supports an on-foot hike into the woods, my pack’s focus is on the most likely scenario.
First steps
I started the job of redoing the packs by putting together lists of what I’d need for two packs, one for myself and another for my wife. This part is a lot easier than it sounds: I just printed out two copies of the item lists from our go-bag checklist article, and I was done!
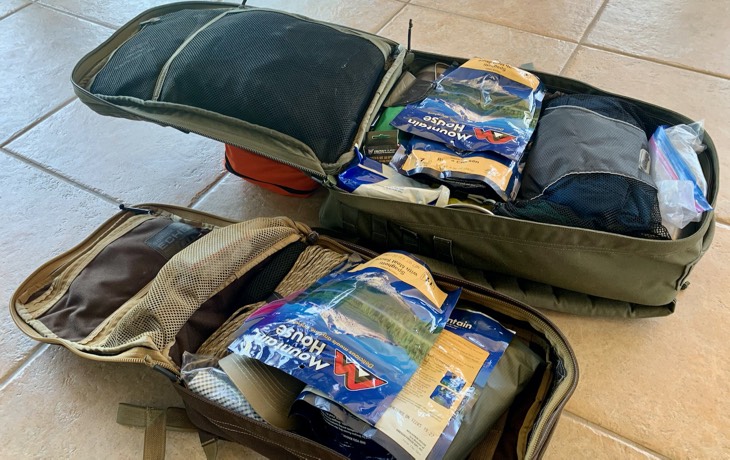
Next, I assembled two piles of gear (one for me, one for my wife) into two large, empty Amazon boxes. I did this by mainly going through my existing preps, list in hand, and pulling out examples of each type of item on the list to toss into the boxes. Each time I put an item in the box, I drew a line through that item on my list with a pencil.
Where I had two or more different versions of a type of item — e.g. knives or multitools, both of which I have a lot of — I followed a simple algorithm: I gave myself a fancy one, and my wife the less fancy one. I did it this way because I like fancy stuff and I’m the one packing the bags, and she’s not a gearhead so she’ll have no clue that I saved all the good stuff for myself.
Having a bunch of prepping gear around is my day job, so most people won’t be able to get as far down their list by just going through their existing stash. But there were still things I didn’t have and had to order. For these things, I used our Kit Builder tool and created a “To Buy” section to help me track.
The systematic approach outlined above uncovered a major oversight — I had no paracord in the pack! There were also some other, smaller, gaps in the bag, like toothpaste, a stove, a spork, and a few other things I needed. I went ahead and ordered these items, and then packed them to finish it all off.
The logic behind specific decisions

There are a number of ways my bag is optimized more for an in-car evacuation than a wilderness trek.
First, I have a tarp instead of a tent. If I really thought I’d be spending the night outdoors, I’d definitely prefer a tent. But a tarp is more flexible for a wide range of situations. And again, I don’t plan on being outdoors — if I do end up outdoors with nothing but my pack, I can make it work, but that’s not the plan.
Read more: We reviewed over 50 tarps to find the best for your pack.
Another example is the fact that I went with inflatable sleeping pads, instead of the recommended non-inflatable pads. I’ve been camping on the same Thermarest pad for over a decade and have never pinholed it. But more importantly, in an evacuation I plan on using the inflatable pads on a floor or other indoor surface, and not on the bare ground. If I have to, I can make it work in the woods, but that’s not the plan.
Right now, I have not spent any money or weight on ultralight quilts or sleeping bags. We have a number of camping sleeping bags that we use as a family, so I’d grab those for the car if I had the time. But if I just had to grab the packs and run, we’d be keeping warm with the packs of mylar rescue blankets in them.
Like the tarp, these blankets are not ideal for camping in the woods. But they’d keep us alive for a few days until I could come up with something better.
Using tools to plan and analyze
I know Kit Builder is our in-house tool, and I’m partial to it because I work on it as a programmer, but I really want to recommend it or some other, similar tool to you.
Here are some ways I used Kit Builder to build my go-bag:
- I sort each section by weight. That way, I can easily troubleshoot my pack weight. This also helps me identify items to toss quickly in an on-foot bug-out.
- I use the section totals for budgeting. I’ve described this process in detail in another article on how to use Kit builder to avoid panic-buying, so I won’t repeat that here.
- I use Kit Builder’s product link capability for checking in-stock status. Supply chain issues mean that many things I want are sometimes not in stock, so when I make a Kit Builder list of preps I’ll include the retail link. That way, I can easily run down the list and check the stock status of the things I need, and then quickly score them if I happen to catch them in stock.
- I also use Kit Builder to share a public version of my bag and solicit feedback from other preppers. It’s great to be able to make a quick copy of the current state of your private bag, and then make a cleaned-up version public for sharing with others.
Ultimately, I use Kit Builder to plan and tweak my bag, and to ensure that it stays within some reasonable weight and monthly budget constraints. The tool also helps me analyze my go-bag in a rational, non-fantasy way. I can see what I’m spending money and weight on, and where it’s bloated and where it’s deficient.
Next steps
Even though my bag is ready, that doesn’t mean it’s finished. It’s still a work-in-progress, and I’m always learning more or coming up with some new ways to optimize it.
For instance, I’m seriously considering adding ultralight camping quilts to mine and my wife’s bags. I think the weight and cost are probably worth it, so as winter approaches I’ll probably add one of those to the “To Buy” section of my internal bag.
I also want to spend some money and weight on an internal pack organizing system. I’d like to break down my pack’s components into colored containers so that I can easily ditch everything that’s a certain color if I have to hike with the bag.
It would be really great to have a tent, if only for the totally enclosed bottom that keeps the critters out. We’re in snake country, and I really don’t want to wake up with a visitor if we do end up in the woods. So I may end up cutting way back on some other areas of my wife’s pack and putting a small tent in it for her and the kids.
Ultimately, though, my main next step is to spend more time camping with this pack. When the weather turns cooler, we have some family camping trips planned. So I’m excited to bring the pack and get a feel for what it’s like to live out of it on a more extended basis than just a backyard camping session.
As helpful as it is to work on the pack via Kit Builder, experience really is the best teacher. You have to get your gear dirty before you can rely on it.
You are reporting the comment """ by on