Food preservation – it makes sense from a survival standpoint
While watching old episodes of Little House on the Prairie (great series if you haven’t seen it before!), something caught my eye that I never had really put too much thought into before. I saw that their sod house out back had baskets of apples and potatoes that just sit there and look to be fine all winter long, yet I struggle to keep apples and potatoes in my house for more than 2-3 weeks without them going bad. Granted this is a TV show, and those apples are probably fake, but it got me thinking about food preservation lately.
Correct me if I’m wrong here, but our ancestors would plant in the spring, grow all summer, harvest in the fall, and then preserve the food in the winter. From a survival perspective, this makes sense. You work hardest during the spring and fall when temperatures are moderate, when it is hot you mostly just let your plants sit there, and then when it is too cold to even go outside you sit inside and work on food preservation. This formula is set up for maximum calorie preservation. You can even go so far of thinking about the fire and heat produced from the canning and other preservation methods blends well with the need to keep the house warm during the winter. I just thought it was a beautiful balance that we may not realize today with tropical fruit shipped in from all over the world every month of the year.
I feel like food preservation is kind of a lost art for many, and most (myself included) were just taught that putting things in the fridge will make them last longer, and putting them in the freezer will make them last even longer. I no longer want to be apart of that crowd though. Call me a rebel, a food preservation rebel! I want to learn how to preserve food without refrigeration like millions before us knew how to do before the invention of the refrigerator. And sure, even on Little House on the Prairie it shows Ma putting some milk in a cold box, and they have the town ice house, but still they knew how to preserve things.
So, smart people of these forums, teach me about food preservation. What kinds are out there? I’m aware of dehydrating and canning, but please teach me about it. What can I preserve using different methods, what gear is involved, how long do things last with each method, etc…
I wanted to get my feet wet in this field, and so I went out and bought a dehydrator. In the comments below, I am going to tell my story of making some homemade beef jerky and some dried blueberries. I want this thread to be mostly teaching me about food preservation, but still wanted to share one of my successes!
-
Comments (61)
-
 Alisa Felix
- February 2, 2021
Alisa Felix
- February 2, 2021

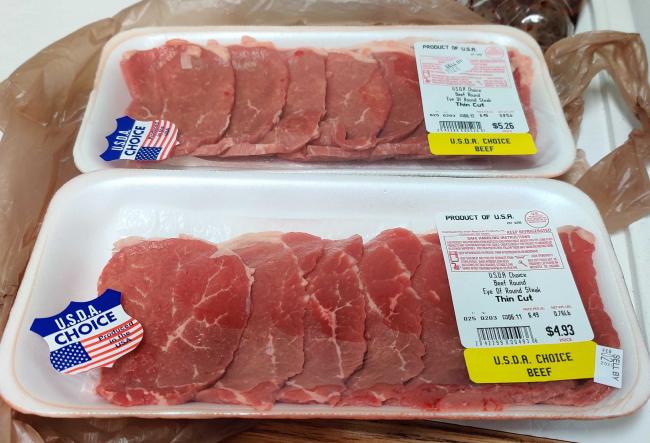
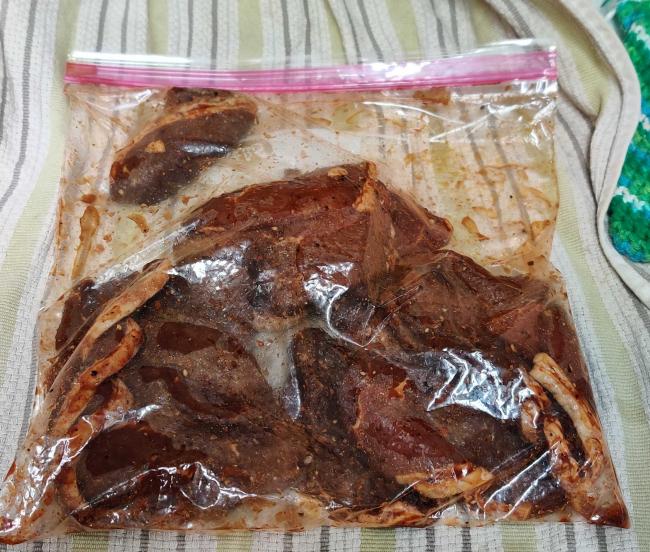
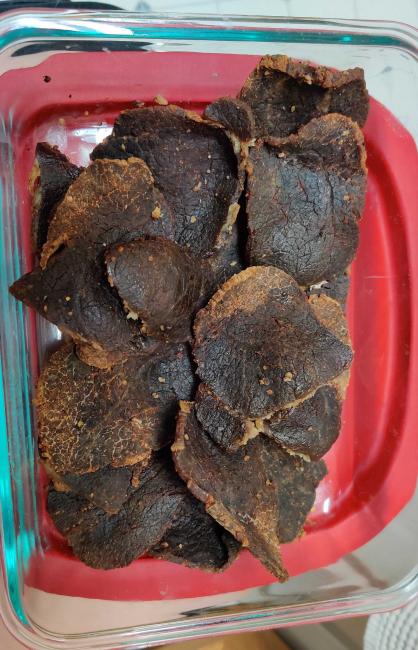
For the beef jerky, I started out by using 2 pounds beef round steak cut into thin strips and marinated it in a Ziploc bag over night. Here is my marinade recipe:
- ¼ cup soy sauce
- 2 tablespoons Worcestershire sauce
- 2 tablespoons brown sugar
- 2 teaspoons salt
- 1 teaspoon ground black pepper
- 1 teaspoon garlic powder
- 1 teaspoon onion powder
- 1 teaspoon paprika

You then take your marinade mixture and place it in a pan and add water until it is covered. Bring your meat strips and water to a boil for 5 minutes and then strain the water out and get your strips as dry as possible. Then place your strips in your dehydrator.
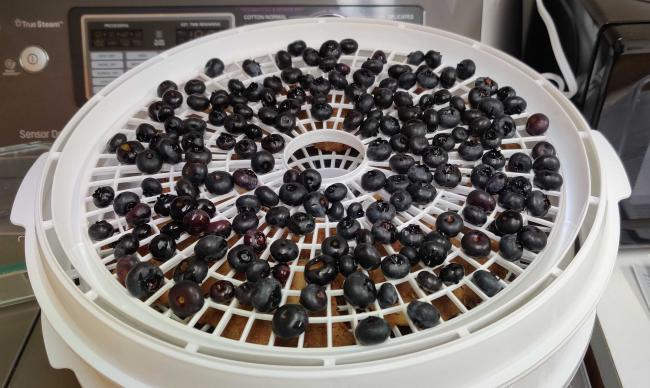
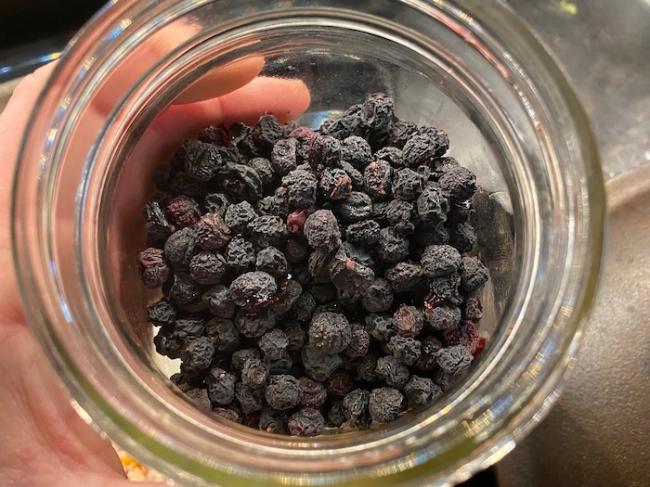
I also wanted to try something other than just meat, and saw blueberries were on sale, so I bought some of those. For the blueberries I rinsed them off and then added them to a pot of boiling water for 1 minute and then dunked them into an ice bath to crack the shells. (my shells didn’t seem to crack though) dry off and place in the dehydrator.

This all was based off of the booklet that came with my dehydrator. I used the $40 Presto Dehydro electric food dehydrator.
How did it turn out? Great! For a first timer.
The book did warn that if I cooked the meat strips before dehydrating, it would cut down on the dehydrating time, but would make the jerky crispier. And although crispy isn’t my favorite, it still was pretty good. I think next time I’m going to cook it after I dehydrate them though.
The jerky took 4 hours to dehydrate.

The blueberries were in there for 7 hours. It was funny how they would shrink in size as the moisture was sucked out of them and they would get smaller. Occasionally I would hear a little thud and it was the shrinking blueberries getting too small for the mesh screen and dropping through to a bottom level. I stopped the blueberries at 7 hours (I wanted to go to bed and not have to watch them). Some were really small and dried completely, others were perfect and had the consistency of a raisin, and the really big ones were still a bit juicy.
I wish I could share my spoils with you all! They both really turned out delicious!
Lessons learned!:
- I will cook my jerky after dehydrating next time
- Cut the extra fat off of the meat strips before marinating or dehydrating
- Sort the blueberries by size next time so that the small ones can be taken out when they are done, and the others can stay in there longer
- My bedroom (where my computer is) was cold that day, so I put the dehydrator in there with me when I was messing around on the computer and it really warmed up the room. Another great reason to preserve in the winter and double as a space heater instead of mid summer when it is already too hot.
- And while it probably is cheaper and so much easier to just go buy a bag of dehydrated blueberries and a pack of jerky, this was a much healthier option (no added sugars, no weird stuff), and I feel pride that I can preserve my food a little bit better.
-
Linnet
- February 7, 2021
I have only made Jerky once, I’m not a fan to be honest. Friends in the USA who make a lot of it gave a a few bits of advice, the one that I found most useful was to part freeze your joint of meat to firm it up to make it easier to slice thinly.
-
Linnet
- February 16, 2021
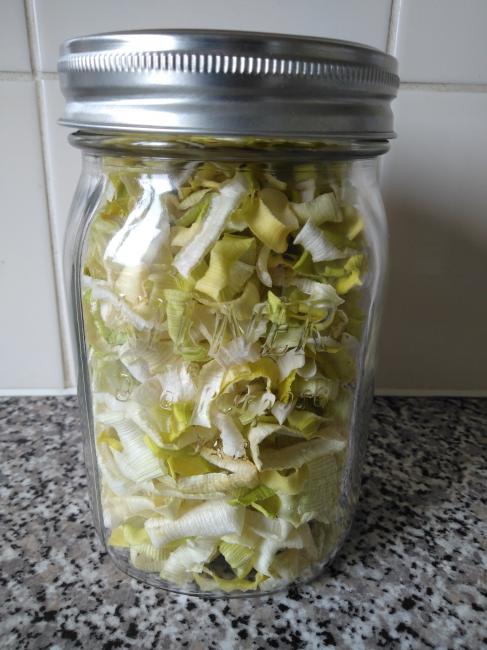
Just thought I’d post a quick picture of the Leeks I dehydrated yesterday.

A Kilo of leeks in a jar.
-
UbiqueContributor
- February 16, 2021
Gorgeous Linnet! How much can you dehydrate at one time?
-
Linnet
- February 16, 2021
I have a 4 tray Excalibur, it all depends on what I’m dehydrating, but to put it in context I can dry a kilo bag of frozen peas in one sitting. Frozen veg are great for dehydrating. No preparation!
-
UbiqueContributor
- February 16, 2021
Thank you for the info, Linnet. I’m smacking my forehead – I never thought of using frozen veg for dehydrating! It would be so much simpler! Frozen veg are just as nutritious. I use them all the time, especially in winter and always have them on hand in my deep freezer. They’re cost effective, too.
-
Linnet
- February 17, 2021
It takes out a lot of tears dehydrating bags of frozen onion!
Onions, Peas, Sweetcorn and mixed veg (with diced carrot) work best. Once dried a kilo of any of the above will fit in a pint canning jar.
I like to dry Grated and sliced potatoes, They are very handy to make quick hash browns or a gratin.
The best time saving thing to dry is cooked beans! I don’t know about you, but I’m really bad at remembering to soak beans to use in a recipe. Again a 500g bag of cooked, dried beans will fill my dehydrator.
-
UbiqueContributor
- February 17, 2021
Brilliant timing Linnet! I was about to add dried beans back into my preps again and now I can dehydrate them. Thank you!
I had switched over to canned beans only because I received an old batch of dried beans from a bulk food store. They were so old I couldn’t hydrate them to the point of being at all edible. I was very wary of purchasing food that might not be edible in a crisis (or in the best of times, too).
I really want to build variety into my pantry as to how the food is preserved. This is great.
Also to be able to dry potatoes is wonderful. It will really help prevent food fatigue in a crisis.
I meant to ask you, how long is your storage time with this type of preservation?
Thank you so much for the info, very appreciated, Linnet.
-
Linnet
- February 17, 2021
I don’t use any special method, just store in a canning jar in the dark. I get 2 years or so like this. In the past I have used oxygen absorbers and to be honest, I found no difference in the keeping qualities.
I do use my dehydrated foods day to day so I’m constantly rotating them anyway.
Bad prepper that I am, I don’t do long term food storage, I prefer to rotate. However, I do eat what I store.
-
UbiqueContributor
- February 17, 2021
Rotation is a sensible approach. I think it is a way to stay more mindful of how our pantries are stocked. I believe we have to eat what we store or it won’t serve us well in a crisis, which can be the pitfall of longer storage practices.
Good to know about using the oxygen absorbers versus not using them. I use them in my pails of brown rice and oats. Brown rice isn’t supposed to keep as long as mine, but I believe it does keep well more to the cool conditions in my basement. I need to replace my oxy stabilizers because mine are quite old (now who is the bad prepper?)
-
OldHouseGirl
- February 2, 2021
Homesteadingfamily.com is a great site for food preservation. Also, if you live in the US, you should check with your county extension office. They have lots of resources for learning food preservation. If you want to get into canning, start small. For ex. I started with apple butter and I was very pleased with how it turned out.
The time frame for canning is going to be very different depending on your location. Most food will need to be preserved as soon as it’s picked. I live in East Texas. Our harvest comes in late spring/ early summer. Therefore, it’s normally very hot when we’re canning and standing over a stove with all the burners going full blast is pretty uncomfortable. But we really have enjoyed home canned goodies this winter!
I haven’t tried dehydrating yet, but I love jerky so I may have to give it a try. Good luck!
-
Robert LarsonContributor
- February 3, 2021
I’ve never heard of a county extension office before, but one quick Google search later and I found mine!
I love their mission statement: “Providing trusted, practical education to help you solve problems, develop skills and build a better future.“
So far i’m very impressed with the programs they are offering (although it looks like many are shut down because of covid). I do like that they have a section called Plant Diagnosis where you can contact them and have their help identifying plants. That’s a skill i’d love to learn, I want to learn what wild edibles are around me.
-
UbiqueContributor
- February 14, 2021
Hi Robert, I found a few titles for you that may be helpful:
Edible Wild Plants: A North American Field Guide to Over 200 Natural Foods [Thomas S. Elias & Peter A Dykeman]
Edible Wild Plants: Wild Foods From Dirt to Plate [John Kallas]
Field Guide to Medicinal Wild Plants [Bradford Angier]
You might also be able to locate books on Indigenous food gathering and growing for your area by speaking with people from those communities also.
-
Robert LarsonContributor
- February 14, 2021
WOW! Thank you so much Ubique. Those look like great resources 🙂
-Be Prepared-
-
Alisa Felix
- February 3, 2021
I can’t imagine canning in Texas during the summer!
But thanks for the link to that website. I’ve bookmarked it and am going to be spending the next few days reading a ton!
-
-
RedneckContributor
- February 3, 2021
On our farmstead, we water bath can our fruits & berries, mainly as jams & jellies as well as apple butter. Have done a pit of pickling, mainly our fresh eggs. However, if it came down to needing to preserve food to survive, canning would be difficult for most because it would require a tremendous amount of jars & lids. Most folks don’t keep a fraction of what would be needed to preserve all the food you would need over a long winter.
My strategy for large scale food preservation is to grow foods as done by the native Americans. The three sisters (field corn, pole beans & winter squash) can be eaten fresh but all can be left in the field to dry naturally and can store over the winter without much additional resources. Other foods such as our apples, could be dehydrated but in a survival situation, I doubt a small electric dehydrator would do much good (we have around 150 trees). You might not have electricity. In the old days in the south, apples & other farm produce would be dried on the metal roof of a building. It would be the small kids job to get up there and keep turning the slices over. Another way to preserve fruit such as apples or grapes is to make into cider or wine, and then even process that into vinegar. Jerky can be made in bulk over an outdoor wood fire.
I suggest preppers practice methods of growing & preserving your food naturally without electricity and modern conveniences.
-
Alisa Felix
- February 3, 2021
I love your suggestion of growing and preserving your food without electricity and modern conveniences. As that is pretty much why i’m getting into this kind of work, I wanna eat when the power’s out.
Can you tell me more about your egg pickling? What are the steps to that? How long do they last? Do they taste all vinegary?
-
RedneckContributor
- February 3, 2021
Since your title states from a survival standpoint, you have to change your way of thinking. As opposed to trying to figure out what food to grow & how to preserve it over the winter, I decided to do as our forefathers did… to include the native Americans. They let their corn dry in the field then put it up in corn cribs to store until the next year. The beans can be shelled & stored in plastic pails. Most winter squash stores fine as long as it doesn’t freeze. I recommend reading Buffalo Bird Woman’s Garden to see how the native Americans handled this issue.
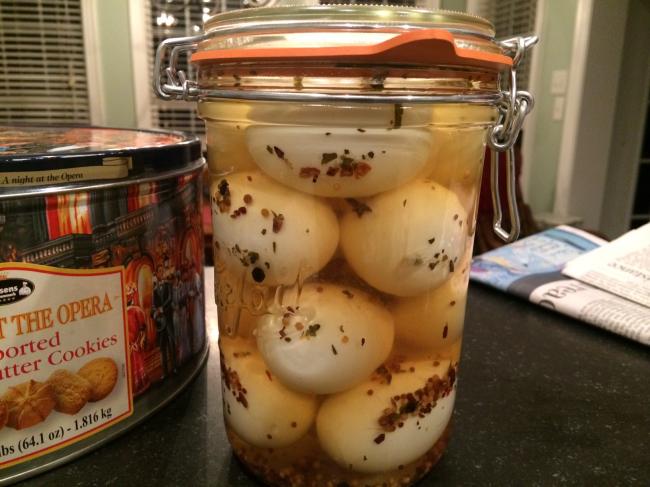
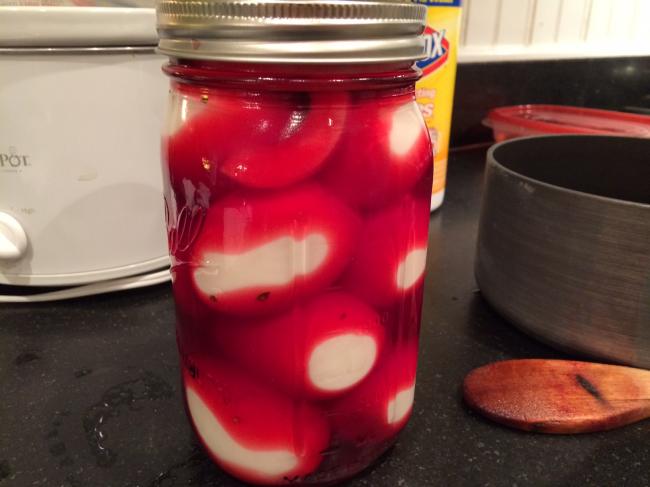
Well the eggs are pickled, so yes they taste vinegary. Anything you pickle will taste that way. In a refrigerator, they stay good for around 4 months, but mine never stay that long. 🙂
I hard boil a dozen large eggs & peel. I also boil a 1 qt canning jar until sterile. Then in a pot I boil for 5 minutes 1 1/2 cups apple cider vinegar, 1/2 cup water, 1 Tbs Kosher salt, 1/2 cup sugar & 1 Tbs pickling spice. Put the eggs in the jar & fill with your liquid. Refrigerate and start tasting after around 5 days or so. By that time they should start tasting right. Some folks like their eggs tinted pink. If so reduce the vinegar to 1 cup and add 1/2 cup pickled beet juice. You can play around with spices you like. Not unusual to see sliced onion and peppers in there.

-
Alisa Felix
- February 5, 2021
Thank you so much for sharing! That doesn’t look too hard at all.
My family ran out of eggs in our fridge today and no one felt well enough to run to the store to get some. It would have been great to just pull a jar out that we canned months ago.
And yes, I’ve been hearing you talk about the three sister plants in a couple of these forum threads. I’m super intrigued into learning more about that, cause it must have worked well for them over the hundreds of years they have lived here. I’ll check out that book you recommended. Thanks again!!
-
RedneckContributor
- February 5, 2021
You are welcome. When it comes to the three sisters, the categories are rather broad. There are lots of varieties of each of the sisters, so I strongly suggest testing out some & finding what works best for your situation & climate. For me, I use Trucker’s Favorite field corn, Rattlesnake pole beans & generally Seminole pumpkins. Seminole pumpkins are great for folks living in warm, humid climates but I find pretty much any winter squash stores well for me.
-
Linnet
- February 10, 2021
I preserve a good deal of our home grown food too. Like yourself I make a fair bit of jam and water bath any fruit I can come by.
I used to pickle a lot, but I have found as I get older, vinegar pickles don’t agree with me.
I love making fermented coleslaw though and this year I am going to try fermenting other types of pickles, never really done this so it could all go horribly wrong.
-
-
-
Olly Wright
- February 6, 2021
I checked out those recipes on that site, and it looks easier than I thought it would be.
-
-
Linnet
- February 7, 2021
I think what we perhaps need to remember is that houses were a lot cooler and probably had quite a bit of unintentional ventilation. Root cellars were the norm. I always think of the root cellar in the film ‘The Searchers’
Here in the UK the country estates had brick built cold houses to store their produce, just a glorified root cellar really.
These days, I’ve made a very good root cellar from burying a dustbin and then storing what I want in smaller containers within the buried bin. I got this idea from Alys Fowler and have used it with great success.
-
Alisa Felix
- February 9, 2021
That sounds like a smart idea that even people with not very large yards can do. So is the dustbin underground up until the top lip of the bin? And then you just put the lid on the top to seal it?
Have you ever put a thermometer inside to see what the temperature is compared to outside?
What kind of things do you store in there?
-
Linnet
- February 12, 2021
To be honest it never occurred to me to put a thermometer in there, doh! When I get the next one dug, I will.
I stored carrots, beetroot and apples as that’s what I had needing storage.
I have Alys Fowler’s book ‘Abundance’ which goes into a bit more detail.
I would certainly recommend it as a beginners preserving book.
Here is a bit about it in one of her articles in the Guardian.
-
-
Josh CentersContributor
- February 8, 2021
Back in July, I had a bag of blueberries that were on the verge of going bad. Many of them had gotten soft and had broken open, leaking juice all over the bag. I simply placed them on a cookie sheet and cooked them at 175F in the oven for a few hours. I baked them until they looked like rabbit pellets, and then I stored them in a Mason jar. It’s February now and they still look good!
-
Olly Wright
- February 9, 2021
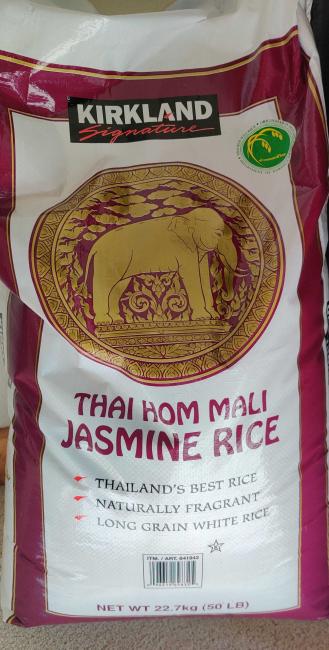
I bought a 50 pound bag of Jasmine rice from Costco yesterday. How do you guys recommend storing it?
It is in one of those plastic woven bags and doesn’t look airtight. I’m not going for 25 year long storage, but just to keep it as fresh as possible until we eat it all. I was thinking about buying some mylar bags and oxygen absorbers and splitting the bag into those. That way if we need to fill up our rice jar, we won’t have to lift a 50 pound bag to pour into the jar and can just rip open one of the mylar bags.
Are the oxygen absorbers overkill if i’m not going for long term storage and will probably use them in the next 5 years or so?

-
UbiqueContributor
- February 11, 2021
Old House Girl gave great advice. The extension info is up to date and a great guide. I have also used information from the Human Sciences (used to be called Home Economics) departments of Universities and Colleges.
I have old cookbooks from my grandmother, but I can’t use some of the canning recipes as times have changed. One of my books talks about canning fish in a oven. That is so dangerous and not recommended. Even with a pressure canner, canning fish is not recommended.
So the information the extension services will give you will be up to date for what are safe methods and recipes for our times.
One other point that might help out is to never substitute or change the proportions of a canning recipe. It can change the safety of the recipe. For example, have you ever noticed how the expiry date of low-sodium or low sugar canned products is not the same as their full sodium or sugar counterparts? It is because the salt and sugar are preservatives and reducing their amounts will affect the preservation of the product.
Using fresh, ripe but not overripe produce is also important.
Last point, storage of canned goods is very impacted by temperature. Even a few degrees can make a huge difference to the life span of any canned good. I use my unfinished basement for storage. It doesn’t freeze, but is definitely a cold area.
Good for you for learning new skills, Alisa. You can do it.
-
Alisa Felix
- February 11, 2021
Thanks for your kind words of encouragement Ubique. I sure am excited to learn more.
So storing your canned goods in as cold of temps (but not freezing) is recommended? That makes sense.
And I’m glad you said something about the low sugar. I’ve seen my grandma can fruit before and was surprised how much sugar she put in. I thought I could just use less and it wouldn’t harm anything and be a healthier option, but glad you taught me otherwise.
-
UbiqueContributor
- February 11, 2021
Hi Alisa; It is strange how food is canned at high heat, yet storage at higher temperature is not good for shelf life. UMN extension recommends canned goods be stored in a clean, cool, dry place at between 50-70 F and below 85 F.
I also use a dehumidifer in my basement to keep the humidity down around food items.
It’s amazing how much sugar was used. There are recipes for diabetic jams, and now that I think of it, freezer jam. It is a bit runnier from what I understand, but still tasty.
Canned tomatoes are a good starter project because they are acidic and a safer item to can. Pickles are a nice way to ease into canning, too.
Learning new skills is really a fun and wonderful part of prepping. If you make jam or jelly, then there is the fun of making bread to go with it.
By the way, I like your jerky recipe and plan to give it a try. Thank you for sharing it.
-
-
Dr. Mac
- February 14, 2021
I have tried them all. The best, albeit the most expensive method is freeze drying. Technically known as sublimation, freezing food, rewarming it in a vacuum, and storing it in an oxygen depleted environment eliminates the need for refrigeration, and is said to preserve meats, fruits, vegetables, and even milk for up to 25 years. I cook before freeze drying, and only need water and maybe some heat to warm and the taste and nutrient preservation is incredible. Harvest Right makes the machines and can provide all the needed bags, oxygen absorbing packets, and the instruction about how it is done. As a hunter, this method has allowed me to long term preserve precious and tasty venison, wild pork, vegetables, and fish for consumption later. I spent about $4,000 for the initial setup, but the equipment will last many years with proper care. What do you think?
-
UbiqueContributor
- February 14, 2021
Dr. Mac – I think it is a brilliant idea. If a person could properly and safely freeze dry food, that would solve many food storage and cooking issues. $4,000 is a bigger investment for a prep item, however, the cost could be shared between family members or a group of prepper friends. It would be an investment that would pay off in a big way considering how much money you could save by making your own freeze dried foods v.s. buy commercial brands.
Thank you very much for writing about this. I have Harvest Right bookmarked and will explore their webside later.
-
Dr. Mac
- February 14, 2021
Happy to contribute. And yes, I share this appliance with our prepper group and all have benefited from its use. Clearly one of the best long-term investments I have ever made.
-
Robert LarsonContributor
- February 14, 2021
My great uncle bought a freeze dryer and I’ve heard that he absolutely loves it. He is a big gardener, and spends so much time freeze drying all of his produce.
Just like Ubique, I think it is a brilliant idea to get a freeze dryer and personally would love one. I think it would get more use for those who hunt (like yourself) and big time gardeners. The average joe (like me right now) who isn’t one of those probably wouldn’t get the most use out of one though.
-
UbiqueContributor
- February 16, 2021
Robert, if you wanted, you could freeze dry store bought meat and produce. Then you could use it for regular meals and the surplus for emergency food.
It is an investment on the front end, but I’ve been turning over in my mind and it wouldn’t take long to pay for itself. The cost could be shared between family and friends if sharing the unit was an option.
-
-
Jessica Sanders
- February 25, 2021
You are making me hungry! Thanks for sharing that recipe Alisa. What are some other things you can use a dehydrator for?
-
Dragoon
- February 26, 2021
Well, you can dehydrate various vegetables and fruit.
One thing i’ve tried in the past is to make my own soup mixes. I took sweet potatoes, onions, and carrots and dehydrated them until they were bone dry. Then you mix them in a food processor and make them into a fine powder. When you want to make some soup, boil some water and add a scoop or two of the various dried powders.
You can also make these dried powders to sprinkle a bit of extra nutrients on various foods.
-
UbiqueContributor
- February 26, 2021
What a great idea! It’s perfect for so many conditions and situations. It makes so much sense to do this.
Thank you so much.
-
Jessica Sanders
- February 26, 2021
@dragoon thanks for the great suggestion. I think i’d like to make some strawberry or raspberry powder that I can then sprinkle onto yogurt or ice cream.
-
-
UbiqueContributor
- February 27, 2021
Hi Alisa,
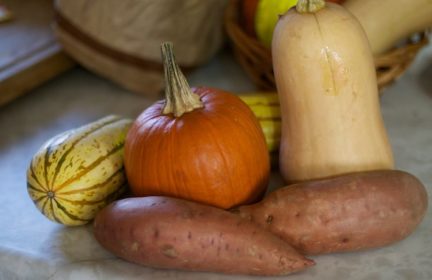
I found a link that might be helpful for you re food storage. Apples and potatoes shouldn’t be stored close together. Apples give off ethylene gas which affects other produce.
For example, if I want to ripen bananas quickly, I put apples beside them.
Here’s the link: How to store vegetables and fruit
-
Alisa Felix
- September 11, 2021
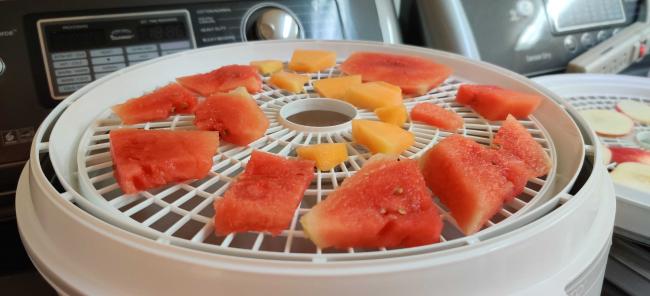
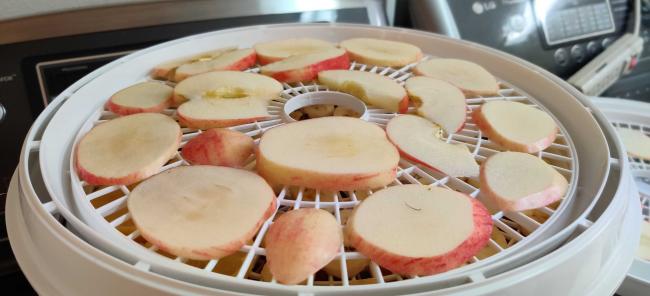
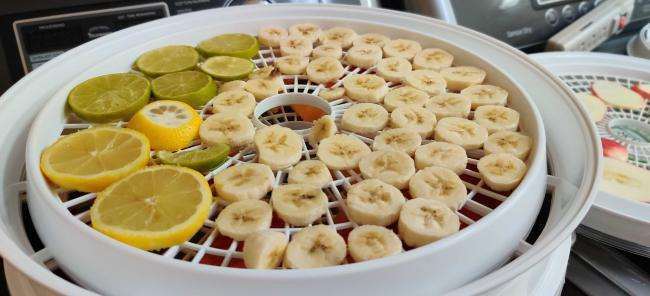
I woke up today and had another itchin for some dehydrating! This time I decided to be a bit more adventurous.
From 9am until 10:30pm I left the dehydrator running and did a batch of watermelon, cantaloupe, apple, lime, lemon, and banana.

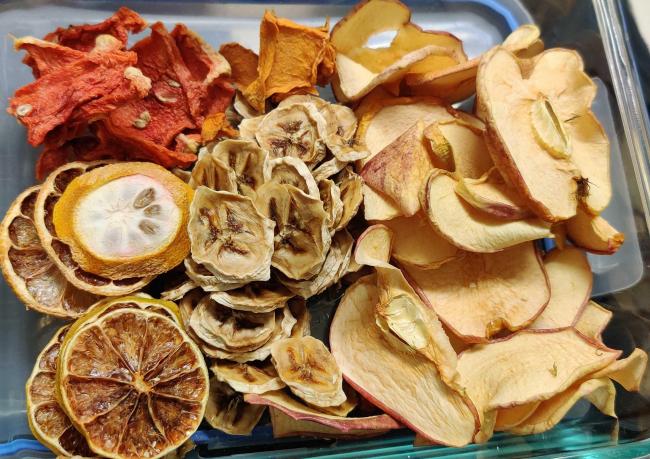
And here’s the finished product. They are still slightly flexible and moist, probably 80% dehydrated. The watermelon and cantaloupe just tasted weird and were kind of a mushy texture. But the rest seem to have dried out well. The lemon and limes will be tested in some drinking water to see if they will rehydrate in a pitcher and provide good tasting water.

Side note…. Do not dehydrate watermelon. First off, like I said it didn’t turn out too well, but also it permanently stained the trays it was on and the dehydrator itself red with it’s juices.
-
Barb LeeContributor
- September 11, 2021
Alisa, where the dehydrator becomes very versatile, is when you become able to convert conventional recipe ingredients to dehydrated ingredients by weight. Then you can make amazing meals with all sorts of dehydrated foods. I’ve found that most veggies dehydrate at a ratio of 1 pound fresh = 1 ounce dehydrated. So If my recipe calls for 1 pound of fresh or canned tomatoes, I substitute one ounce of dehydrated tomato slices.
In starting to build a conversion list, I would weigh the prepared food going into the dehydrator, then weigh it coming back out, and write it down.
One of my best uses for dehydrated foods is to assemble all ingredients for a recipe we like into “kits”, then vacuum seal for storage. I include notes on assembling/cooking the dish in the package. Part of a kit can frequently be a jar of canned hamburger or chicken, and maybe a box of shelf-stable beef or chicken broth.
I dehydrate everything from tomatoes to canned chilis and olives!
-
Alisa Felix
- September 11, 2021
Thank you for your comment. I would like to dehydrate more often and play around with recipes like you are doing.
Do you dehydrate things until they are bone dry? I mentioned in my post how I got everything to about 80% moisture removal, where it’s semi squishy and bendable. I don’t know if I have ever dehydrated to 100% removal, where bending it would snap it in half because it is so dry. Is that 100% removal the goal to make food last the longest?
-
Barb LeeContributor
- September 11, 2021
Well, it kind of depends on the food. I think some fruits, with their high sugar content are going to remain a bit bendy. I lost a batch of potatoes once, though, by leaving them a bit bendy. They molded in a vacuum sealed jar. So now when I do potatoes, They’re so dry I could inflict a wound with the sharp edge of a broken chip! LOL! You can over-dry though, so that they turn a bit brownish. Still fine to eat.
Our favorite snack is frozen dehydrated apple slices. They’re a tiny bit chewy at room temp, but have the greatest crunch when frozen!
I dry tomato slices until they come out crackling off the trays when they are still warm. However, when they cool they’re softer. If I want to crush or powder them, I have to freeze them first. So the warm food, fresh out of the dehydrator may have a little different texture than when cold.
I dehydrate a lot of frozen sweet corn and peas, and they must be cracklin’ dry. They need to shatter if you hit them with a hammer. Or crunch between your teeth!
Onions go to a very dry state too, to where you can crumble them easily. They also brown a bit if they go too long.
Some foods, like onions, will also absorb moisture from the air very quickly if not packaged as soon as possible.
It’s just one of those things that you have to play with to get the hang of it. I always err on the side of getting the food as dry as possible.
You will never dehydrate a food 100% with a conventional dehydrator. I think you can get down to about 3% moisture with a freeze dryer, but maybe achieve about 10-15% moisture the conventional way. Our baled hay always tests at around 90% dry matter (10% moisture) and that’s dry enough to preserve it for years.
-
CR
- September 11, 2021
Quick addition to this thread: I’ve experimented with canning, drying, cold & room temp pantry storage for years. With dehydrated fruits, etc.: Always pack batches LOOSELY into a large ziplock or gallon jar & leave on the counter to remember to shake them vigorously daily for a couple weeks to equalize moisture or else you may have damp spots that foster mold & ruin your hard work.
I tried drying grapes, apple slices, and prunes in my roasting hot attic too, and the apples in particular developed worms in storage, as the attic hadn’t gotten hot enough to kill the eggs in my very organic apples. Other fruits did fine. It may make sense to do a final quick roasting in the oven at 150 or so before storage to kill eggs?
-
Barb LeeContributor
- September 11, 2021
Good points CR. My old “Stocking Up” book from Rodale Press says you can pasteurize dehydrated foods by spreading the dehydrated food 1 inch thick on cookie sheets or trays, and heating for 10 to 15 minutes in a 175F oven for 10-15 minutes. Pasteurize before the moisture distributing step.
-
CR
- September 11, 2021
Awesome, thanks Dogpatch! I hadn’t gotten around to looking up the specifics on that, will pasteurize next time. Had bought hanging cannabis drying racks for the attic & they worked great for the fruit (my intended purpose in buying them), but I didn’t appreciate the extra protein that grew in those apples!
-
Barb LeeContributor
- September 11, 2021
The book says that treatment will kill bug eggs too. You’re making me lift my game and do the extra steps! I tend to just go straight to vacuum sealing. Yeah, those little protein nuggets would be a little off-putting! LOL!
-
Lilian
- January 1, 2024
> Awesome, thanks Dogpatch! I hadn’t gotten around to looking up the specifics on that, will pasteurize next time. Had bought hanging delta 8 gummies drying racks for the attic & they worked great for the fruit (my intended purpose in buying them), but I didn’t appreciate the extra protein that grew in those apples!
These are the things I also have in my storage, they come very handy specially in hard situations. Generally speaking, I mostly try to ensure that I’m receiving the best vitamins and nutrients even when surviving on preserved food.
-
Barb LeeContributor
- September 11, 2021
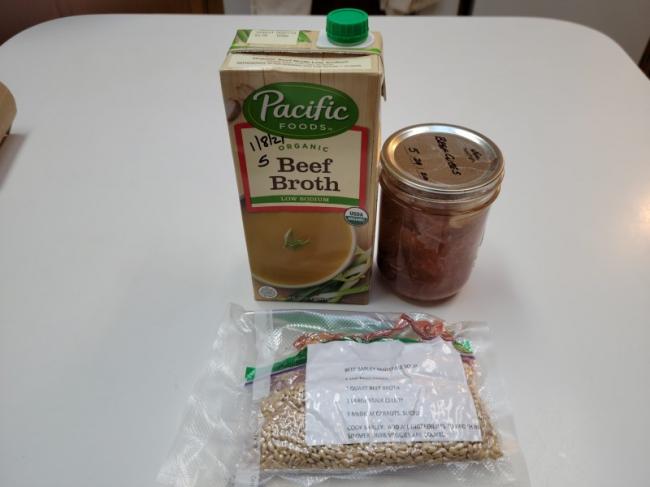
This is a big pot of beef barley soup. Since I can’t make a significant amount of beef stock from scratch, I like to buy this shelf stable boxed beef broth. One pint of cubed beef. The packet contains dehydrated veggies of all sorts (tomatoes, onions, corn, peas, green beans), herbs and quick-cooking barley. I keep some packets of frozen corn/celery to add while there’s refrigeration, but those are a bonus. This is very good soup! It’s adapted from a 1970’s conventional recipe!
-
Alisa Felix
- September 11, 2021
Dogpatch maybe my fruit is dehydrated more than I think it is because you said that the sugars will keep them slightly bendy.
CR thank you for jumping in with your thoughts as well. That’s a good tip about shaking up the bag for a few days to spread out what moisture there is left in there to prevent mold.
I’m looking forward to making another batch of something or other here soon!
-
CR
- September 11, 2021
Good projects! I just remembered the term for equalizing the moisture content “conditioning.” You really can’t overdry, I think, but it’s very easy to underdry and get spoilage. I’ve had some of our prunes in the kitchen pantry for 7 years (!) and the flavor has only improved & gotten richer. I get a kick out of pushing the boundaries, sometimes to my disadvantage, but often learning cool stuff! A couple of our Lumina pumpkins hung out in the same pantry for 2 years in perfect condition. An important consideration for storage of any intact fruit or vegetable is whether or not it’s a variety that stores well. Then discover what conditions it prefers and think about where in your property those conditions can be found. For example I found I can safely store perfect, ripe pomegranates (very gently harvested as mold develops from bruises) in 1/2 bushel baskets wrapped in burlap in a garden shed (we get frost, but not enough to freeze shed) until spring. A north facing unused bedroom has sheltered my latest experiment in winemaking all year, and yielded tasty results. You’ll find you may have great storage spots that you simply haven’t thought of! Just remind yourself to check such things regularly or you may be surprised by a wad of rot or worms. 😳
-
Barb LeeContributor
- September 11, 2021
A really worthy book on veggie/fruit-specific storage conditions is “Root Cellaring” by Mike and Nancy Bubel. We followed their advice for setting up a great “root cellar” (built into the corner of a below-grade bank barn foundation). What needs humidity, what needs dry, what needs near freezing, what needs warmer. Also offers suggestions for best varieties of “keeping” veggies to grow. I believe the book offers all sorts of ways to identify useful nooks and crannies to store fresh produce.
-
CR
- September 11, 2021
Yes! That’s a great resource, I have a well worn & annotated copy too! I drooled over their basic root cellar plans for years before accepting the fact that our soil’s water movement simply does not allow for one here. However they do have great info also on other methods like I alluded to above. Maybe the site moderators would want to review that book if it’s not too far off topic?
-
CR
- September 11, 2021
If it’s ok to share?
-
Carlotta SusannaStaff
- September 11, 2021
Thanks for asking, but it’s absolutely great! Thanks for sahring. This book is even on our list of best prepper books 🙂
-
-
Alisa Felix
- November 2, 2022
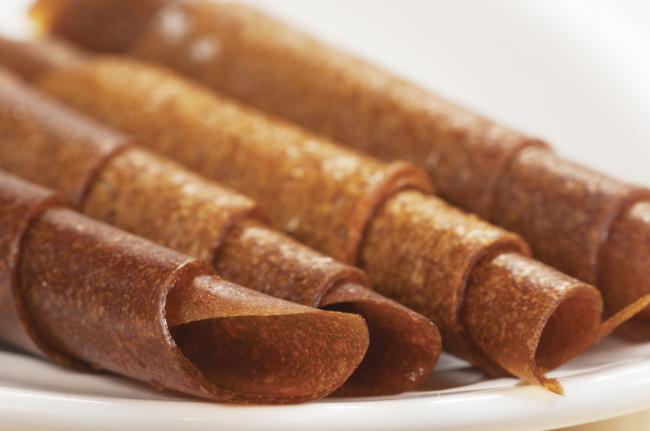
This recipe for Pumpkin Pie Leather sounds good. Does anyone know if I could used canned pumpkin instead of cooked pumpkin? If not, how do you cook pumpkin?
500 mL (2 cups) cooked pumpkin
45 mL (3 Tbsp) granulated sugar or honey
2 mL (½ tsp) pumpkin pie spice
Puree ingredients until smooth. To turn your puree into fruit leather, follow the drying instructions on your manual

-
Barb LeeContributor
- November 2, 2022
You can absolutely use canned pumpkin, which has a nice, creamy texture! Just make sure it’s not canned pumpkin pie filling, which you could also dehydrate into leather, just without the additional ingredients.
Canned pumpkin might be a bit stiffer than pureed, home cooked pumpkin, which might flow out onto the leather sheet a little more smoothly, while canned pumpkin might have to be “smeared” with a knife. You could also add a little water to the canned pumpkin, just enough to make it flow a little bit better.
To cook a pumpkin, you can either simmer in water or bake. To simmer, you’d peel it and chunk it up, then cook in water like a potato. Drain and puree.
To bake, you would cut it in half (small pumpkin), remove seeds, place cut side down on a baking sheet lined with parchment paper if possible, and bake at 350 until easily pierced with a fork an hour or so. Scrape the meat out of the rind and mash. This will be a little firmer than cooked in water.
Pie pumpkins are sweeter and meatier than field pumpkins. Also, you could substitute butternut squash.
-
Alisa Felix
- November 2, 2022
Thanks for teaching me! I will try making some of these pumpkin pie leathers and see how they turn out. I’ll do the canned pumpkin route just to be easier on myself for my first time.
-
Barb LeeContributor
- November 2, 2022
Way easier unless you grow your own pumpkins! I even like to make leather out of canned tomato sauce, for crumbling up in recipes!
-
-
- Whats going on with this site - 2 months ago
- Mylar Bags - February 27, 2026
- Shot Show 2026 recap - January 22, 2026
- News for the Week 2026-1-12 - January 12, 2026
- News for the Week 2026-01-05 - January 5, 2026
This forum is heavily moderated to keep things valuable to as many people as possible. Full community policies are here. The basics:
- 1. Be nice to each other.
- 2. Stay focused on prepping.
- 3. Avoid politics, religion, and other arguments.
- 4. No unfounded conspiracies, fake news, etc.
- 5. Debate ideas, not people.