While hardtack is usually associated with the American Civil War, its origins date to a century prior, when sailors needed a way to preserve food on long voyages. Neither fresh bread nor flour would last very long — so this could be a way to preserve your flour in a SHTF situation. Sailors called it ship’s biskit, hard biskit, sea biskit, or ship’s bread.
It wasn’t unusual for hardtack to become infested with insects, which some welcomed because it added extra protein (another nickname for hardtack is “wormcastles”). Sailors and soldiers would often eat their hardtack in the dark so they wouldn’t know one way or the other.
More: Lifeboat rations are a store-bought (and tastier) alternative to hardtack. MREs work too, but they don’t last as long.
Hardtack, as its name suggests, isn’t fun to eat. It can break or chip teeth when eaten dry. Sailors and soldiers would soak their hardtack in grog, coffee, or water before eating. Creative cooks would use them to thicken soups or grind them up for cereal or flour.
But the upside of hardtack is that it can be eaten after years and years of sitting on a shelf. Hardtack rations from the American Civil War are still edible, even if they don’t taste great.
Since hardtack is mostly carbohydrates, it can keep you alive but may still leave you hungry. Civil War veteran John Billings wrote in his memoir, Hardtack and Coffee, “While hardtack was nutritious, yet a hungry man could eat his ten in a short time and still be hungry.” For that reason, it’s best used as a combo with or as an ingredient for other foods.
Summary:
- Hardtack is made from flour, water, and salt. Keep it simple.
- Making the dough is much easier if you have a stand mixer.
- Dough consistency is key. You don’t want runny, sticky dough. Add water a bit at a time until the dough comes together. If the dough is too wet, slowly add more flour.
- Punch holes in the hardtack biscuits to keep them from rising. Use a chopstick or nail for large holes. Keep holes in a grid pattern, as a sort of perforation to make portioning easier.
- Whether you cook it fast or slow, flip it halfway through cooking.
- Hardtack might come out slightly soft. It will dry more in the air.
- Hardtack is easy to store, but try to protect it from moisture and bugs.
- Avoid biting into dry hardtack. Soak it in liquid or suck on a piece to soften it.
- Hardtack is best used in other dishes, like soups or fried in fat.
Be prepared. Don’t be a victim.
Want more great content and giveaways? Sign up for The Prepared’s free newsletter and get the best prepping content straight to your inbox. 1-2 emails a month, 0% spam.
Basic hardtack recipe
Ingredients:
- Four cups of flour, plus extra just in case
- Two cups of water
- 1 tablespoon salt
Mix the ingredients together to form a dough, roll out the dough, cut into squares or rounds, poke holes in them with a fork, and bake them in the oven. Couldn’t be simpler, right?
However, there are many hardtack recipes, and while they all share more or less the same ingredients, in similar proportions, there are many debates over the details. We cooked several test batches to see what works best.
We used a conventional electric oven, but hardtack can be made in much more rustic settings. Dave Canterbury demonstrated making hardtack in a portable wood stove in a yurt.
Tip: The salt is not optional! It’s essential for preserving the hard tack. You can dial the salt back (or up) a bit, but don’t exclude it unless you just can’t get salt. That’s what pioneers sometimes had to do. Be sure to store plenty of salt in your pantry.
Pioneers would sometimes make hardtack without salt because it was expensive or hard to get, but salt is cheap and readily available today.
Which flour and salt to use
For our batches of hardtack, we used white, bleached, all-purpose flour because it’s what we had and it has a longer shelf life than whole-wheat flour. However, whole-wheat flour was used historically and is more nutritious. Do not use self-rising flour.
Likewise, you can use any sort of plain salt in your hardtack, like table salt, kosher salt, sea salt, etc. However, you may consider iodized table salt for an extra bit of nutritional value.
Nutritional value and cost of hardtack
How much nutrition your hardtack has will depend on the flour you use, since hardtack is essentially just a flour brick. We used white flour, which has 103 calories, 0.28 grams of fat, 21.63 grams of carbs, and 2.93 grams of protein per ounce.
Each 3×3-inch hardtack biscuit we made weighs about 2.5 ounces, so each one has roughly:
- 258 calories
- 0.7 grams of fat
- 54 grams of carbs
- 7 grams of protein
If you use whole grain wheat flour, each ounce has 96 calories, 0.53 grams of fat, 20.57 grams of carbohydrates, and 3.88 grams of protein, so a 2.5 ounce biscuit will have:
- 240 calories
- 2 grams of fat
- 51 grams of carbs
- 10 grams of of protein
You get slightly fewer calories, slightly more protein, and much more fat, so whole wheat hardtack should leave you feeling more full than white flour hardtack, but don’t expect miracles from either one.
Hardtack is incredibly cheap to make. It’s mostly flour with negligible amounts of salt and water. Four cups of flour weigh roughly a pound and a five-pound bag of flour costs $1-4, so you can make a batch for under a dollar.
Can you add more ingredients to hardtack?
Some add black pepper to their dough. That’s not historically accurate and makes the hardtack a bit less versatile, but since black pepper has preservative qualities, there’s nothing wrong with adding it.
Some recipes suggest adding herbs. If you do, know that introduces potential vectors for spoilage. Also, some herbs taste nasty if they’re overcooked. If you want to flavor your hardtack, it’s best to do so as you eat it, such as soaking it in a flavorful liquid like broth or coffee.
One thing you do not want to add to hardtack is any sort of fat, which will cause the hardtack to eventually spoil. Avoid greasing your cutting tools or the baking sheet. If the dough is sticking to either, it’s too wet — see below.
The correct dough consistency
The key to making hardtack is getting the dough consistency just right. A dough that’s too dry will fall apart. Dough that’s too wet will be sticky and hard to work with, and will lead to hardtack that splits and crumbles due to the steam released during cooking.
The trick is to slowly add the water in small increments as you mix the dough. You can mix the dough by hand, but a stand mixer makes the job easier and more consistent, though you need to push the edges in with a spatula to ensure a good mix.
You want to add a little water and keep mixing for a few seconds to see what happens. Once the dough “comes together” stop adding water. You’re looking for a firm ball of dough that isn’t powdery or runny.
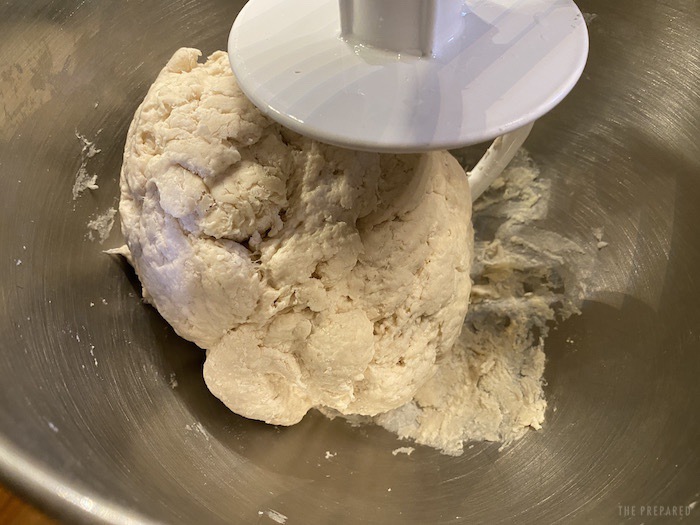
The dough should not be sticky. All dough is kind of sticky, but it shouldn’t stick to your hands and tools. If it does, it’s too wet, which you can correct by putting it back in the mixer and slowly adding more flour.
Rolling the hardtack dough and getting the right thickness
Once the dough is ready, prepare a surface — either a large cutting board or your counter — by sprinkling flour to prevent sticking. Put your ball of dough on the floured surface, press it down gently with clean hands, and dust the top with flour.
Tip: Don’t fold or knead the dough. You want a single firm layer.
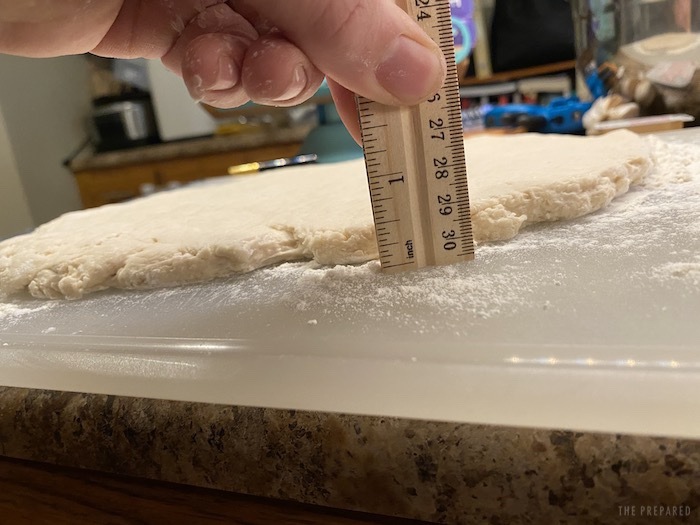
Dust a rolling pin with flour and roll from the center out to the edges. To make the dough even, apply a bit of pressure on the rolling pin starting out and lighten up as you approach the edges. That will prevent thin edges and a thick center.
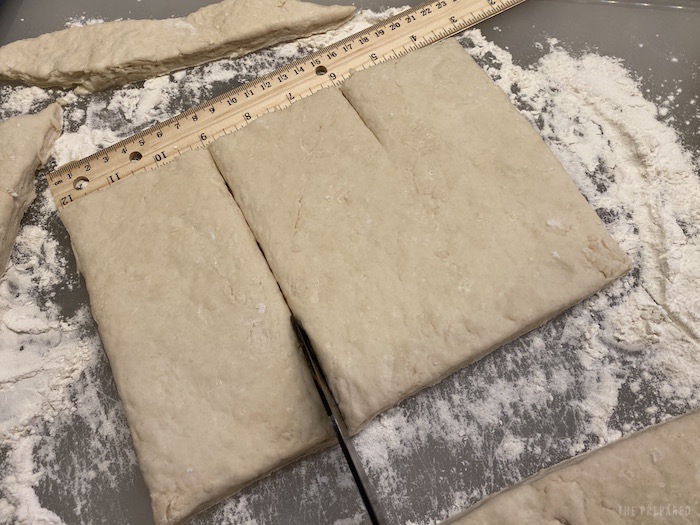
You don’t want your hardtack to be more than a half-inch thick and no less than a quarter-inch thick. Too thick and it won’t dry properly. Too thin and it won’t hold up in your bag. One-third of an inch is ideal.
Cutting the biscuits
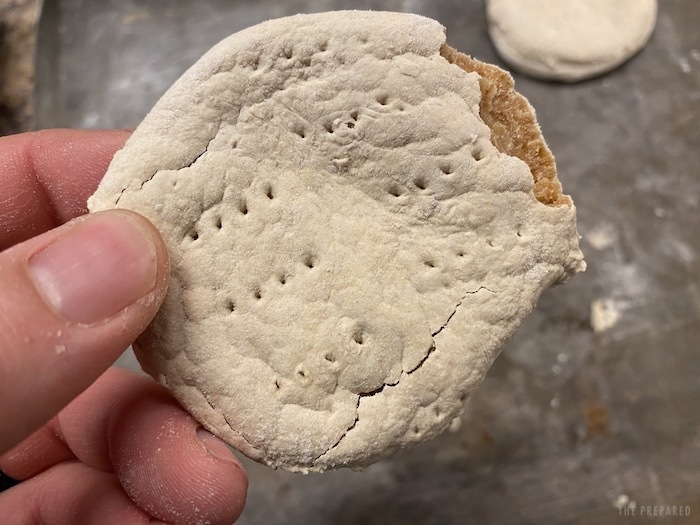
Ship’s biskits were round, but the ones eaten during the Civil War were square. The choice is yours. However, we found that simply cutting them into squares was much easier than fumbling with pastry rings.
Start by cutting off the jagged edges of the dough to square it off. Use a knife or a pizza cutter. Set aside the scrap pieces — you can cook those as well.
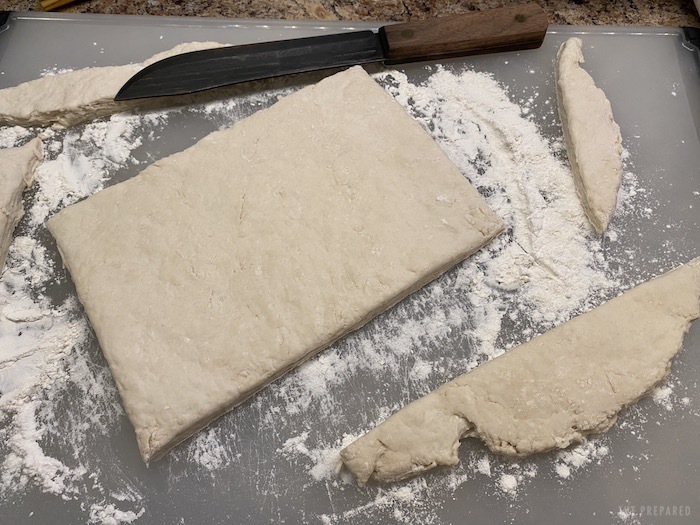
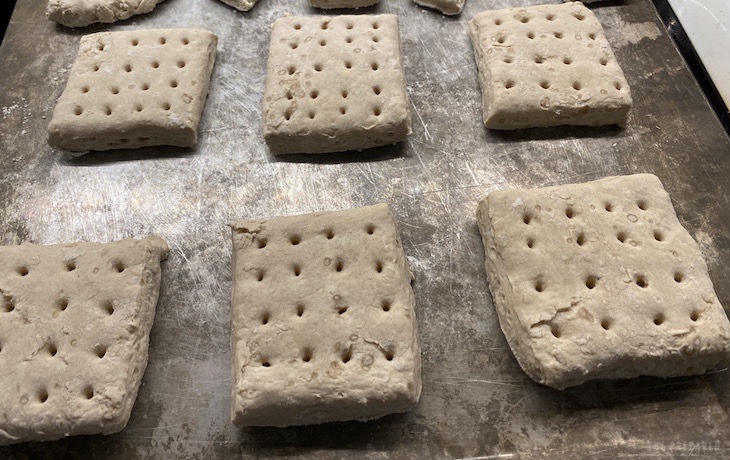
Cut the squared-off dough into 3×3-inch squares.
Making holes
The classic Civil War hardtack most are familiar with looks like a big cracker with a pattern of holes. Punching holes in the hardtack is called “docking.” The holes serve two functions:
- Let air escape so the hardtack biscuits don’t bubble or rise
- Act as perforations so you can more easily break off pieces
You can just stab each biscuit with a fork, but to get the nice, large holes, use a plastic chopstick or a nail. Insert the tip of the chopstick, push it all the way through, and then twist and pull up to remove.
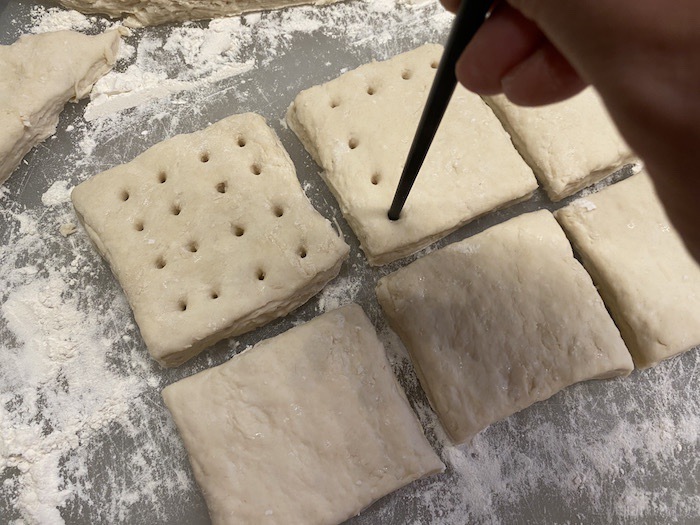
Maintaining a grid pattern is a bit painstaking, but makes the hardtack easier to portion. Hardtack lasts forever, so it’s worth taking your time.
Tip: You can buy hardtack cutters that cut the biscuit and dock them in one step.
Baking hardtack
There are two schools of thought on baking hardtack. One method, taught by bushcrafter Dave Canterbury, calls for 30 minutes on each side at 375°F. Another method, often used by Civil War reenactors, specifies four hours at 250°F.
The argument for lower heat and a longer cooking time is that it supposedly creates drier hardtack, with less browning. Given that hardtack can be broken back down into flour, you want to minimize browning to maximize versatility.
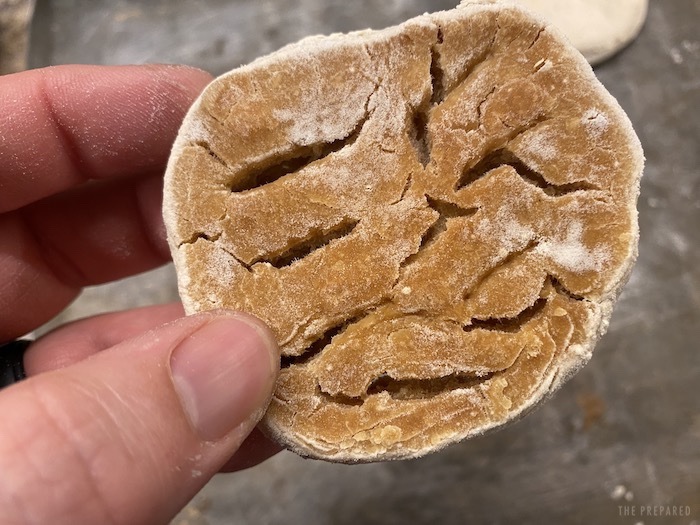
In our testing, both methods produced similar results, with light browning. However, our 250°F batches seemed to crack a bit more, though we’re not sure if it was due to the long cooking time or the consistency of the dough.
One thing is for sure: turn your hardtack halfway through cooking. We tried one recipe that didn’t call for turning, and it led to deep cracks and browning on the underside of the biscuits. Those big cracks offer crevices for moisture, insects, and germs to creep in.
You want your hardtack to cool slowly. During the Civil War, some manufacturers cooled hardtack quickly to produce it as fast as possible, which led to it crumbling and falling apart in the field. Some suggest letting it cool in the oven, but it should be just fine cooling on the counter.
Final hardtack consistency and additional drying
Hardtack, as the name suggests, should be hard, like a hockey puck. You want to be able to slap two pieces together and hear a “clack” sound.
After the hardtack cools, you might find that it’s ever slightly soft in the center. That’s okay, it will harden up over time. Historically, some bakers would bake it over and over again over a matter of days to draw out every bit of moisture and maximize its shelf life.
If your hardtack isn’t sufficiently hard, give it a day to dry on the counter. If it’s still too soft for your liking, put it in the oven for four hours at 200°F and let it cool another day. But too much oven-drying can cause your hardtack to get crumbly, so waiting for it to air dry is your best bet.
Storing hardtack
Hardtack was designed to be stored without much care. If made correctly, it shouldn’t break easily and should be pretty resistant to spoilage. For short-term use, you can wrap a biscuit in a bandana to keep it clean and put it in your bag or pocket.
For long-term storage, your two biggest threats are moisture and insects, so store hardtack in a watertight container.
Eating hardtack
You can bite directly into a hardtack biscuit, but that might be risky. Another nickname for hardtack was “jawbreakers,” and it was well-earned because it can chip or break teeth. If eating hardtack plain, break off a piece and let it melt in your mouth a while before biting down.
The traditional way to eat hardtack is to soak it into a liquid, just like you’d soak an Oreo in milk. Try soaking a hardtack biscuit in coffee for breakfast in the morning. Just drop it in, drink the cup, and then fish out the hardtack and eat it — ideally with more coffee to wash it down. For a night cap, sailors would soak it in grog, but if you’re fresh out of grog, you could soak it in wine or brandy, which are other traditional liquids to soak hardtack in.
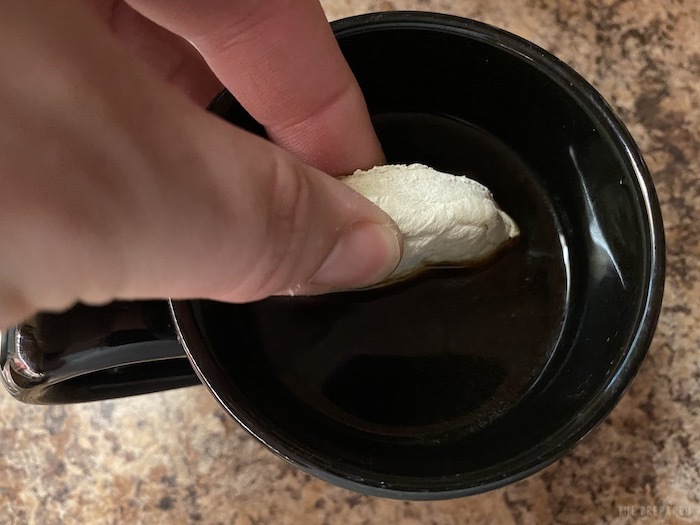
Simply dipping the hardtack isn’t enough, it really has to soak, and it’s almost impossible to over soak it. It takes at least 10 minutes to get the hard tack to where it’s edible, and even then it might be chewy or even a bit crunchy still.
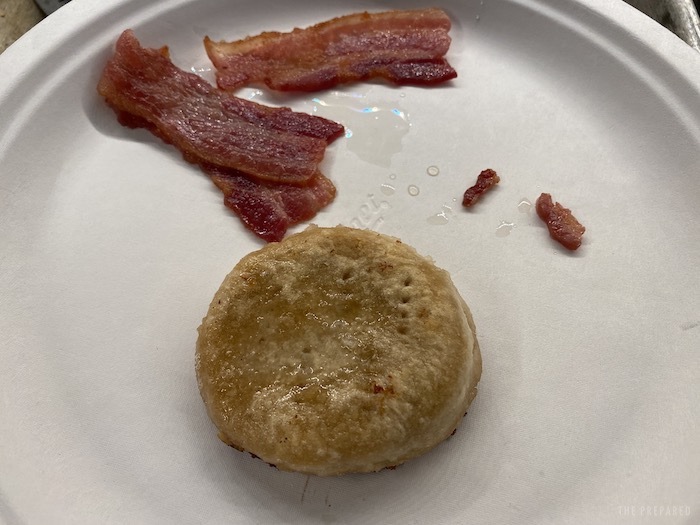
Civil War veteran John Billings wrote in his memoir Hardtack and Coffee about a dish soldiers would cook called skillygalee, in which they would soak the hardtack in cold water and then fry it in pork fat. If you have bacon handy, fry up a few pieces (lower heat will render out more fat), and then toss a piece of hardtack into the grease and fry on both sides until brown.
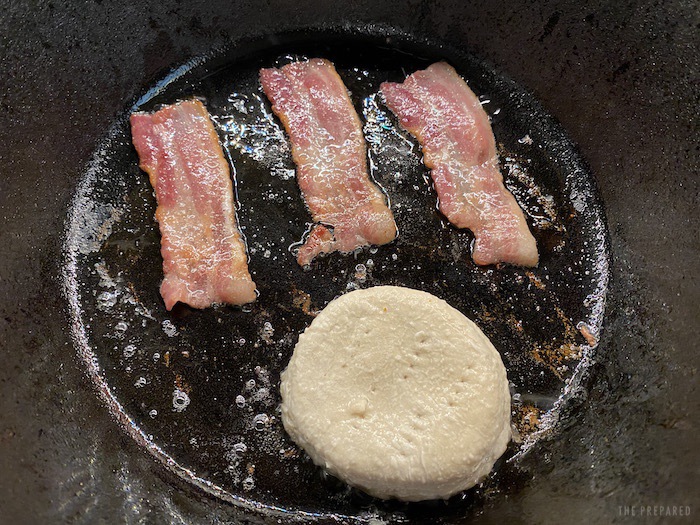
The resulting dish is simple and rustic, but quite good.
If you carry Mountain House meals in your go-bag, you could wrap up some hardtack in a bandana and crush it with a rock or the blunt end of a hatchet and mix the hardtack in with the hot water. If you do this, you’ll need more water than the instructions call for since the hardtack will absorb some of it. You can also use hardtack to thicken up soups in the same way. Or make a quick soup by boiling hardtack in broth.