When you’re buying food from the market in normal life, you don’t have to think about the differences in what it took to grow one type versus another — all that matters to most people is taste and purchase price.
But there’s a lot of variables from one crop to another when it comes to the qualities that matter for an emergency scenario. This means it’s worth being smart about what you grow. Sure, anything is better than nothing, but you’ll be much better off with just a few smart decisions.
Let this list be a guide and not a prescription. For example, we don’t recommend lettuce because it’s tricky to grow and not especially nutritious, but don’t let that stop you if that’s what you want. The same goes for tomatoes. Nothing beats a homegrown tomato, but they’re a lot of trouble for the nutritional gain. That said, pretty much every gardener grows tomatoes or at least tries.
More: Beginner’s guide to survival gardening and where to buy great seeds
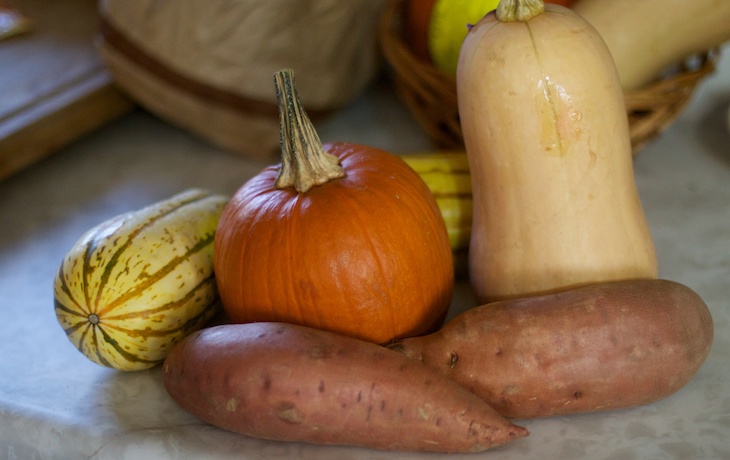
For a survival garden, you want the bulk to be calorie-dense crops like winter squash, sweet potatoes, and potatoes. You then want to round out your calorie crops with flavorful and nutritional plants like amaranth and garlic. Many calorie-dense crops, like winter squash and potatoes, take all season to grow, so you want easy but nutritious crops like green beans you can harvest throughout the growing season.
The best survival crops for most people:
- Winter squash — easy to grow, easy to store, calorie-dense
- Sweet potatoes — nutritious and you can eat the leaves
- Potatoes — the starchy superfood that fueled European conquest
- Field corn — high in calories and can be distilled
- Amaranth — grows like a weed, good for greens and edible seeds
- Beans — green beans during the growing season, dry beans for storage
- Cabbage — nutritious cool-weather crop, can be turned into sauerkraut
- Turnips — another nutritious cool-weather crop, edible roots, and greens
- Garlic — super easy to grow, packed with nutrients and flavor
- Perennials — fruit and nut trees, berry bushes, and other food crops that produce year after year
What makes a good survival crop
Easy to grow. Some food is very picky, while others ‘grow like weeds’ even when you try to kill them. A survival situation is no time to roll the dice on delicate snowflake vegetables such as carrots.
Works well in a wide range of climates or geographies. You might find a niche crop that grows well in your local area and meets the rest of these criteria — if so, great, grow it. True yams are an excellent survival crop, for example, but they need a tropical environment. For this list, we focus on food that can be grown by the widest range of people across typical American climates. Which also makes the crops more forgiving to unusual conditions as the climate crisis worsens. That said, some things may not work where you live — sweet potatoes don’t do well in cold Northern climates, and cabbage and potatoes can be tricky in hot Southern ones. But you can probably grow most of what’s on this list.
Nutritionally dense. Once you’ve got the hard parts of gardening down and are producing food, your main challenge in these scenarios will be yield — can you produce enough nutrition with the limited resources you have. So if you’re going to put in the effort, you may as well get the most survival-bang-for-your-buck. You could grow a whole field of celery, for example, but it’s not going to keep bodies functioning the way a potato will.
Easy to store with a relatively long shelf life. Again, keeping things simple and less risky by avoiding foods that come with more ‘baggage’ when you’re trying to preserve and store them. In the type of emergency where you are depending on this food, for example, that means you’ll likely want your harvest to last for at least a few months through the winter. And you might not have refrigeration, the ability to salt or can for preservation, and so on.
That said, long-lasting foods also tend to take a long time to grow, so it’s good to also plant things you can eat in season, like amaranth greens and green beans. Sweet potatoes are a 1-2 punch since you can eat the green leaves as well as the sweet potatoes.
Easy to harvest, both in terms of when you can harvest them and how. Favor crops that have wider, more forgiving windows of time when you can harvest them. And you’d rather avoid foods that are tough to harvest, such as requiring a lot of painstaking manual labor or specialized equipment. eg. Wheat is a great survival crop in theory, but you have to thresh and grind it, so it’s overly labor-intensive for most people.
Taste is less important than some people think. “But in this kind of scenario, having my favorite food will help my mental health and will to survive!” Yes, mental health is very important, but this isn’t the way to check that box. Even if you normally hate things like potatoes, squashes, and legumes, there are solid reasons why those foods beat out other options — better to have 1,000 potatoes you hate than a handful of your favorite niche food.
Won’t upset your stomach. A lot of people grow Jerusalem artichokes as a survival crop. Yes, it grows absurdly well and is nutritious, but Jerusalem artichokes also give many people diarrhea, which you obviously want to avoid in a survival situation. (Pigs apparently love Jerusalem artichokes, so maybe consider them if you want to raise your own bacon.)
Be prepared. Don’t be a victim.
Want more great content and giveaways? Sign up for The Prepared’s free newsletter and get the best prepping content straight to your inbox. 1-2 emails a month, 0% spam.
Winter squash
- Sun: 6-8 hours per day
- Ideal growing temps: 65ºF (18ºC) and above
- Transplant or direct sow: Direct sow
- Time to harvest: 100 days
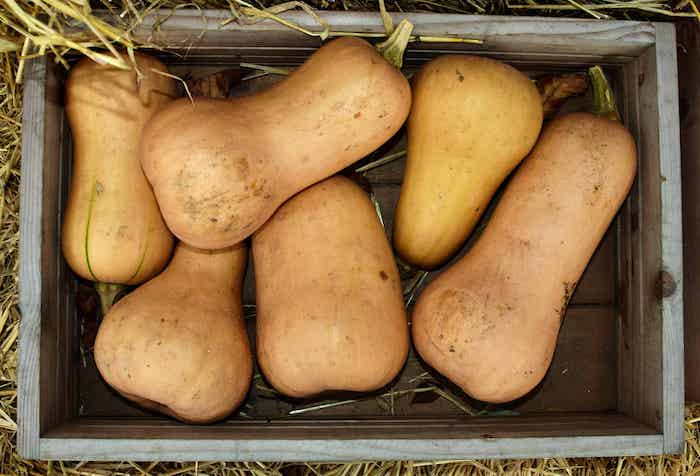
If you can grow only one crop in a survival garden, it should be squash, especially winter squash varieties like Waltham Butternut. Winter squash are named not for when they grow, but due to the fact that they can be stored all winter long.
Winter squash pros: High in calories, stores well, easy to grow
Winter squash cons: Takes all season to grow, vulnerable to squash bugs, quickly gets tiresome to eat, needs heat to grow well, difficult to weed
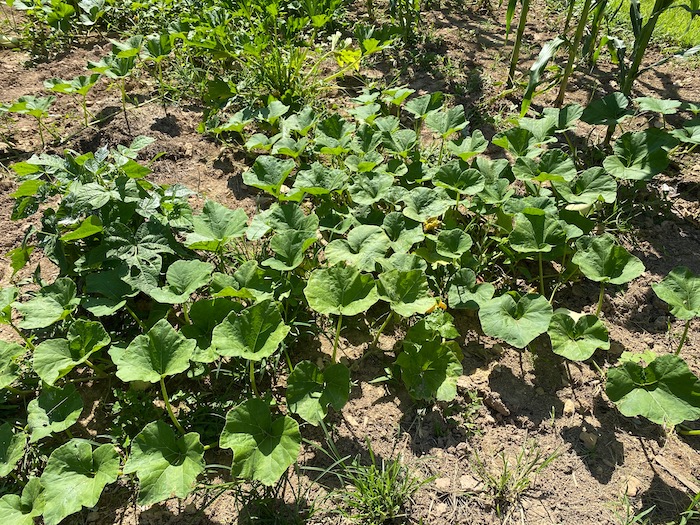
Growing squash: Squash are so easy to grow that they often grow on accident, like out of a compost pile. Any easy way to grow squash is a melon pit, in which you dig a small but deep hole and fill it with kitchen scraps.
You can grow 2-4 squash plants in each mound. Leave 4-6 feet between each mound to give room for the sprawling vines. Mulch the vines thickly, if possible to keep weeds down, because it’s very difficult to weed around squash vines. Weed aggressively around young squash plants because they hate competition.
Squash pests: Insects, especially squash bugs, are a common problem. Keep leaves covered with diatomaceous earth or neem oil to keep them at bay. Sprinkle with Sevin for severe infestations.
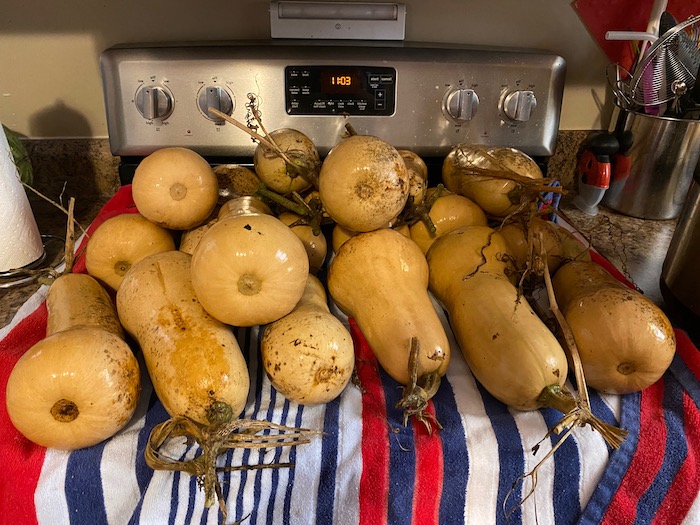
Squash growing time frame and harvest: Winter squash take an entire season to grow, so you might consider throwing in some summer varieties for faster harvests. Check your seed packet for specific harvesting timeframes and instructions. A good way to harvest mature squashes is by clipping them from the vine about an inch above the fruit — keeping the stem on the fruit helps it last longer. Any squash fruit that is damaged during harvest should be eaten soon.
Storing squash: Winter squash stores well, lasting upwards of a year. Wash and dry the squash well and store in a cool, dry, dark place in containers that provide good ventilation like a wooden crate or a basket. Root cellars are ideal if you have one.
Eating winter squash: A common use for butternut squash is soup, though you can make chili or even muffins from it.
Propagating squash: Squash seeds are some of the easiest to save. They’re large and usually spill out of the fruit when you slice it open. Dry the seeds well, store in airtight containers in a cool, dry place, ideally a refrigerator or freezer.
Sweet Potatoes
- Sun: 6-8 hours daily
- Ideal growing temps: 75° to 95°F (24-35°C)
- Transplant or direct sow: Transplant
- Time to harvest: 100-150 days
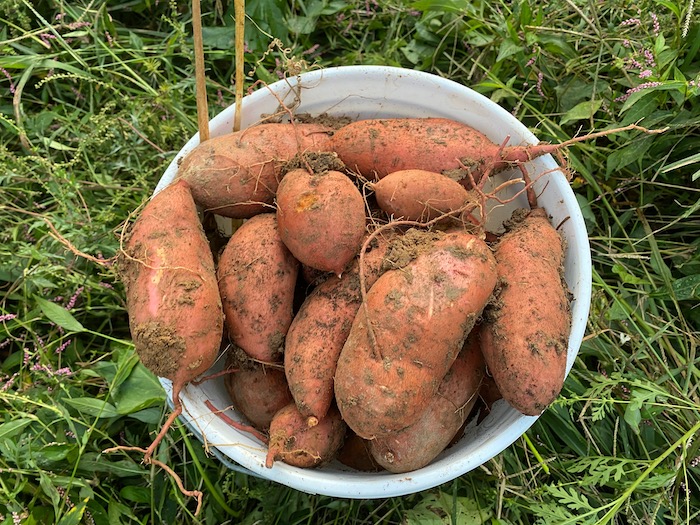
Sweet potatoes are a great survival crop for warmer climates. Just a few slips (the thin plants that sweet potatoes grow from) can net you gallons of sweet potatoes. The tubers are tasty and packed with nutrients while the leaves are edible and can be used in salads.
Sweet potato pros: Grows prolifically, hardy against pests and disease, low maintenance once established, nutritious, versatile
Sweet potato cons: Slips can be fussy to start, needs loose soil or mounds, takes all season to grow, grows underground so you don’t know how much you’re growing until the end of the season, needs to be cured
Growing sweet potatoes: You first have to start slips from a seed sweet potato, either by throwing the potato in a pan of soil or by suspending a seed potato in a glass of water with toothpicks. If you have chlorine in your tap water it will dramatically slow down slip production, so filter or distill your water. You also want to change out the water every few days to prevent disease.
When the vines get about a foot long or longer, you can clip them and plant them in the ground by pushing a pointed stick in loose soil, dropping the slip in, and packing the soil around. Strip the bottom leaves off the slip first. Water the slips well after planting.
If you can’t grow your own slips, you can buy them. George’s Plant Farm is a good source. Ship dates will depend on which climate zone you live in.
Sweet potatoes prefer loose soils like sand, so if you have clay you’ll want to build long hills to put your slips in, about 18 inches apart. Raised beds also work well.
Sweet potato pests: Sweet potatoes are fairly trouble-free, but there are a number of insects that feed on both the above-ground foliage and the tubers. You don’t need to worry too much if insects munch on the leaves, as long as they’re not eating entire leaves. Your best defense against underground pests is crop rotation. After growing sweet potatoes in one spot, wait at least three years before planting them in the same spot again to give time for sweet potato pests to die.
Sweet potato growing time frame and harvest: Sweet potatoes take an entire season to harvest. To harvest your sweet potatoes, cut the vines and dig them up 3-4 days later. A broadfork is a useful tool for harvesting sweet potatoes. After pulling your sweet potatoes, you have to let them cure in the open air, otherwise, they’re tasteless. An ideal setup is a table in a barn or under a porch where they’re protected from rain, ideally when it’s warm outside. When cured, any cuts on the sweet potato from harvest will look dried over and the sweet potato skin will feel moist.
Storing sweet potatoes: Once the sweet potatoes are cured, wrap them in paper and stash them in a dark closet. They keep for up to a year.
Eating sweet potatoes: Sweet potatoes are versatile. You can make and eat them like a baked potato. Sweet potato fries are also pretty good and healthier than regular fries. They’re especially good boiled and mashed with butter, salt, and chipotle chiles in adobo sauce. You can even make sweet potato cookies.
Propagating sweet potatoes: Save a few sweet potatoes from your harvest and use them to grow slips as described above.
Potatoes
- Sun: 4-6 hours per day
- Ideal growing temps: 45° to 70°F (7° to 21°C)
- Transplant or direct sow: Direct sow
- Time to harvest: Up to 140 days
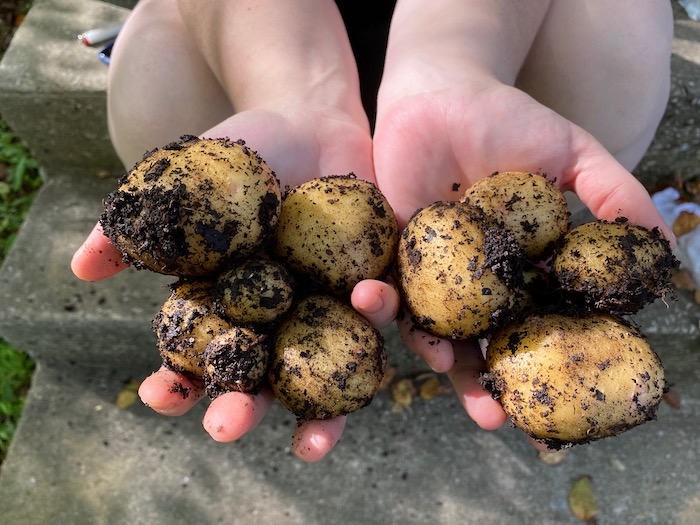
The next crop to consider is the humble potato. Actually, the potato isn’t as humble as you’d think — many historians credit potatoes for fueling the European conquest of the world. They’re fairly low maintenance, tolerate poor soils, and are high in calories.
Potato pros: High in calories and nutrition, fairly easy to grow (in theory), low maintenance, versatile, and almost universally loved
Potato cons: Prone to pests and disease, takes months to grow, can rot in the ground, grows underground so you don’t know how many you have until harvest, you may not get as many potatoes as you hoped for
Growing potatoes: Potatoes can grow from seed, but almost no one does this. Instead, you plant seed potatoes, either whole or in slices, which sprout “eyes” and eventually entire new potato plants.
That is, if you can find seed potatoes. Seed potatoes are ideal since they’re usually free of disease and aren’t treated with any chemicals to prevent sprouting. But if you can’t get seed potatoes, save any store-bought potatoes that have eyes.
Potato farmers plant potatoes without eyes, but since you’re working at a smaller scale, you can let them sit out in the open to let them sprout, which is called chitting.
There is a debate about whether it’s better to plant potatoes whole or slice them so that you have 1-2 eyes per slice. Potato cutters argue that doing so stretches your seed potatoes, producing more plants per potato. Whole potato plants argue that their yields are no lower, but their potatoes are more resistant to disease.
Assuming you have a great need for food and not many seed potatoes, you should slice them. It’s what professional potato farmers do. Leave the cut sections out indoors for a few days so they “cure.” The cut sections will turn brown and leathery, which seals the potato from rot and disease. If you don’t have time to wait, you can coat the cut ends in wood ashes to protect them.
There are numerous methods to grow potatoes, but the general idea is the same. The tubers grow from the roots, and while not edible, the above-ground foliage is important to the plant’s life. You want to bury your prepared seed potatoes, wait for foliage to grow out of the soil, and then cover all but the very top of the foliage with mulch or more soil to encourage more tuber formation. A few ways to do that:
- Dig a shallow trench, cover potatoes with mulch or soil, and then either mulch the growing plants or hill soil around them
- Throw potatoes directly on the ground and cover with a thick layer of mulch, like hay
- Use a tall container, like a trash can, with holes drilled in the bottom for drainage. Add a few inches of soil, add potatoes, and cover with more soil or mulch. Continue adding soil as the potato plants grow.
A few key things about growing potatoes:
- Potatoes need loose soil to grow well. Sweet potatoes can power through dense soils, but regular potatoes aren’t as tough.
- They also need good drainage or they can easily rot in the ground.
- Potatoes can grow in poor soil, but a good dose of phosphorus and potassium do wonders for tuber formation. Add organic amendments like wood ashes and bone meal to your soil, if available.
- Potatoes don’t like heat and will die off in summer temperatures. Start them in late spring, early winter, or in the fall. Potato plants are sensitive to frost but can bounce back well from frostbite.
- It’s key to protect potato tubers from the sun. The sun will turn them green and inedible.
Potato pests: Potatoes are vulnerable to a slew of pests and diseases, most notably the potato bug. Crop rotation is your best defense: wait three years after growing potatoes to grow more in the same spot. You can protect the foliage with organic amendments like diatomaceous earth and neem oil, or chemical pesticides, though potato bugs are notoriously resistant.
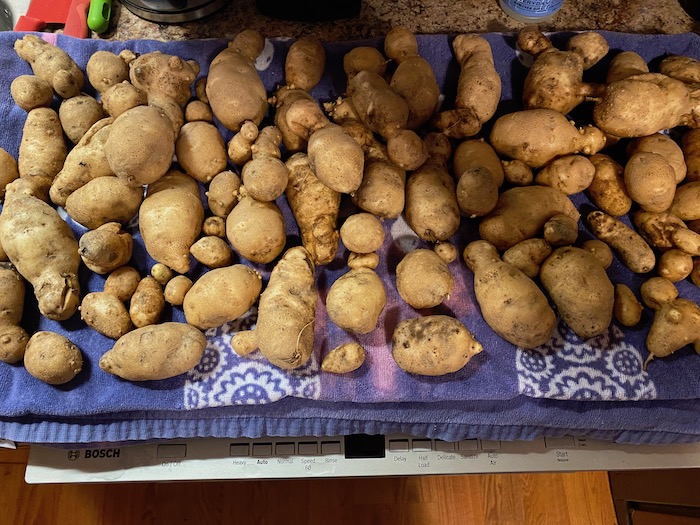
Potato growing time frame and harvest: It takes several months to grow mature potatoes, though you might be able to harvest smaller new potatoes earlier if you need them. Wait for the potato plants to flower and die off, then dig up the potatoes with a fork. Be careful to not damage the potatoes.
Storing potatoes: Eliminate or eat any damaged potatoes. Dry them well. Store them in a cool, dark, dry place with good ventilation, ideally a root cellar. Potatoes stored this way can last a couple of months. If any potatoes form eyes, consider planting them.
Eating potatoes: Most westerners are familiar with the potato and know what to do with them. But if you need ideas…
Propagating potatoes: Set aside potatoes that are growing eyes for replanting.
Field Corn
- Sun: 10 hours per day
- Ideal growing temps: 65°F (18°C) and above
- Transplant or direct sow: Direct sow
- Time to harvest: 60 to 100 days
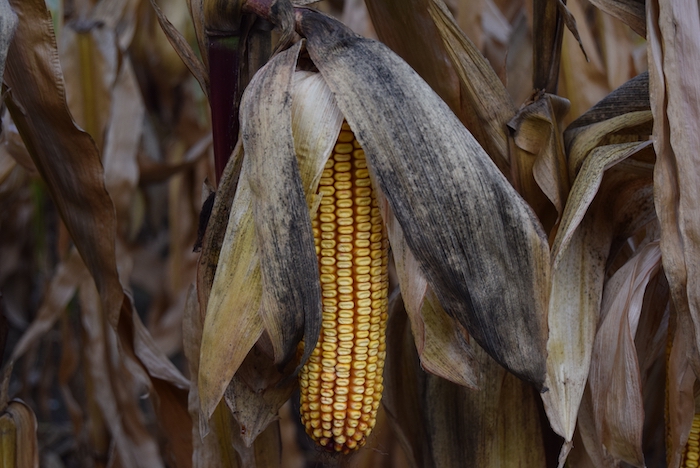
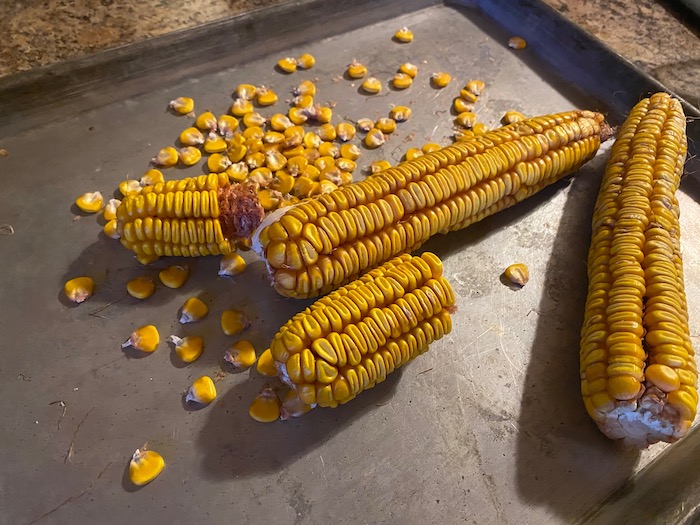
Of the calorie-dense crops, corn is perhaps the least desirable. Corn takes a great deal of nitrogen and space, and if raccoons live in your area, they’ll pounce on your corn the minute it’s ripe. However, corn is a useful and calorie-dense crop that can grow with little attention once established. Corn isn’t just food, it can be turned into flour or alcohol (for medicine, fuel, and yes, drinking).
Skip tender sweet corn varieties that are only good for eating fresh. Opt for hearty seed corns like Hickory King that can be dried as a grain or picked in its young “milk” stage and eaten like sweet corn.
Corn pros: High in calories, low maintenance, versatile
Corn cons: Raccoons love it and will destroy it, needs high-nitrogen soil, takes up a lot of space, processing it can be a chore
Growing corn: Being a field crop, corn does well in a large plot grown in rows. If that isn’t feasible, dig up several mounds and fertilize them heavily with scraps or blood meal. Plant them at least a food apart (check your seed packet). Put 2-3 seeds in each planting spot to maximize germination and later thin each spot down to 1 plant if needed.
A traditional way of fertilizing corn is to dig a hill, put a fish in the bottom of that hill, and plant corn on top. If you don’t have a fish, you could use animal guts, blood meal, manure, or any manner of fertilizers, just put them at the bottom of the hill so they don’t burn the plants.
You can’t grow just a little corn. You need to grow a lot to ensure cross-pollination and good ears.
Corn pests: There are several sorts of worms and diseases that can affect corn, but your biggest threat is raccoons, and they’re hard to keep out. They’ll often climb up a cornstalk, peel a fresh ear, take a bite, and move on to the next stalk.
A few raccoon strategies:
- Plant squashes around your corn. Raccoons hate the feel of prickly squash vines.
- Spray ears with pure pepper spray
- Keep a loud radio playing in your garden at night to scare them off. However, this may bother you neighbors and some raccoons don’t mind the noise.
- Keep a dog near your corn
- Put paper bags over growing ears and secure them with a rubber band
- Surround your corn with an electric fence
- Use live traps baited with cat food and shoot the raccoons you catch (check your local laws). Unfortunately, there are always more raccoons.
None of these are guaranteed to work. Raccoons are smart and adaptable. Plant more corn than you think you’ll need and harvest it once the raccoons get to it.
Corn growing time frame and harvest: Corn takes all season to grow. It may be ready to pick when the silks turn brown and the corn starts pulling away from the stalk. There are two stages to pick field corn in: the milk stage, when it can be eaten fresh, and the dry stage. To see if the corn is in its milk stage, pull back the husk and poke a kernel. If the liquid is clear, it’s too early. If it’s white and “milky,” it’s ready to be eaten fresh. You can leave the field corn on the stalk until fall to dry, at which point the kernels will be hard and sunken.
Corn is best harvested in the morning. Pull down the ear and break it from the stalk.
Storing corn: You need to remove the husk from the corn, a process called shucking. A brush helps get silks off the bare ear. If storing fresh corn, use a knife to slice off the kernels and freeze them.
If you’re opting for dry corn, turn on an oven to 200 F (or lower) and throw the whole shucked ears in for a few hours. Let them cool, and then strip the dry kernels from the ear. A corn cob stripper is a specialized tool that makes it easy, though you can also pry them off with a butter knife. It’s kind of like pulling loose teeth. Put the kernels on a baking sheet and dry them in the oven again to make sure all the moisture is out.
Eating corn: Fresh corn can be boiled, grilled, or roasted. Dry corn can be boiled until soft or you can use a corn grinder to grind it into cornmeal.
Propagating corn: Saving corn seed isn’t recommended. You need to harvest seed from at least 100 different plants to avoid inbreeding. If you want to try it, don’t throw the kernels in the oven because that kills the kernel. Instead, let them dry naturally, put them in an airtight container, and store in the fridge if possible.
Amaranth
- Sun: 6+ hours per day
- Ideal growing temps: 65°F (18°C) and above
- Transplant or direct sow: Direct sow
- Time to harvest: 30 days for leaves, up to 120 days for seeds
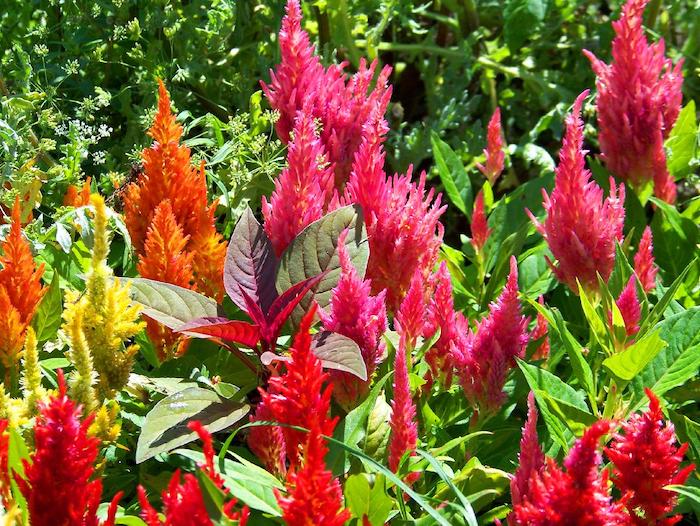
Amaranth is a favorite of TP contributor Redneck and David the Good likes it as a “chop and drop” mulch. Amaranth can be grown either for its spinach-like leaves or for its grain-like seeds, depending on which cultivar you choose.
Amaranth tends to prefer average or even poor soil, and it may actually grow worse in very rich soils. An excess of nitrogen can cause amaranth to grow “leggy,” in which the stems are long and thin.
Amaranth pros: Grows well in poor soil, edible as a green or grain, self-seeds, high in nutrition
Amaranth cons: May perform poorly in well-prepared garden beds, it’s not a food your family is likely used to, may become invasive
Growing amaranth: Amaranth seeds are tiny, so the best strategy, assuming you have a plentiful amount of seed, is to just throw them over your garden bed (called broadcasting) and water them in. Many people grow amaranth for microgreens, and in that case, there’s no reason to thin them out. If you want larger leaves or are growing amaranth for grain, thin the plants out to
Amaranth pests: Pests aren’t a big concern with amaranth. In fact, the amaranth could become a pest, since it self-seeds prolifically. You may want to dedicate a garden bed or a spot to amaranth to reduce those concerns.
Amaranth growing timeframe and harvest: Amaranth greens grow in a few weeks and can be clipped throughout the season. The seeds take all season to grow and dry — when they’re ready you can shake them loose from the plant.
Storing amaranth: The greens should be consumed as soon as possible.
Eating amaranth: The leaves, when picked young, can be used anywhere you’d use spinach or kale. Use them in salads, cream them like you would spinach or kale, use them in soups, or cook them with pork.
Amaranth seeds are a complete protein and similarly versatile. You can use them as chicken feed, simmer them as a breakfast porridge, pop them like popcorn, or use them to thicken soups and stews.
Propagating amaranth: Amaranth plants, especially the grain varieties, drop tons of seeds. Just shake out the seeds, let them dry naturally, and store in a cool, dry, dark place in an airtight container.
Beans
- Sun: 4-6 hours per day
- Ideal growing temps: 45° to 70°F (7° to 21°C)
- Transplant or direct sow: Direct sow
- Time to harvest: 50 to 90 days for green beans, longer for shell beans
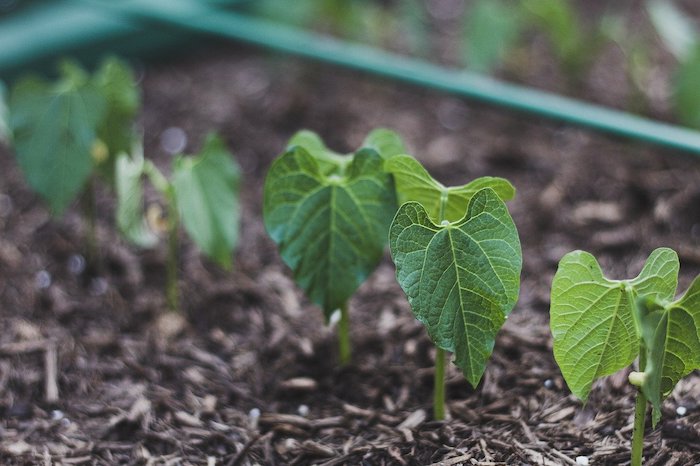
When Thoreau isolated himself in the woods, he practically lived on beans. And if Thoreau could grow them, so can you! What’s great about beans is that they’re nitrogen fixers: they literally pull their own fertilizer out of the air.
Many survival gardeners like the snake bean, which comes from Asia. Snake beans grow up to a yard long (they’re also called yard-long beans), and aren’t bothered by poor soil or hot weather.
Bean pros: Nitrogen fixers, easy to grow, dry beans store extremely well
Bean cons: Green beans aren’t super high in calories, vulnerable to Mexican Bean Beetles, green beans need canning or freezing to store, pole beans need trellising
Growing beans: You grow beans from other beans. Beans seeds are rather large, so they do fine in thicker soils that daintier seeds would struggle in.
You can choose to either grow shell beans (green beans) or dry beans and from there you can decide on pole beans or bush beans. Pole beans require a trellis or pole to climb up but produce more than bush beans.
There are multiple ways to support pole beans. An easy way is to shove a long, straight stick into the ground next to each bean plant. You need to train the bean vine to climb the pole by wrapping it around the pole.
Bean pests: One of the biggest threats to beans is the Mexican Bean Beetle, which resembles a yellow ladybug and can skeletonize the leaves. There are a few strategies you can employ against them:
- Pick off the bugs and crush them, as well as the eggs they lay on the undersides of the leaves
- Plant marigold, nasturtiums, or rosemary near beans to deter beetles.
- Keep beans covered with organic insect repellents like diatomaceous earth or neem oil (you’ll need a sprayer for the neem oil)
- Treat bean plants with an insecticide like Sevin for serious infestations
Bean growing timeframe and harvest: Shell beans start producing in a matter of weeks. Pick them regularly when they reach a good size as this will encourage more bean growth. Dry beans should be left alone until the end of the season. When the pods are dry and make a rattling sound when shaken, they’re ready to pick. Open the pods, dump out the beans, and set them on a tray to dry.
Storing beans: Shell beans don’t store well and need to either be pressure canned or frozen. In a survival garden scenario, shell beans are best used as a fresh source of food in the growing season. Dry beans should be stored in an airtight container and kept in a cool, dry place.
Eating beans: Green beans are another versatile vegetable. Boil them with some salted pork (like country ham or bacon) until they’re tender. You can also blanche them (boil them briefly and throw in ice water) and stir fry them.
Dry beans have to be boiled to be made soft enough to eat. Dry beans can be flavored any number of ways, and pinto beans can even be turned into fudge.
Propagating Beans: You can plant any dry beans you harvest. Set some aside to put in airtight containers. For green beans, cut a few raw beans open, dump out the seeds, and let them dry, then store in airtight containers in a cool, dry place.
Cabbage
- Sun: 6-8 hours
- Ideal growing temps: 45° to 80°F (7° to 26°C)
- Transplant or direct sow: Transplant
- Time to harvest: 70 days
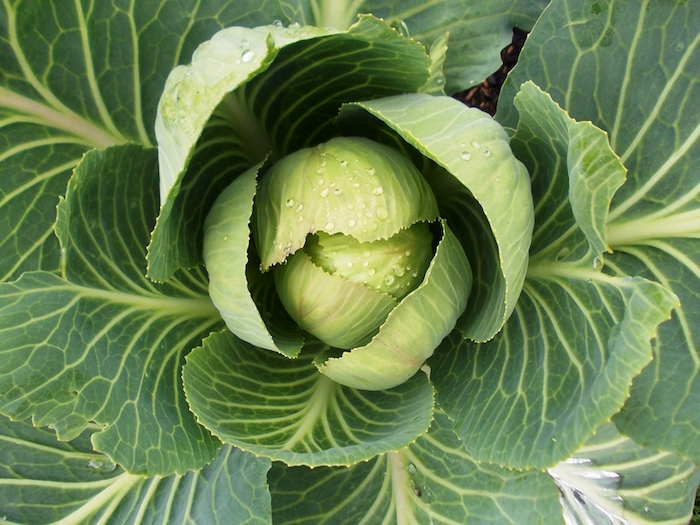
Cabbage is up there with potatoes in terms of survival food. A peasant mainstay for centuries, cabbage is packed with calories and nutrition, and it’s versatile. Cabbage goes great in stir-fries, fried southern style, or turned into sauerkraut. Cabbage seeds are tiny, so you typically need to start them in a potting mix and then transplant them into your garden bed.
Tip: Kale is a brassica-like cabbage, and while it doesn’t have the same caloric content and versatility, it’s easier to grow and packed with nutrients.
Cabbage pros: Versatile, nutritious, frost tolerant
Cabbage cons: Hard to grow, bolts in warm weather, vulnerable to cabbage worms
Growing cabbage: Cabbage should be started indoors in winter or mid-summer. Transplant them to the garden in fall, late winter, or early spring. Cabbage can tolerate temperatures down to 20 F, but can start bolting in temperatures as low as 70 F. Soil for cabbage needs to be rich and high in nitrogen for full heads to form. Cabbages, like other brassicas, prefer alkaline soil, so lime is another good soil amendment for cabbage.
Cabbage pests: Cabbage worms are the main pest to worry about. Inspect cabbages regularly and pick off any worms you find. Birds like to eat cabbage worms, so you can put bird feeders around your cabbages to encourage them to come around. Diatomaceous earth also kills cabbage worms, and floating row covers can keep them off.
Cabbage growing time frame and harvest: Cabbage can take a long time to grow, up to 180 days. Cabbage is ready to harvest when you have a full-grown head of cabbage. Pull the entire plant out by the root. If a head does not form, you can harvest individual leaves. You may be able to just remove the head and let another head form on the plant.
Storing cabbage: Cabbage can last a few months stored in a root cellar. Cabbage can be frozen by slicing it up, blanching it, drying it well, and then freezing it.
For long-term storage, you can make sauerkraut. The total process and its caveats are outside the scope of this guide, but you can place layers of cut-up cabbage in a tall glass or ceramic container. Put down a layer, add a pinch of salt, and then another layer and more salt. Alternate cabbage and salt until the container is full. The salt will draw out the water from the cabbage and aid the pickling process. The Pioneer Woman has a simple sauerkraut recipe with more details.
Eating cabbage: Cabbage is one of the most versatile garden vegetables. You can simply boil it with a bit of salt and sugar, fry it with salted pork, blanche it and use it as a wrap, use it in soups, etc. You can make cabbage steaks by cutting thick slices and grilling or baking them.
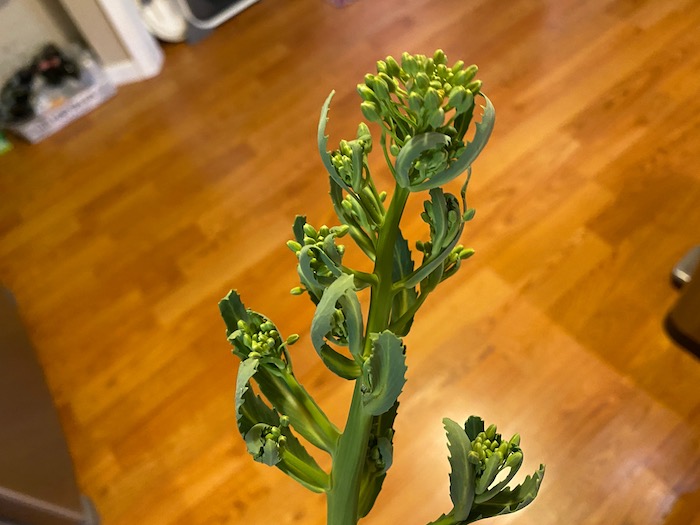
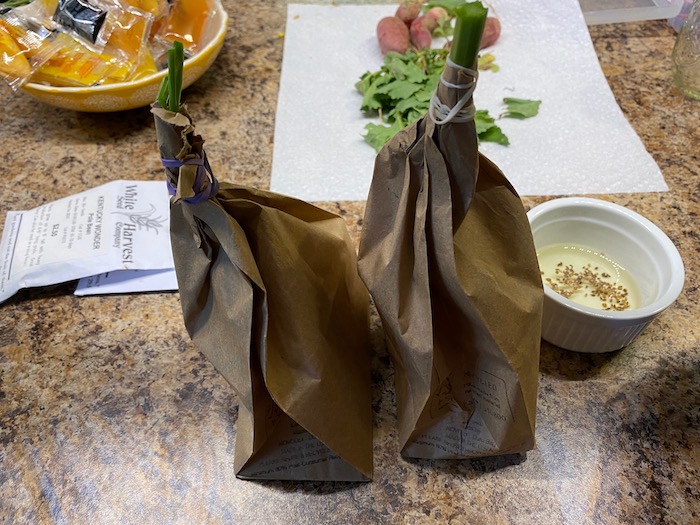
Propagating cabbage: Cabbage seed is a pain to save and may not be worth the trouble. When temperatures get warm, cabbages will bolt, sending up a tall, flowering shoot. Cut off a flower-covered shoot and put it upside-down in a paper bag, wrapping a rubber band around the stem and bag to hold it in place. As the cabbage flowers dry out, they will dump seeds in the bag.
Turnips
- Sun: 6+ hours
- Ideal growing temps: 40°F to 75°F (7-24°C)
- Transplant or direct sow: Direct sow
- Time to harvest: 30-60 days
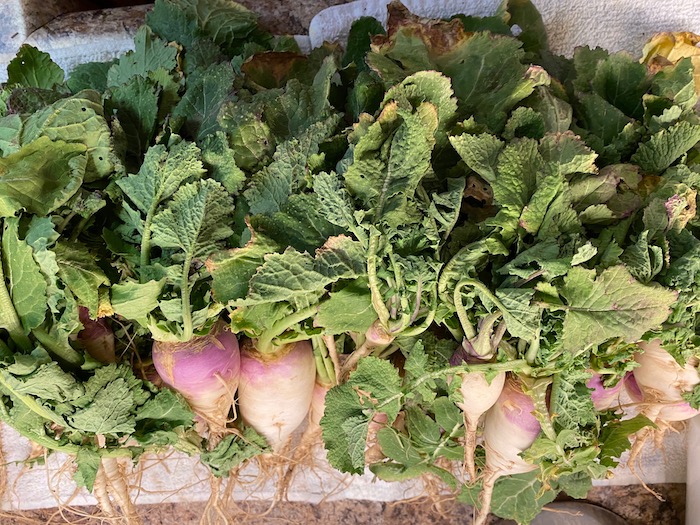
Another cool-weather peasant crop, turnips form both nutritious roots and greens. They’re easy to grow but aren’t many people’s favorite vegetable.
Turnip pros: Frost tolerant, calorie-dense, store well, easy to grow, fast-growing
Turnip cons: Many people do not like turnips
Growing turnips: The best time to plant turnips is late summer or the fall. Turnip seeds are tiny, but since it’s a root crop it’s difficult to transplant. A good turnip-planting strategy is to broadcast the tiny seeds in a garden bed and then water them in. Once they start germinating, thin out to one turnip every few inches (check your seed packet).
Turnip pests: There are a number of pests that can destroy turnips, but if you grow in cool weather they’re not as troublesome.
Turnip growing time and harvest: It takes roughly 60 days to grow turnips, less if you just want greens. Grasp the base of the green and yank the root out of the ground. You may need a spade or fork to help lift the turnip out of the ground.
Storing turnips: The greens can be stored in the refrigerator for a couple of days but should be cooked as soon as possible. Turnip roots can last a few months in a refrigerator or root cellar. Alternatively, you can leave turnips in the ground over winter and harvest when needed.
Eating turnips: A lot of people hate turnips, which is a shame. The greens can be boiled and eaten and the roots can be mashed like potatoes.
Turnip roots can have a very strong flavor, which you can tame by boiling and then draining the water. Chop up the greens and boil with salted pork until the greens are mushy, and then add the cooked roots back in. Serve over cornbread, if available, to soak up the “pot likker.”
Propagating turnips: Leave some unharvested turnips in the ground. When it gets hot outside, turnips grow flowers that you can harvest seed from in a method similar to cabbage.
Garlic
- Sun: 8-10 hours
- Ideal growing temps: Any, but benefits from cool temperatures early on and warm temperatures later
- Transplant or direct sow: Direct sow
- Time to harvest: 150 days
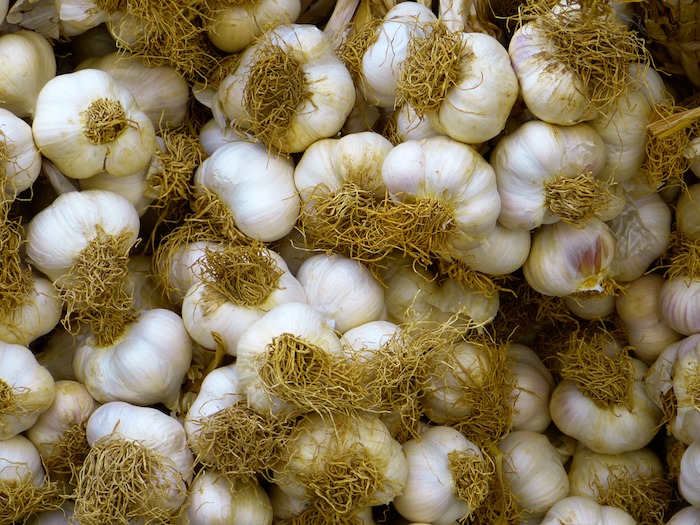
Garlic is great both as a flavor enhancer and for its nutritional value. Garlic is also purported to have many medicinal properties. It’s super easy to grow, but a bit of a pain to store. One big advantage of growing your own garlic is that you can harvest the tasty scapes that usually aren’t sold in grocery stores.
Garlic pros: Easy to grow, tasty, stores well, pest resistant
Garlic cons: Takes a long time to grow, not calorically dense
Growing garlic: Take a head of garlic, break off individual cloves, and plant them about six inches apart. It’s best to start garlic in late fall, as cold weather enhances its flavor.
Garlic pests: Garlic is largely resistant to pests and diseases. Mulch well to suppress weeds.
Garlic growing time and harvest: Garlic takes a long time to grow. If you plant in the fall, expect to harvest in late spring or early summer. In the garlic’s late stage of growth, it will start growing long, tubular scapes. Trim them close to the plant to encourage bulb formation. The scapes themselves are a tasty herb. When the leaves start turning brown, pull the bulb from the ground. You may need to pry them out with a hand spade.
You can plant garlic in the spring, but you won’t get as much. However, it can be a helpful strategy to keep your garlic supply going year-round.
Storing garlic: After picking, garlic must be dried. Traditionally, you braid the garlic leaves together and hang the bunch in a cool, dark, dry place with good air circulation for a few weeks. Then pull them down, cut the bulbs off and store them in a cool, dark, dry place. Garlic can be pickled and canned for long-term storage.
Garlic scapes can be stored in a fridge for months.
Eating garlic: If you’ve never cooked with fresh garlic, you’ve been missing out. Split individual cloves from the bulb and peel them — smashing them with the flat end of a knife makes peeling quick. You can eat raw garlic by itself if you have a strong constitution. If frying garlic, slice up the cloves and fry gently, usually just before adding other ingredients — garlic tastes horrible if burnt. You can also add garlic to soups and stews. Start cooking with garlic and you’ll use it all the time.
Garlic scapes can be used anywhere you’d use garlic. Younger scapes are tender and can be sliced up for salads. Older, tougher scapes should be sliced and cooked to soften them.
Propagating garlic: Save some of your garlic crop for planting. Break off individual cloves and plant them.
Perennials
Most things you grow in the garden are annuals or plants that last only a single season. For long-term sustainability, consider supplementing with perennials, which produce food year after year without needing to replant. Most perennials are not typically grown directly from seed, though they can be.
One type of perennial worth considering is trees, which are usually planted as seedlings sold anywhere from a foot to several feet tall. Fruit and nut trees can be excellent sustainable sources of food, though they take years to start producing. Apple trees are notoriously finicky, but pears, mulberries, and Dunstan Chestnuts are often overlooked. Mulberries grow like weeds and produce berries within just a couple of years of planting if well taken care of. Chestnut Hill Outdoors sells Dunstan Chestnut seedlings and Tennessee Nursery sells all varieties of mulberries. Note that these companies only ship seedlings in a small window in the fall or spring regardless of when you order.
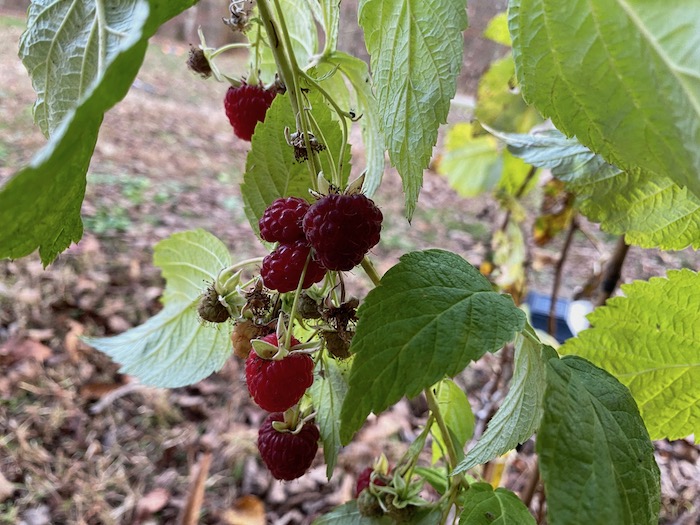
Plant bushes alongside trees, like perennial raspberries and strawberries. These are often planted as rooted cuttings that you partially bury in the ground, just like trees.
Other perennial plants to consider:
- Air potatoes
- Asparagus
- Jerusalem artichokes
Be careful planting these. Air potatoes and Jerusalem artichokes are considered invasive, and may even be illegal in your area. Asparagus is not invasive or illegal, but will come back year after year, and can flourish for decades, so choose their location wisely.