Let’s say you find yourself needing to grow food quickly, but you don’t have a lot of tools to work with, and your soil is either devoid of nutrients or is hard to work. Perhaps the most efficient way to get started is with a simple mound, which survival gardener David the Good calls a “melon pit.”
Melon pits are easy and quick to make, and they can produce a lot of food. They’re a great complement to raised beds, because you can add them to spots where you don’t yet have a raised bed or a raised bed wouldn’t fit.
I made a video showing how I dug a melon pit:
Important bits:
- Melon pits are based on the agricultural practices of American indigenous tribes.
- A melon pit is a hole filled with rich organic matter and then covered with the soil dug from the hole.
- The only tool needed for a melon pit is a shovel, and you can make one in minutes.
- Bury rich organic matter in your melon pit, like kitchen scraps, spoiled meat, animal guts, and dog food.
- Avoid anything full of seeds, anything treated with herbicide, or cat litter.
- Pile the soil you dug out to form a mound over the pit, which you then plant into.
- You can plant immediately after forming the mound or wait a few weeks for the organic matter to decompose and enrich the soil.
- In theory, you can plant anything in a melon pit, but squashes will likely give you the best return on investment, since you can plant three or four and get several fruits from each vine.
What is a melon pit?
Many indigenous American tribes would plant by digging a hole, filling that hole with organic matter, and then using the soil from the hole to build a mound on top. The most famous example is the Three Sisters method taught to European settlers, in which a mound was dug, filled with fish, and then planted with corn, beans, and squash.
David the Good borrowed that method for melon pits. A melon pit is both a planting and a composting method. The organic matter in the hole breaks down, releasing nutrients and feeding plant roots. You can add rich fertilizers to the hole, like chicken manure, that are so high in nitrogen that they would usually damage plants, because the mounded soil helps protect them. Meanwhile, the mound makes for loose, well-draining soil.
In Compost Everything: The Good Guide to Extreme Composting, David the Good explains his inspiration for melon pits:
Some years ago when I was living in Tennessee, I was plagued by hard, rocky, clay soil. When we had a lot of rain it turned into slick red muck… and when we went without rain for a few weeks, it turned into orange crack-riddled concrete. As we saw in the chapter on sheet mulching, I was able to transform this ground into a great garden, but it didn’t happen overnight. Sheet mulching uses a lot of space, is time-consuming, and is a real resource hog. It just takes too long. When I discovered the Native American method it gave me a thought: why not enrich a few small spaces, plant them with squash or melons, then let the vines sprawl around over the grass?
David then tells a tale of teaming up with some Nigerians to buy goat meat from a local Amish community, which ended up with him having to dispose of some unwanted goat parts:
I went out to the garden and started digging pits two to three feet deep into the hard clay on a day when the temperature allowed outdoor work. Despite the ground not being frozen, this still required a pickax and a shovel, making me glad I wasn’t double-digging the entire area. I placed the pits about six feet from each other and threw some ashes in them, along with kitchen scraps, raw manure from a bucket sawdust toilet (more on that in an upcoming chapter!), my wife’s failed beef stew, and yes, awful goat parts.
The results were incredible:
For the first couple of weeks the seeds grew normally, and then something happened. Their color rapidly deepened to a rich green, and they sprang into abundant growth. Those plants needed no additional fertilization and tolerated drought better than the surrounding garden.
Why call it a melon pit? Because it’s an ideal environment to plant squashes. The squash vines grow from the mound and cover the surrounding ground, even if it’s grassy. Plus, winter squash like butternut stores extremely well without much work and has a great deal of calories and nutrients. It’s an easy way to grow sustenance crops.
Technically, you could plant any crop in a melon pit, but squashes are going to give you the best return on investment. A single butternut squash plant growing out of a mound can produce anywhere from 3 to 10 large squashes, and a single mound can support 3 to 4 vines. Corn and sunflowers also do well in mounds, as would any crop that can grow vertically on a trellis, like pole beans or indeterminate tomatoes. Some people even grow trees in mounds.
You could get more ambitious and grow a full Three Sisters mound, but that’s going to add a lot more work and complication. You need a much larger mound to accommodate the three plants, along with much more organic matter. And Three Sisters mounds are tricky. The pole beans depend on the corn growing for support. If the corn doesn’t grow, the beans are doomed. And corn takes a lot of nutrients, which could keep the squash from growing. Growing only squash makes things much simpler, though David also grew sunflowers in his first mounds.
Digging a melon pit
So far, I have three raised beds set up, with a fourth one planned. I have a lot of unused space, and like David had, I have hard Tennessee soil that’s tough to work. I want to maximize food production while minimizing time and labor. So I decided to try melon pits for myself.
You need four things to create a melon pit:
- A shovel
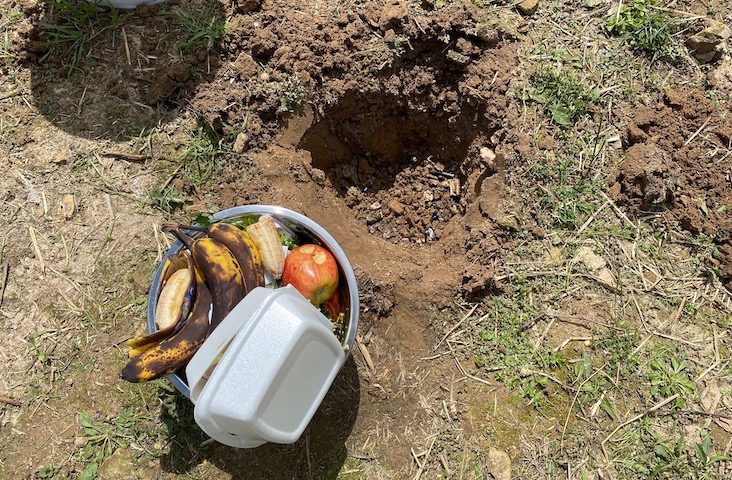
- A big bowl or bucket of rich organic matter such as kitchen scraps, animal guts, fish, manure, or dog food
- A patch of land at least 12 feet by 12 feet, to accommodate the squash vines
- Seeds
I like to grow Waltham Butternut squash. It’s a great producer, has a lot of nutrients and calories, a mild flavor that makes it versatile in dishes, and it stores well. You can grow any kind of squash or melon you like, and that also includes cucumbers, which are related to squash. Corn and sunflowers would also work well, but I think hardy winter squash is your best bet.
You can dig a melon pit right before planting or even a few weeks before. Start by picking a spot. The mound doesn’t take a lot of space, but the squash vines will, so make sure to give them about six feet in all directions.
Next, gather materials for the melon pit. David the Good recommends putting some wood chunks at the bottom to help hold in moisture. I’m not sure my heavy clay needs that, but I do it anyway.
Next, you need enough organic matter to fill the hole you’ll dig. You don’t want cardboard and paper towels. You want the rich stuff like spoiled lettuce, banana peels, and meat. If you slaughter your own animals, the leftover guts are an ideal addition. If you don’t have meat, use dog food, which is basically pelleted meat. Just use whatever you can. David the Good even tosses chicken and human manure into his pits.
You can throw pretty much anything organic in your melon pit, but there are some things you probably want to avoid:
- Anything with seeds
- Cat droppings (lots of ammonia, risk of toxoplasmosis, and just gross)
- Anything treated with herbicides (especially aminopyralid)
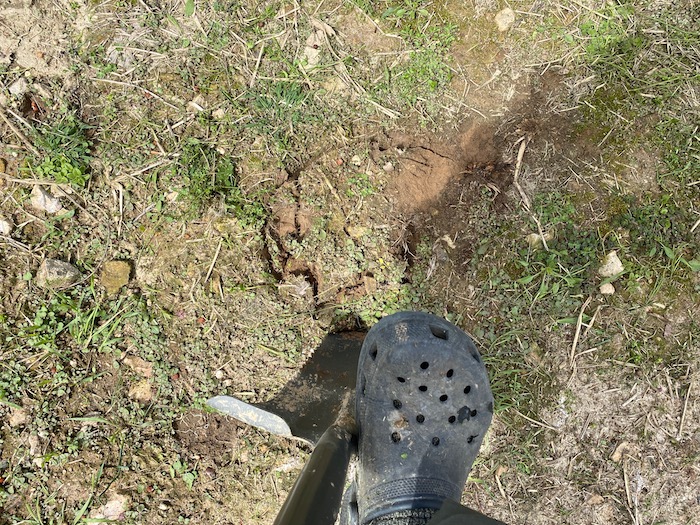
After I’ve picked a spot, I like to go over it with a flame weeder to burn away weeds and weed seeds, but that’s completely optional.
Next, dig a hole. It doesn’t have to be large in diameter — mine are only about a foot wide, but you want it to be two to three feet deep. You want to bury your goodies well so animals don’t dig them up.
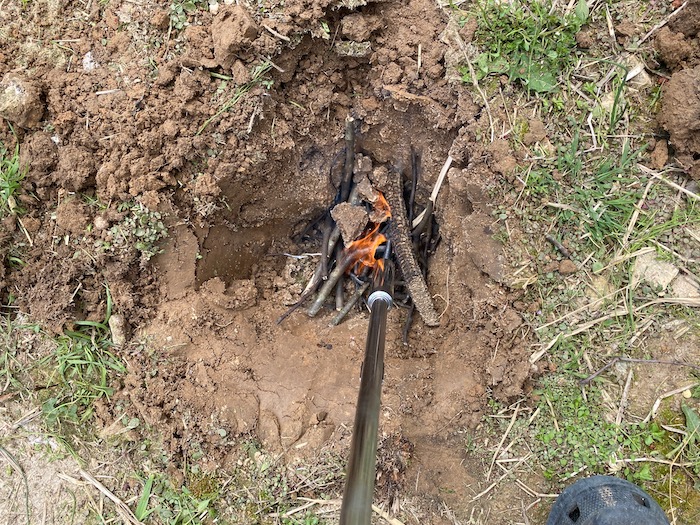
Once you have a hole, drop in wood chunks if you have them. If you have a way to make fire, you can light them on fire and then extinguish them with the dirt you dug out to make biochar, which enriches your soil and helps regulate moisture. I do this with my flame weeder, but again that’s totally optional.
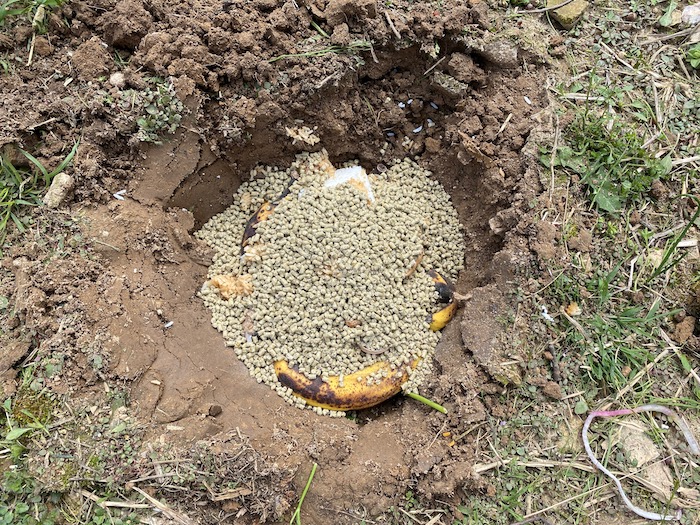
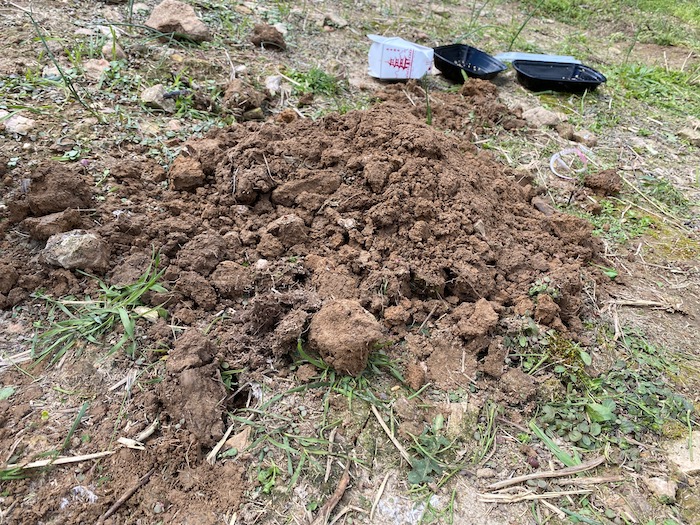
Then fill the hole with your organic matter and cover it with the dirt, forming a mound. If you have a flame weeder, you can work it over the mound to burn away weed seeds. (OK, I just like burning stuff with the flame weeder.)
That’s it! It takes me about 30 minutes to create a melon pit, including the time to get the shovel and gather materials. You can plant right away or give the stuff a few weeks to compost. I’m waiting until all danger of frost has passed, which will be sometime in May.
When you’re ready to plant, plant three or four squash seeds on opposite ends of the mound and water them well. If your mound is fertile enough, you can produce up to four vines from a single mound (that’s about as many vines as a mound can physically support). If all of your seeds germinate, but they’re growing slowly, cull one or two of the weakest-looking to give more nutrients to the rest.
I’ve dug two melon pits so far, and plan to dig at least three more. I’ll post an update at the end of the season to let you know how they performed.
You are reporting the comment """ by on