A dedicated cooking/boiling kit is one of the first things experts recommend adding to your go-bag once you’ve got the basics covered. Because a good go-bag is designed to support one person for a few days as you change locations — you’re not trying to live out of it indefinitely, nor are you trying to support an entire group with it — a complete go-bag cooking kit can and should be pretty minimalist.
After some research, I’ve put together a personal cooking kit that is inexpensive, compact, and versatile and comes in at just a little over a pound.
Considerations for cooking on the run
While bugging out on foot, keep the following considerations in mind when it comes to food:
- Ready-to-eat food is the core of your go-bag calories. Prepared food is supplemental, for extending your calorie runway.
- Don’t plan on sumptuous meals that require a well-stocked kitchen.
- Any cooking will have to be done with minimalist, lightweight gear.
- Prefer boiling to any other kind of cooking, since it’s easy and has a ton of survival uses beyond cooking (e.g. sanitation, water treatment).
- You want easy clean-up.
- Remember that food isn’t your highest-priority survival item. You can likely go a few days without it.
My first go-to for go-bag food is lifeboat food bars like those from Datrex and SOS. Each block lasts a few days and doesn’t require cooking. Ideally, that should be enough to get me where I need to go, and I won’t have to cook at all.
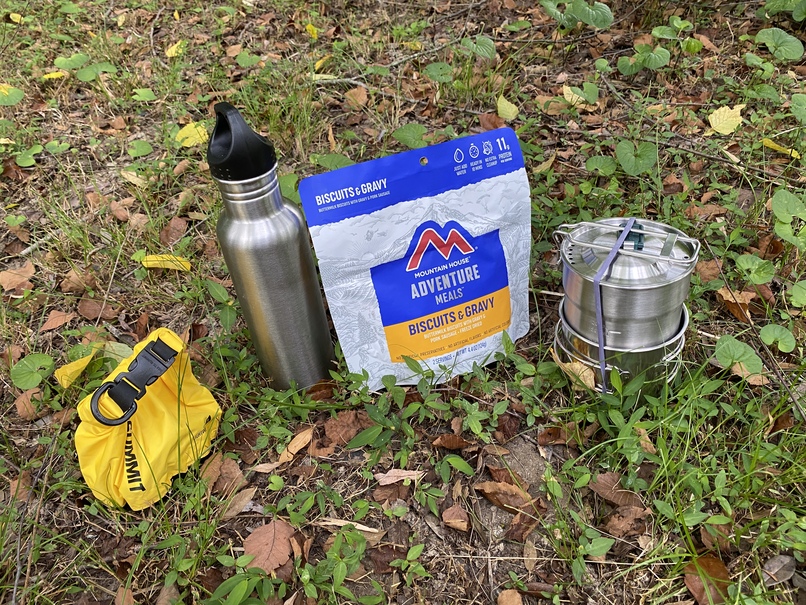
Of course, you can only eat ration blocks for so long (and they’re heavy). My personal choice for extending my time window of survival is freeze-dried meals from Mountain House. They’re lightweight, easy to cook, and easy to clean up. Simply boil water, dump it in the bag, stir it up, close it up, and let it soak. They’re not cheap, but it’s not a huge expense to keep a couple in my go-bag.
With all my combination of ration blocks and freeze-dried food, I can realistically expect to last five days on foot — maybe up to a week.
The pot and cup
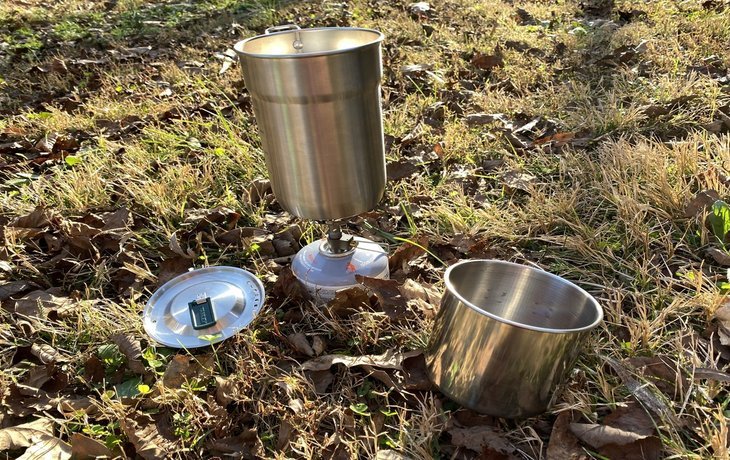
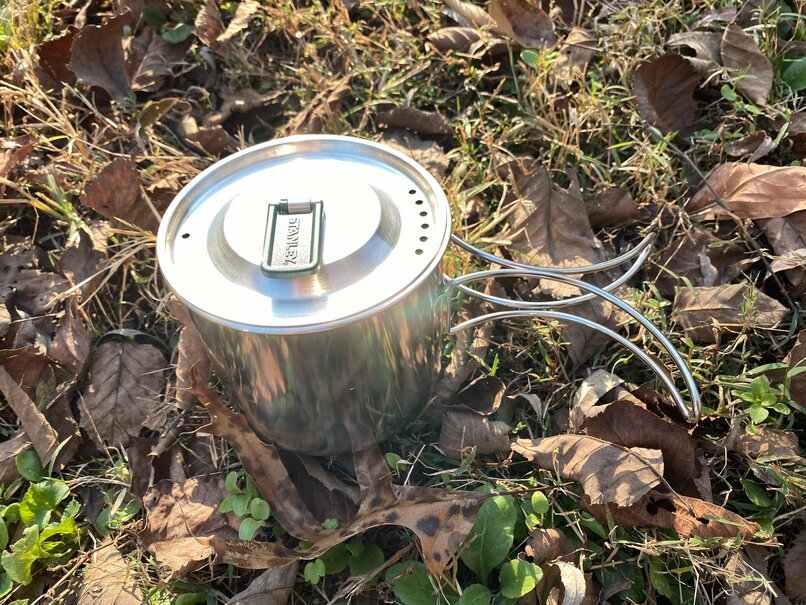
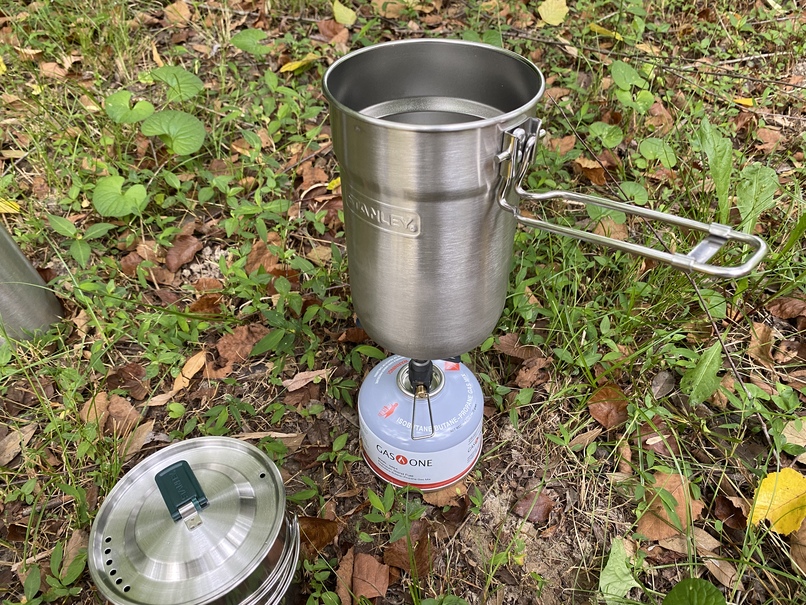
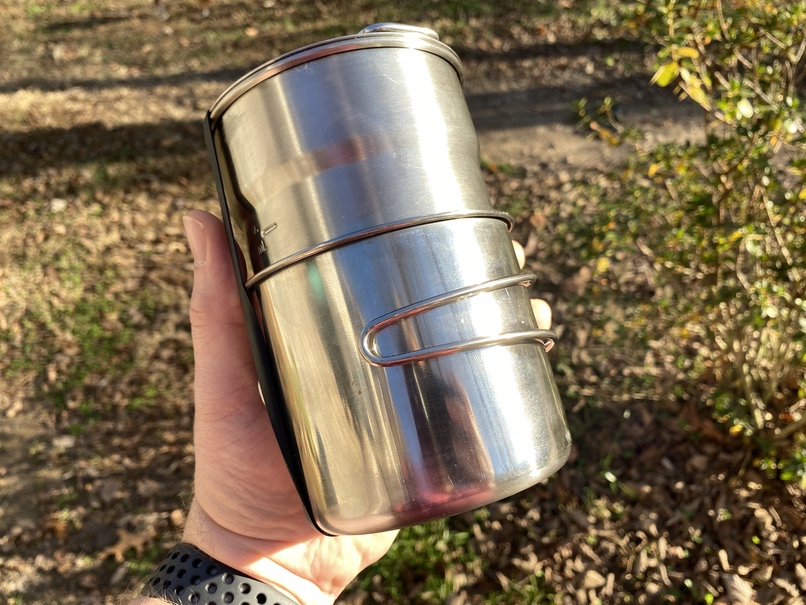
The core of the kit is the classic Stanley Adventure cook set. It’s a clever stainless steel design featuring a locking pot handle that also holds the lid in place for storage. It has graduated marks indented in the side for measuring water or other ingredients.
The kit is cheap, lightweight, and durably constructed. My only complaint is the plastic tab on the lid, which seems to inevitably melt with enough time and heat exposure, but resourceful YouTubers have found that it can be replaced with a cheap metal keyring.
The Stanley Adventure comes with two plastic cups, but I keep them out of the kit because they’re heavy and they take up a lot of room in the pot that can be used to store more useful stuff.
The pot is good enough to cook and eat in, but you can never have enough containers, and it’s nice to be able to fix a hot beverage. GSI makes a nice stainless steel cup that the Stanley Adventure nests in, but you can save some change with Walmart’s shameless knock-off, which is only $5. The cup features fold-out handles so you could also cook in it if need be. The handles are curved so they fold around the cup for compact storage. The lid of the Stanley Adventure even fits on the cup, giving you more options in the field.
One of the things I like about this setup over something like a Jetboil is that the Stanley Adventure doesn’t mind being tossed into a fire. And Jetboils aren’t cheap. The Jetboil Zip, the least expensive model runs for about $85. Our kit, including fuel and a utensil, costs about $50. That’s a big savings, especially if you need to outfit more than one person.
But one of the Jetboil’s advantages is that you don’t need to build a fire to cook or boil water. What if I told you you can buy a gas stove that will not only fit inside your cook kit, but in your hand? The BRS 3000T fits the bill for under $20.
The stove
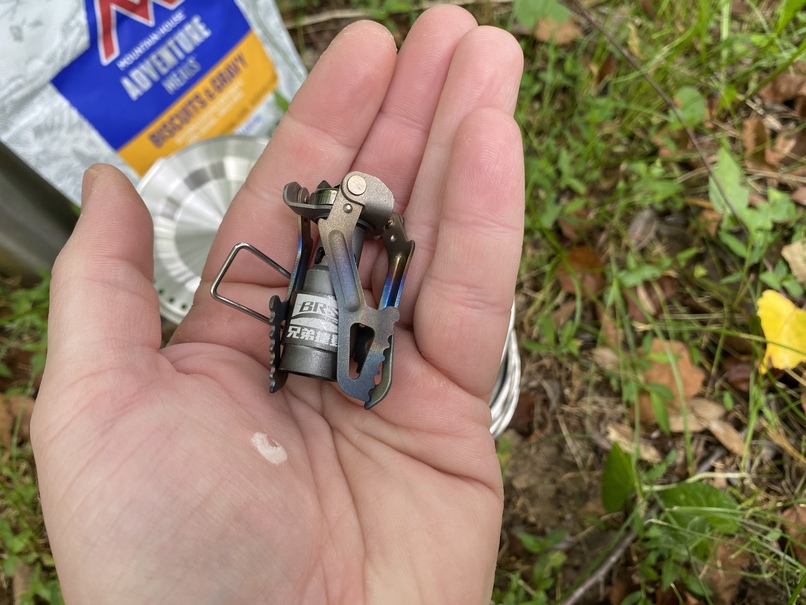
The BRS stove is an ingenious but fiddly design. The legs and valve handle fold up for a compact design that can fit into the tiny included drawstring bag, but you have to be careful unfolding it, since one leg can block another and prevent it from unfolding. But none of the legs feel flimsy.
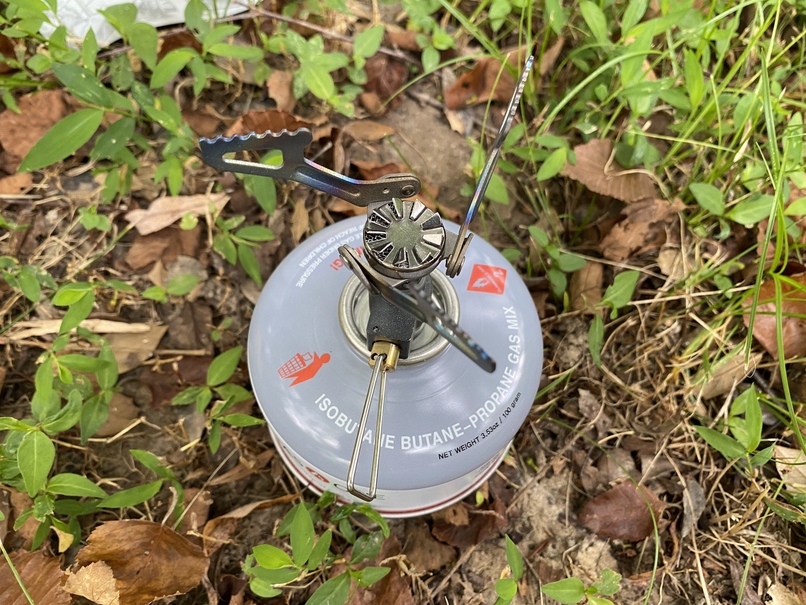
You unfold the BRS stove and screw it onto a can of camping fuel—a mix of butane and propane. You then twist the valve handle to open the gas and light it with something from your fire kit like a Bic lighter, match, or ferro rod.
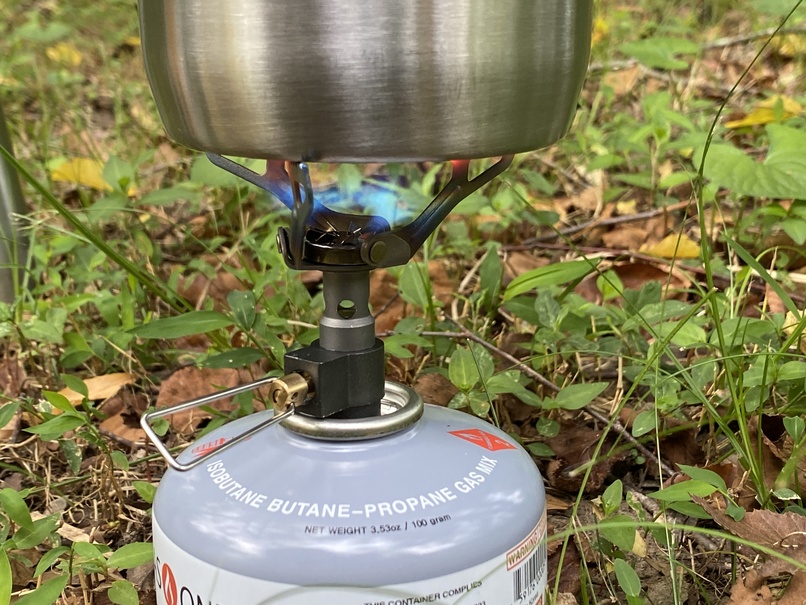
The only bad thing about using the BRS stove is that, because of its light weight, it’s easy to tip over, so handle with care. After I boiled my first pot of water I accidentally dumped it on the ground and had to start over. Thankfully, it only takes about three minutes to boil a liter of water. Actually, BRS claims 2 minutes 58 seconds, and in my tests that is spot on.
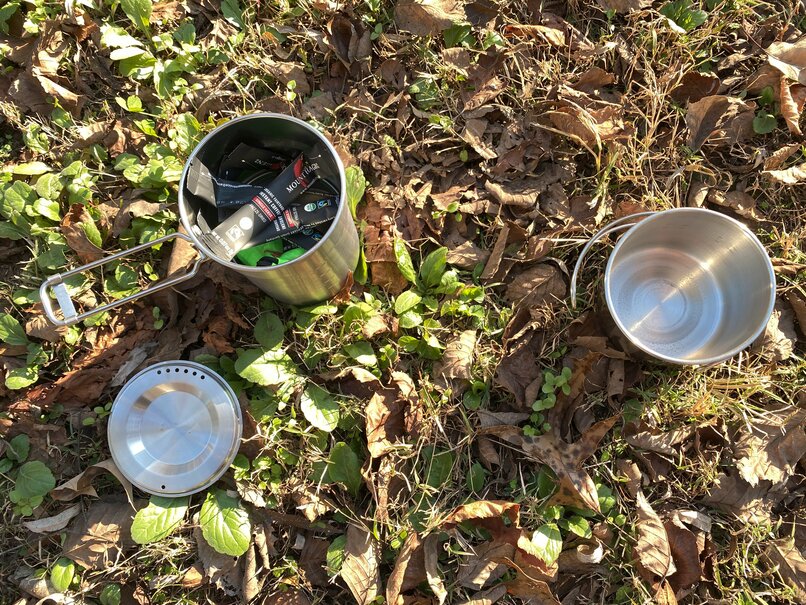
What’s great is the fuel canister fits in the bottom of the Stanley Adventure. If you put it business-end down, the concave bottom of the canister leaves enough room for the stove and other goodies like freeze-dried coffee packets. You could also throw in a mini Bic lighter as a backup fire source—there’s quite a bit of room in there.
One problem you might have with this setup is if the gas canister slips past the graduation marks, it can get stuck. It’s annoying, but not a dealbreaker: just turn the pot upside down and smack it hard on the ground. The Stanley Adventure and the fuel canister are durable enough to take the abuse.
Rounding out the kit
But wait, what will you eat with? I found that this folding titanium spork fits in the empty space in the Stanley Adventure. I had trouble with the spork folding back on itself during usage until reader SK pointed out that you can slide the bar at the end of the spork toward the hinge to lock it in place—in the first picture below, it has the word “titanium” on it.
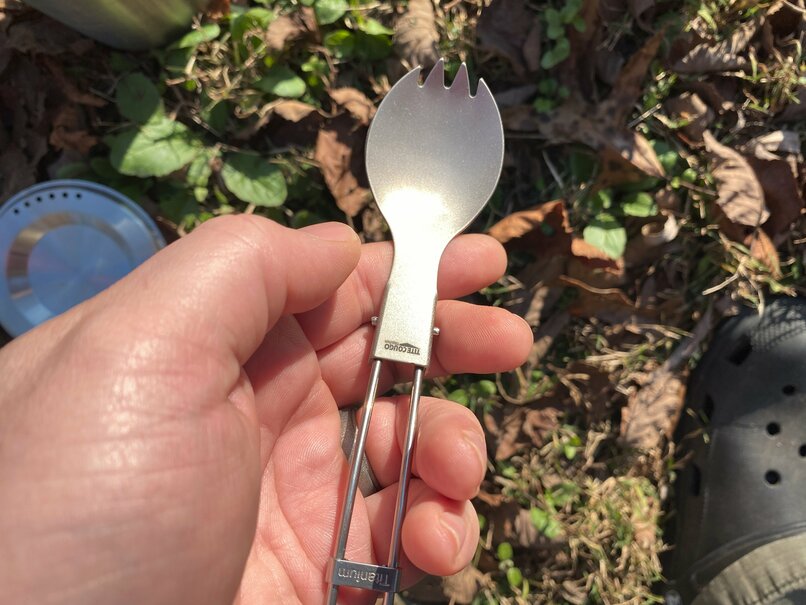

As we pointed out in our guide to sporks, folding sporks are pretty lousy. You might consider a better-quality spork to keep elsewhere in your bag or somehow affixed to the outside of the cook kit.
Read more: The best sporks for your go-bag
Once it’s time to put the kit together and shove it in your go-bag, simply slip a ranger band over the whole kit to hold the cup and pot together.
Cleaning up
We’ve received a lot of questions about how to clean a go-bag pot. I personally don’t carry anything specific in my kit because my plan is to just use it to boil water and dump it in a Mountain House bag. If I make coffee, I’ll just rinse the cup out with water. If I need to wipe out a container, I keep several multi-purpose bandanas in my bag.
If that’s unsatisfactory, there is a clever hack. Cut down a thin scouring pad—one of those green 3M ones—so that it fits between the pot and the cup. That also provides a bit more padding between the two. I’m not a big fan of this, because the green pads tend to flake and leave green dust behind, but if you’re worried about cleaning big messes, it’s an easy option.
In my experience, boiling water does a pretty great job of cleaning on its own, especially if you follow it with a scrubber. The key is to clean up immediately so food doesn’t have a chance to harden and stick. Ideally, you should have some camp soap in your go-bag for larger messes.
You are reporting the comment """ by on