Even if you’re in a small apartment or have killed everything you’ve tried to grow in the past, you can garden. It doesn’t require lots of money, time, or space. You do not have to become a hardcore hobbyist spending all of your free time in the dirt just to learn the core 80-20 skills.
As long as you end up with something edible, you’ve succeeded! Even lousy homegrown vegetables are often better than anything you can buy at the store.
But gardening requires some knowledge and practice — it’s almost never as simple as digging a hole, dropping whatever seeds you have in the ground, and then waiting until harvest. You need to know how to prepare the ground, what to plant, how to plant it, get rid of weeds, fend off pests, etc.
So while anyone can learn to garden and it’s a reasonable goal to get to the level where you supplement your store-bought diet, it’s not as easy or fruitful as some people think. For example, people make the mistake of assuming they can go from someone who’s never grown food to suddenly growing enough to feed their family after a major catastrophe.
It just doesn’t work that way. So if you just want to get your food preps covered, there are easier ways:
- Best survival food kits — buy one kit, put it in a closet, and you’ve got the basic ‘two weeks of food’ covered
- Best food blocks / lifeboat rations — great for kits / go-bags
- Best staple ingredients that last a long time in storage
- What foods to buy from the supermarket for your survival pantry
- How to use the First In First Out method to prep for free
- Best MREs (Meals Ready to Eat)
But stored food will eventually run out, or maybe you get separated from your stores. Gardening is obviously one of the ways to get more food in a long-term scenario besides hunting, fishing, trapping, and foraging.
There’s a lot of value that comes from personal experience. Local details, such as your soil and climate, means it takes trial and error to become a good gardener — the local gardener you drive past with the enviable harvest has probably killed more plants than you’ll ever successfully grow.
Thankfully, new products and methods are making it easier for anyone to dip their thumb in green, even if it’s just a small amount of garnishing herbs like basil or cilantro grown in your kitchen.
Many people get started with a small box/bed, maybe on their back patio or balcony, and just integrate the modest harvest into whatever they’re cooking alongside store-bought ingredients. That small time and money investment can teach you a lot that might pay dividends in a SHTF situation later.
In order to consider gardening part of your prepping, you at least need to have some materials and knowledge on-hand before an emergency hits, and ideally already have a garden going. If you wait until SHTF to take the very first steps with gardening, you’ll be at a disadvantage without at least having basic tools, seeds, and fertilizers ready to use.
Two of our recommended offline resources are David the Good’s Grow or Die: The Good Guide to Survival Gardening and Steve Solomon’s Gardening When It Counts. Both books are unique in that they focus on gardening after SHTF. David the Good’s book is a bit shorter and more accessible, but both are very much worth reading.
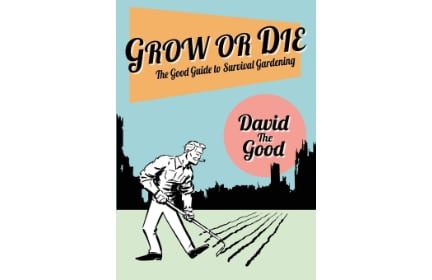
Grow or Die: The Good Guide to Survival Gardening
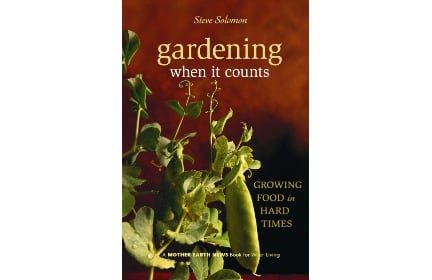
Gardening When It Counts
Another excellent book is The Mini Farming Bible: The Complete Guide to Self-Sufficiency on ¼ Acre by Brett L. Markham, which offers straightforward, common-sense advice on maximizing food production in a small space in a cost-effective way.
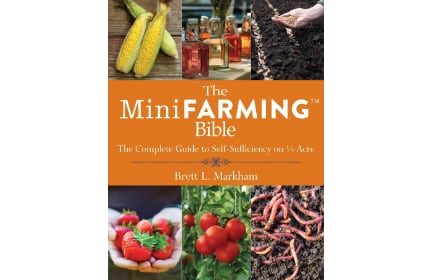
The Mini Farming Bible
More: Best books for your prepping library
- Basic steps to start gardening
- Cost, time, and effort
- Considerations for preppers
- Know your hardiness zone
- Setting mental expectations
- Core concepts of what plants need to grow
- Types of gardens
- The importance of compost
- Soil types
- Soil amendments
- Mulch
- Cover crops
- Dealing with weeds
- Water considerations
- Dealing with disease
- Combating pests
- Managing temperature
- Planting seeds vs. transplanting
- Common debates
Basic steps to start gardening
- Understand your local climate and “hardiness zone”, what can grow there, and when.
- Decide what you want to grow and how much of it, then buy seeds.
- Figure out what kind of soil you already have around, including what core nutrients you naturally have too much or too little of.
- Decide how you want to garden: digging rows in the ground, piling new soil on top for a no-till bed, building raised beds, hydroponics, etc.
- Similarly, decide where you’ll garden. Hydroponics can happen inside, for example, while other types of beds may need a specific spot of your yard for optimal sun.
- Start composting sooner than later. It takes time to get the ball rolling but pays huge dividends, especially in emergency situations.
Cost, time, and effort
One of the neat things about gardening is that it can scale to pretty much any budget. The rich and poor both garden. If you’re truly scrapped for cash, you can save some seeds from a tomato, dig some dirt out of the backyard, put it in some disposable cups, and plant. Don’t let your budget keep you from gardening.
But gardening is one of those things where you make choices between time, money, and effort. You can often spend money to save time and effort, for example, or do more work to save money. Of course, you can also set up a garden that requires a lot of all three — those are often called farms 😉
There’s a dizzying array of variables, but here’s some examples of how you might spend various budgets to get started.
$100:
- You’ll be using your native soil and the sweat of your brow to prepare garden beds. You’ll spend hours up front and over time, since you’re saving money in favor of doing more work yourself (eg. weeding and watering).
- Basic tools like a hoe, perhaps bought used at a yard sale.
- A few seed packets at $1-5 each.
- Basic amendments to help your plants grow.
$200:
- Saving time and labor by buying soil or compost to fill a raised bed you build out of lumber or other materials. This also includes the tools, seeds, and amendments from the $100 tier.
- You could also choose to skip the frame and invest more in soil/compost.
$300:
- Save more time and labor with a quality raised bed kit (like one from Birdie), which costs more money, but will last longer than lumber.
$1,000:
- Instead of going with raised beds, buy a tiller (assuming new price) and the stuff from the $100 tier. The tiller will make working native soil much easier and quicker than hand tools.
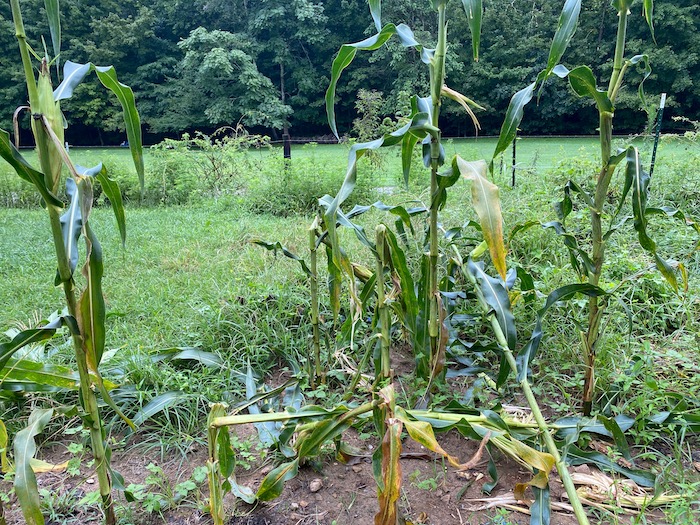
Grow time: While it of course varies from one plant and locale to another, you might get 1-4 growing cycles within a given year (if growing outside in the elements). Germination typically happens in the 1-2 weeks after planting, which is when you’ll see little sprouts form. For faster-growing crops such as greens, they’ll be ready for harvest in 4-6 weeks after planting. Bigger crops like corn take the whole season. Seed packets will give you guidelines.
Be prepared. Don’t be a victim.
Want more great content and giveaways? Sign up for The Prepared’s free newsletter and get the best prepping content straight to your inbox. 1-2 emails a month, 0% spam.
Considerations for preppers
Almost every gardening guide out there teaches you how to garden in ‘normal’ life, not in an emergency or austere context. That means they assume you’ll have easy access to fuel to power machines, endless clean water, electricity to power grow lights, fertilizers and pesticides, and so on.
You can certainly take advantage of those modern conveniences. But if you’re in a situation where you actually need to depend on your garden to survive, that likely means things are pretty bad in the world and you can’t depend on those conveniences.
Important things to think about:
- Know how to find, catch, store, and recycle water.
- Have a core set of unpowered hand tools, namely: a shovel, hoe, rake, and wheelbarrow.
- Composting is even more important than normal, so that you have a way to turn random organic waste into plant food without needing to buy from the store.
- Think about your garden — and particularly your soil — with a long-term horizon. If you build up your soil quality when times are good, it will coast further when times are bad and you can’t get store-bought amendments.
- Keep seeds on hand instead of always buying more at the beginning of the season. As 2020-21 showed us during Covid, seeds can be hard to come by in a crisis.
Know your hardiness zone
Every region has a different climate, which determines what you can grow and when you can grow and harvest it. The US Department of Agriculture has split the United States into 28 hardiness zones: 14 main zones, each with two sub-zones.
Look up your zone at the USDA website or find your country’s list.
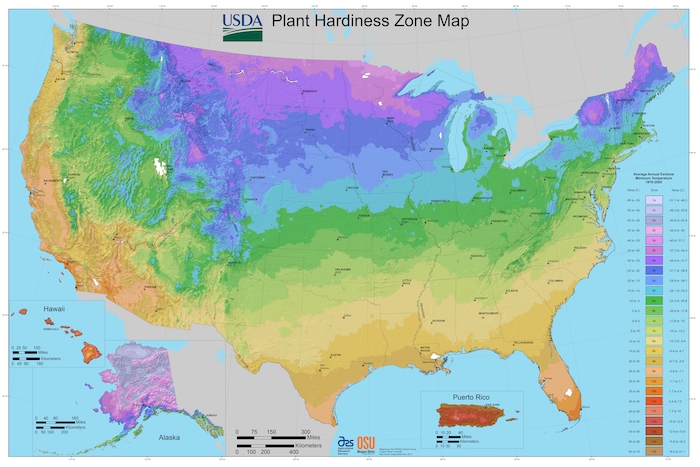
Some examples:
- Albuquerque, New Mexico: 7b
- Columbus, Ohio: 6a
- Houston, Texas: 9a
- Nashville, Tennessee: 7a
- Orlando, Florida: 9b
- Portland, Maine: 5b
- Tucson, Arizona: 9b
It’s essential to know which hardiness zone you garden in. Planting instructions on seed packets usually refer to your hardiness zone when determining the best times to plant. Also, if you ask for gardening help online, the first thing other gardeners will want to know is your hardiness zone.
Keep in mind that as the climate crisis continues to change our environment, your zone may change over time.
Setting mental expectations
False expectations cause many new gardeners to end up feeling overwhelmed or disappointed to the point they quit, grumbling about how the gods have cursed their soil or that they don’t have a green thumb — but outside of the Hulk, Grinch, Martian Manhunter, and Swamp Thing, no one has a natural green thumb.
The most important thing: Above all else, if you have coaxed plants into producing some amount of food, you have succeeded. Perhaps you could have had greater success, but any time you are producing your own food, you are succeeding at gardening.
You will fail: Even if someone has a natural talent for gardening and all the right equipment, they will still fail. Gardening is an exercise in failing, learning from mistakes, and iterating. That’s how people become great gardeners, and even the greats will often fail when they move to a new location.
Timing is everything: One of the most difficult adjustments to make when you start gardening is getting in tune with the timing of nature. Cold weather kills many garden plants, or at least stunts their growth, so you have to know when it’s safe to plant. You also need to know when the sun rises and sets because that usually determines when you should work in your garden.
There isn’t a “right way” to garden: Like any hobbyist culture, you’ll hear plenty of opinions and arguments. Some people bury crystals in the soil. It’s fine to have your personal choices about things like whether or not to use chemicals, but recognize that gardening is mostly personal and there are few very dogmatic Best Right Ways.
Gardening is hyperlocal: One spot in your garden might perform differently than another. What works for someone across town might not work for you. What works for a garden author or YouTuber might not be right for you. If your neighbors garden, they can often be your best resource because they may know location-specific information that no one else does.
Every plant is different: You have to do the research on every plant you grow. Some like hot temperatures while others prefer cool temperatures. Some germinate fast while others germinate slowly. Some plants get along better with some plants than others. Every plant is different, and it can take time to know the characteristics of each one you grow.
You might have to make hard choices: Gardening is often synonymous with peace and tranquility, but you also often have to make tough decisions such as what lives and what dies. You might need to tear up some healthy plants to let other ones thrive, for example, or take steps to discourage or kill bugs.
Organization pays dividends: If you don’t carefully organize and label the plants in your garden, it’s easy to get confused. “Are these peppers or tomatoes?” “What variety of corn did I plant here?” “Did I just mistake my lettuce for a weed?” Organization will set you free and prevent foolish mistakes. It also helps to keep a journal of what you planted, when you planted it, what amendments you used, what worked, and what didn’t.

Core concepts of what plants need to grow
Wild plants survive without any help from humans because they get what they need for photosynthesis from the natural environment around them.
Domesticated crops that you’d grow in a survival garden are a different story. If the conditions aren’t right, they might not produce much food or even grow/sprout at all.
This is one of the biggest things new gardeners learn and why people who “don’t have a green thumb” might not be as doomed as they thought. It’s easier said than done, but the name of the game is putting the right ingredients together so life can… uh… find a way.

Carbon dioxide: CO2 is naturally in the air around us, so your job is to make sure your plants can breathe. If you put too much mulch around a young seedling, for example, you’re choking off the plant from the CO2 it needs in the open air.
Oxygen: While the top of the plant breathes in carbon dioxide and releases oxygen, the roots do the opposite. So the growing medium needs to accommodate a plant’s oxygen needs. For plants grown in soil, this means loose, fluffy soil that has plenty of air pockets and drains well so as to not accumulate too much water around the roots and drown them. Hydroponic gardeners get around this by pumping air into the water.
Water: Plants absorb most of their water through their root systems. But too much water can be a bad thing because it literally drowns the roots, preventing them from breathing in needed oxygen. Too much water can also breed disease.
Soil / growing medium: Plants have extensive root systems that anchor them to the ground and absorb crucial nutrients. For some plants, like potatoes, the root is the end goal of what you’re trying to harvest. The most common growing medium is soil, but technically anything that provides the plant with the ingredients it needs can work. Hydroponics is a field of agriculture devoted to growing plants in water, for example, and many gardeners like to start seeds indoors to extend the growing season and they typically use a sterile and soil-free seed-starting mix.
Light: The sun is not required for photosynthesis, just visible light. That’s why you can grow food indoors using electric LED lamps. Many plants need lots of light or full sun, but others, like lettuce and some delicate herbs, will suffer if they have too much light.
Correct temperature: Plants generally like warmth, but it’s important to know how much each crop wants. Plants like peppers, bananas, and pineapples like it hot, which is why they do so well in tropical climates. But others, like lettuce and kale, prefer cooler weather and will wither or bolt in hot weather. For a plant to “bolt” means that it grows taller, sprouts flowers, and starts putting out seeds, which ruins the flavor of the leaves. Some plants even have their flavor improved by exposure to a little frost, like turnips, collards, and garlic. But even then, there are limits to how cold a plant can get without suffering damage.
Nutrients: Plant roots draw necessary nutrients from the soil. The most important are nitrogen (chemical symbol N), phosphorus (P), and potassium (K), often shortened to NPK. Fertilizer labels use a standard nomenclature to indicate the percentage levels of these elements. For example, a 10-10-10 fertilizer has 10% nitrogen, 10% phosphorus, and 10% potassium. Commit this information to memory, because it’s essential when choosing fertilizers.
Just like with water and light, you can have too much of a good thing. Too much nitrogen can burn plant tissue (creating brown dead spots), cause root vegetables to overgrow their stem and leaves while crippling the root, and generally ruin your soil for vegetables.

NPK isn’t the whole story, which is why they’re called primary macronutrients. There are also important secondary macronutrients like calcium, magnesium, and sulfur. There are also micronutrients like iron and copper that have a more subtle role that’s still important for plant health and producing nutritious food.
Protection: Your job is to protect your plants from pests, pestilence, and weeds. Much of the active work once your garden is planted is guarding against these dangers.
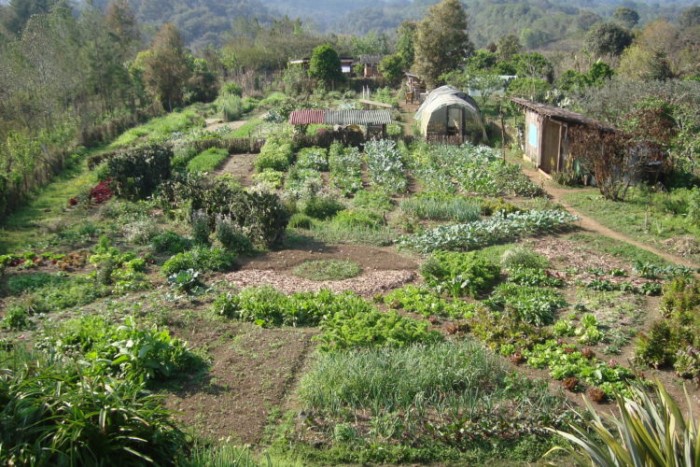
Types of gardens
Below are the common ways people garden. Most people have limited choices based on how much and what kind of space they have around their home.
That said, experts recommend most people start smaller, such as a raised bed that’s a few feet on each side. You’re better off with a small garden bed that you tend well than a sprawling garden full of weeds and withered vegetables.
Row crops
Considered the “standard” method of growing food in the US, especially at scale because it’s particularly well-suited to machinery like tractors or draft animals. A series of tools breaks the soil into increasingly smaller fragments, a process called tilling or cultivation, until the soil is fine enough to accommodate seeds. Then seeds are planted in neat rows.
The key advantage of row cropping is uniformity, which allows for automation. For farmers, this means driving a machine out to quickly perform most crop maintenance, from planting to harvesting. For the home gardener, it means you can run a tiller or a wheel hoe between rows to eliminate weeds and loosen soil. Row cropping also makes irrigation easy, because you can just run a hose along every row.
The disadvantage of row cropping is that it takes a lot of space, and it can be an overwhelming amount of work if you’re stuck with hand tools.
In-ground beds
Instead of tiling an entire field, you can dig up a rectangular space, like 4-by-8 feet. A popular method of doing so is double digging, where you shovel out trenches, break the subsoil with a fork, and then fill each trench with the soil from the next trench. That loosens the soil and creates a well-draining raised planting surface. But it’s a lot of work.
In-ground beds let you position plants much closer than row cropping. That’s the basis for the John Jeavons Biointensive system in the video above.
No-till
Another way to build a bid is to not dig at all, but instead pile on organic matter to create a new layer of soil. There are several ways to do this: Ruth Stout covered seeds with hay, the Back to Eden method prescribes covering the ground in wood chips, and lasagna gardens have you layer organic ingredients to create garden beds.
No-till eliminates many common gardening problems, like poor soil and resurfacing weed seeds, but requires a lot of materials, like compost, hay, leaves, straw, and wood chips.
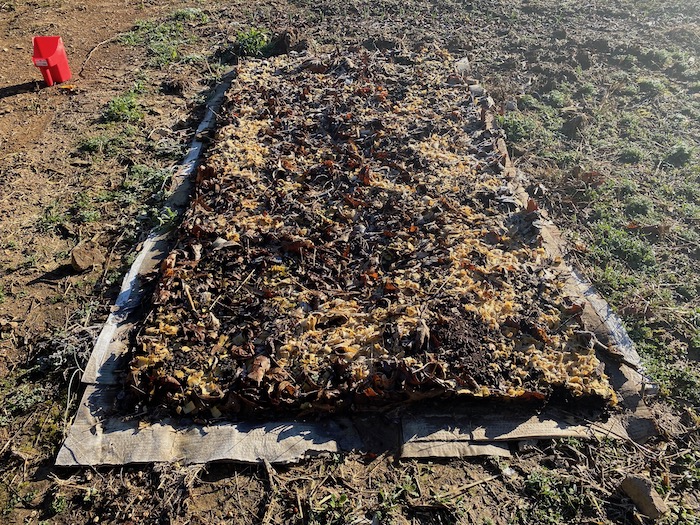
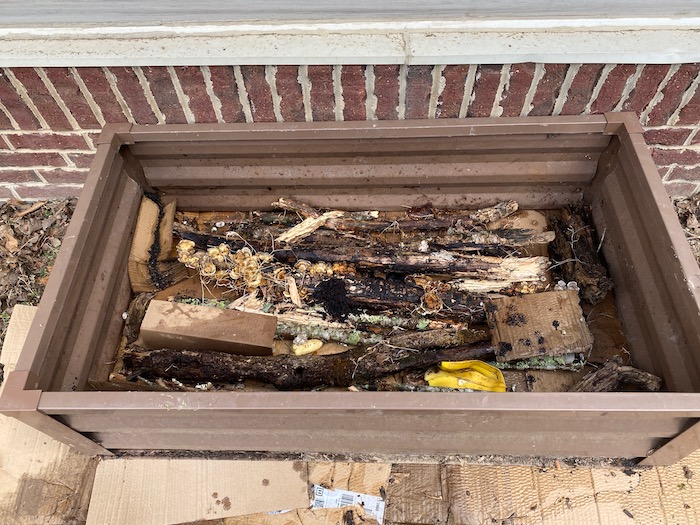
A cousin of no-till gardening is hügelkultur, in which organic matter and soil is piled on top of logs to create a planting mound. This is an inexpensive way to build up a raised bed. The wood breaks down over time, adding nutrients to the soil, and it helps retain moisture.
Mounds
A fast and simple (though not always easy) way is to dig a wide hole and use that removed soil to pile up a mound.
Many Native American tribes grew food this way. The most famous example is the Three Sisters method, where field corn, pole beans, and winter squashes were planted together in a mound with fish or other strong organic matter buried in the bottom for fertilizer.
A modern twist on this concept is the melon pit, in which you dig a hole, fill it full of scraps, and then mound the dirt over top. Mounds aren’t very common these days, because you can’t grow much in a single mound, but you can dig a lot of melon pits quickly if you have enough materials.
Containers
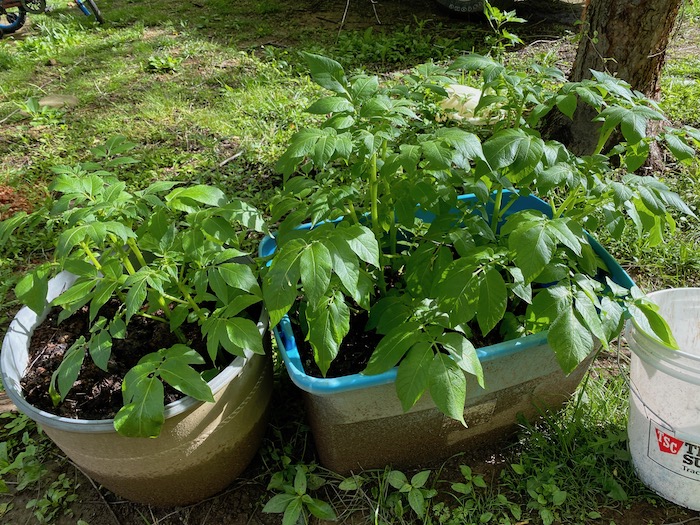
Don’t have space for a garden bed? Maybe you want to grow salad greens on your porch or test a spot to see if it gets enough sun before going big. You can grow many crops in simple pots and other containers. Many people like to grow potatoes in large containers like garbage cans because it makes it easy to keep piling soil on top to encourage tuber growth.
Raised beds
Taking container gardening to the next level, in raised bed gardening, you construct a large container and fill it with soil. That container doesn’t necessarily need a bottom — it can just be walls sitting on top of natural earth.
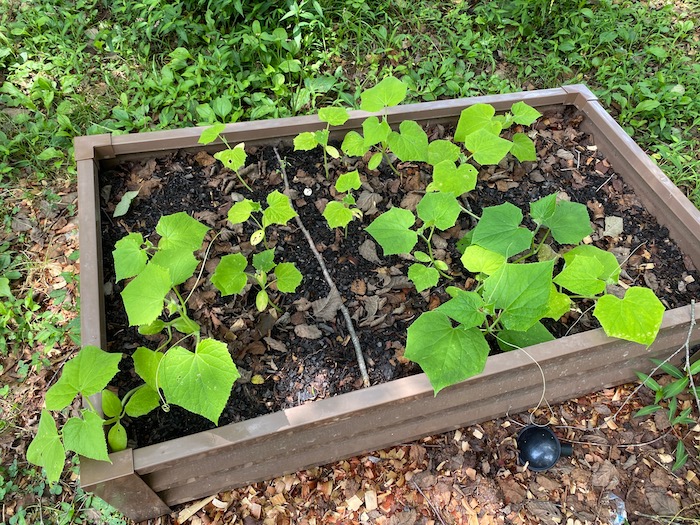
Or you can build a bottom and let the whole thing sit on the ground. Or you can put the bed on legs to raise it up off the ground.
More: Why I’m switching to raised beds for my backyard garden
Raised beds can be built out of wood, concrete, plastic, stone, or anything that can hold soil. Raised beds can get expensive, so many raised-bed gardeners implement no-till techniques to cut costs, such as filling the bottom third of a bed with cardboard, wood, grass clippings, and other cheap organic matter that breaks down over time.
Square-foot gardens
A variation of raised beds invented by engineer Mel Bartholomew, a square-foot garden is a raised bed divided into one-foot squares in which seeds are planted according to a predefined pattern. Square-foot gardening takes a lot of guesswork out of gardening, but can be expensive and requires steady access to irrigation.
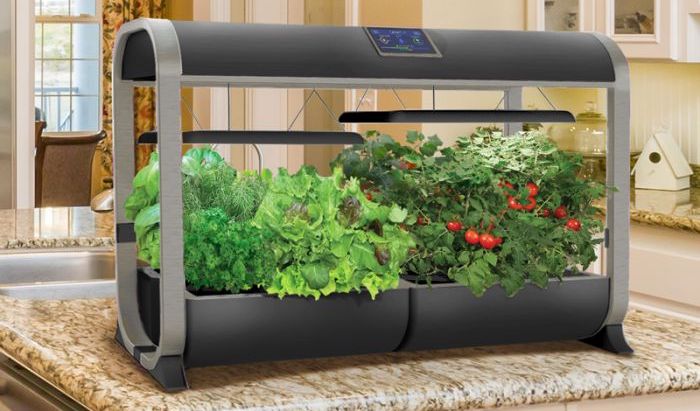
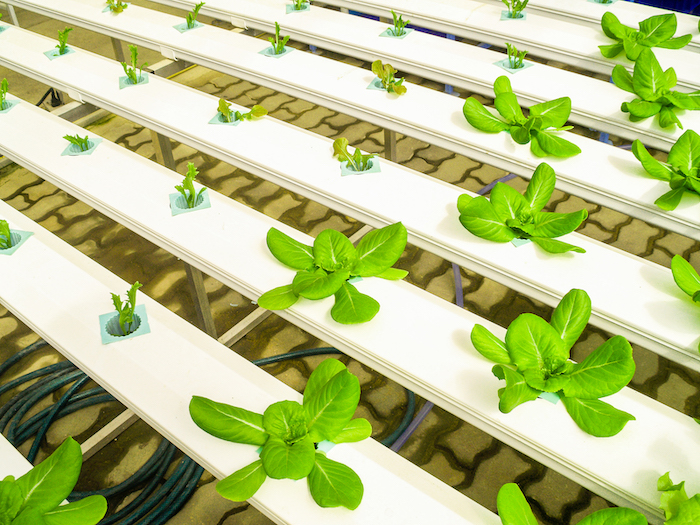
Indoor systems / hydroponics
In hydroponics, you grow plants in water without any soil. Nutrients and oxygen are added to the water to allow plant growth. Hydroponics allows you to grow food in places where it wouldn’t otherwise be possible, like in space or your bedroom closet.
Orchards and food forests
If you have the space, perennial trees and bushes are a good investment, giving you food year after year without replanting. It can be simple as a few fruit trees, or you can develop what’s called a “food forest,” which is a mix of perennial trees and bushes, along with other hardy beneficial plants.
The importance of compost
More: Check out the beginner’s guide to composting
Compost is essential for every form of gardening except the all-in-one hydroponic products. It’s essentially free, rich fertilizer you can make at home with all kinds of food scraps, yard trimmings, dog poop, etc. Compost has several benefits for your garden:
- Acts as a fertilizer, providing nutrients.
- Improves soil structure. It loosens hard soils and tightens up sandy soils.
- Holds moisture while also improving drainage.
- Adds useful probiotics to your garden.

And it takes so long to make compost that one of the best first moves you can make in gardening is to start a compost pile as soon as you start working on this topic.
Soil types
Broadly speaking, there are four types of soil:
- Sand is coarse and rough and irritating, and it gets everywhere. The large, coarse particles make sand easy to work and shape, but it’s bad at holding onto nutrients and water.
- Silt is usually found near water sources. Because silt has smaller particles than sand, it can get compacted easily, but is often extremely fertile.
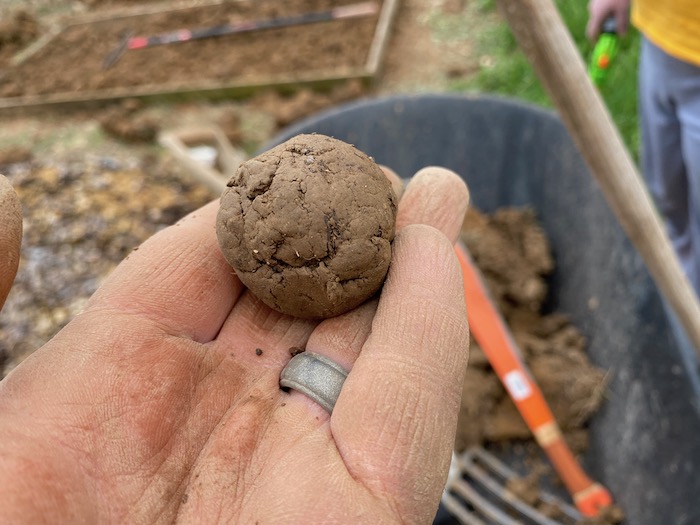
- Clay is the opposite of sand, with small particles that make it thick and heavy. Clay excels at holding nutrients and water. Maybe too well, because clay compacts easily, which can lead to water puddling on the surface instead of draining. Clay is tricky, because if you dig it wet it will become hard as a rock when it dries, and when it’s dry it’s often too hard to dig.
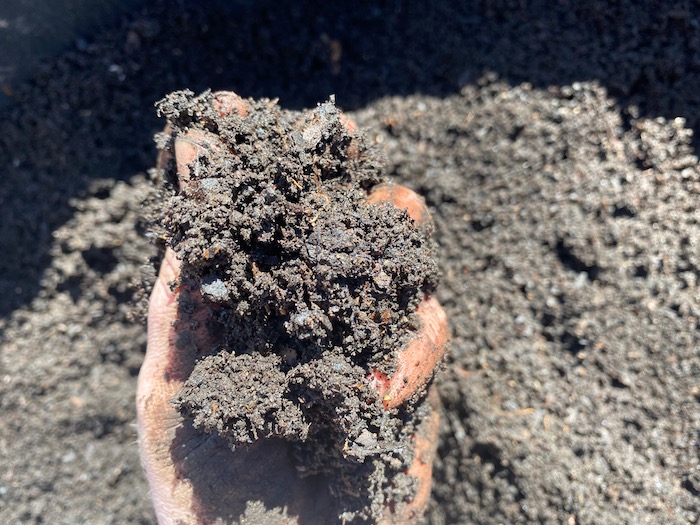
- Loam is the platonic ideal of soil, a mix of clay, sand, and silt, along with a good deal of organic matter. It drains well, but holds nutrients and moisture, and it’s easy to work.
Your soil is probably either some sort of sand or clay or a mix of both. You can perform a separation test at home to see the breakdown, or send soil to a lab for a structure analysis.
If you hate the soil you have, you have four options:
- Haul in good topsoil
- Add enough organic matter to improve its structure
- Build no-till beds on top of the soil
- Build raised beds on top of the soil, using purchased soil or compost
Soil amendments
No matter what kind of soil you have, soon or later it’s going to need something added to it for plants to grow well:
- Macronutrients like nitrogen, phosphorus, and potassium
- Micronutrients like boron, iron, and zinc
- Minerals like calcium and copper
- Additions to adjust the pH (ie. acidity)
The only way to know for sure what your soil needs is to have it tested. You can send soil samples to a company like Logan Labs or use basic at-home tests like the Rapitest. Many university extension offices offer basic soil tests for a small fee.
Amendments can be split into two categories: organic and inorganic. Organic amendments include naturally-occurring fertilizers like compost, manure, urine, blood meal, bone meal, seed meal, and kelp meal. Basically, stuff that comes from something that was once alive. Inorganic amendments include things like potassium nitrate, which is a potent chemical fertilizer.
However, it’s worth understanding that there can be a fuzzy line between what’s organic and what’s not organic. Miracle Gro is largely crystalized animal piss, but it isn’t considered organic. Dyna-Gro is an excellent liquid fertilizer made from mostly natural ingredients, but it’s also not considered organic.
So organic is good, right? Not always. Let’s say you buy a load of manure to fertilize your garden. But the cows that produced the manure ate grass treated with an aminopyralid herbicide like Grazon, which kills all plants except grasses and survives digestion and composting. You plant tomatoes and squashes, and they do great… at first, then they curl up and stop growing. Aminopyralid can last in the soil for years.
Chemical fertilizer has a lot of downsides, such as adding salts to your soil and not returning essential minerals to your soil like organic fertilizers do. But 10-10-10 also won’t contaminate your ground with unexpected chemicals like aminopyralid.
Mulch
Mulch is simply a covering for your soil. It could be rocks or chunks of old mattresses, but typically you want organic material that will break down and improve your soil.
Benefits of mulch:
- Protects the soil surface from the sun
- Helps retain moisture in the soil
- Prevents weeds
- Improves the soil as it breaks down over time
Typical mulch materials:
- Compost (finished or unfinished)
- Hay
- Shredded leaves
- Straw
- Wood chips
Wood chips can be a bit of a hazard in your garden because they absorb nitrogen from the soil as they decompose. That’s fine as long as they stay on the surface of your soil, but if they get mixed in, it could stunt plant growth. However, wood chips are great for covering paths between beds and for mulching trees and bushes.
Whole leaves are another hazard because they take a long time to break down, absorb nitrogen as they do so, and can form a mat that smothers the plants. It’s best to shred leaves before mulching with them. You can use a string trimmer and a trash can to shred them.
Another issue with mulch is that it could be contaminated with weed seeds or chemicals. The best mulch is compost you’ve made yourself, but there’s just never enough of it 🙁
But really, any organic material can be mulch. You can mulch with food scraps, though that might attract wild animals. Some gardeners keep otherwise unwanted plants around for what’s called “chop and drop” mulch, where they’ll periodically chop part of the plant off, let it fall to the ground and rot, and then do it again when it grows back. Comfrey is a popular plant for this purpose.
You might also hear the term “living mulch,” which means plants growing close enough together that they cover or shade out bare soil to act much as a mulch does. That could mean planting one crop so intensively that all the soil is covered, or interplanting with a cover crop.
Cover crops
A cover crop, also called green manure, is a plant that you either use to cover bare soil when it’s otherwise unused or plant alongside other crops to act as a living mulch. Cover crops offer many benefits over just letting weeds grow in an unused space:
- Cover crops aren’t noxious or invasive
- Many cover crops, like clover and peas, add healthy nitrogen to your soil
- When cut down or tilled in, cover crops add organic matter to your soil
- Some cover crops (eg. mustard) grow deep, penetrative roots that help break up hard soil
You may even want to use an empty plot for cover crops, in order to grow those nutrient-loaded plants for your compost pile. It’s a good idea to always keep something growing in a garden bed to hold in nutrients and keep weeds from invading.
Cover crop seeds are typically bought as a by-the-pound mix instead of in a little packet. Cover cropping probably isn’t worth investing in early on, but it’s a technique to keep in mind as you advance as a gardener.
Dealing with weeds
Plants compete for resources: nutrients, water, even access to light. So you want to minimize unwanted plants in your garden that are stealing those resources.
“Weed” is a subjective term. For example, if you grow Jerusalem Artichokes and they start unintentionally spreading into your lettuce patch, then those unwanted Jerusalem Artichokes are weeds. But typically, weeds are plants like grasses, thistles, vines, and flowers.
Another way to think about weeds is that they’re pioneer plants: hearty plants that happily fill in any bare patch of ground.
There are three ways to deal with weeds.
Prevention: Remember, nature hates bare ground and will try to fill it as quickly as possible. You ideally want your garden beds planted at all times. If you don’t have a particular crop to plant, you can plant cover crops.
Your soil is full of dormant weed seeds waiting for light and air. Tilling or digging the ground can bring these seeds to the surface and restart the cycle, which is why many gardeners prefer to avoid this problem via no-till methods where they build soil on top of the ground. That’s also why a good, thick mulch around your plants can suppress weed growth.
You can also use cardboard or weed barrier cloth to cover the ground and keep it weed-free. If you garden in raised beds that still have bottom contact with the ground, it’s a good idea to put one of those barriers under your bed to suppress any weeds from shooting up.
Physical removal: The key to weed removal is to pull it out by the root. Anything less and the weed will grow back. You can use your fingers for this: pinch the base of the weed with your thumb and forefinger and pull it out of the ground. This works best in wet soil.
Removing weeds with your fingers can literally be a pain. There are several weed-removing tools, but the most common is a regular garden hoe, which you can use to cut into the soil under the weed and scoop it out. Another useful weeding tool is a stirrup or scuffle hoe, which is a sharp u-shaped piece of spring steel on a handle that you rub across the ground to quickly rip out weeds.
You can automate the work of a stirrup hoe with a wheel hoe, which is sort of a primitive one- or two-wheel device that can accept many attachments, usually including a stirrup hoe. If you till, you can also till empty ground to eliminate weeds and loosen the soil around your plants.
Flame weeders are a fairly new way to combat weeds. You hook up a propane tank to what is essentially a flamethrower and burn the weeds. It’s a useful tool when prepping beds for a new crop.
Chemical removal: Many people turn to herbicides like Roundup to kill weeds. It’s easier than physical removal, is usually long-lasting, and does a better job of killing the weeds than a hoe.
However, herbicides can also kill the plants you want to keep. Herbicide sprays can get carried away in the wind and contaminate plants you didn’t intend to spray. And you may not feel great about eating food that’s soaked up those chemicals or how they may have seeped into your water table.
Water considerations
The main ways to water a garden:
- Rain: The obvious and free choice that you want to take advantage of. But it depends on your climate, and it’s getting harder over time to grow food using only the rain.
- Manual watering: If the rain mostly does the job but your plants need the occasional boost, a good watering can do the job, and is a good tool to have around anyway.
- Irrigation: If you live in an especially dry area, or you want to minimize your labor, you can bury drip tape or irrigation hose under or alongside your plants.
Denser plant spacing might produce more food but will require more water than more distant plant spacing. And some plants require more water than others — think about a juicy watermelon vs. kale.
If you live in a dry area or have sandy soil that doesn’t retain water, you might consider growing in trenches, which can absorb, hold, and retain more water.
Signs that your plants aren’t getting enough water:
- Limpness
- Yellowing
- Dry or dying leaves and stems
- Reduced production
Your plants can also get too much water. Unfortunately, the symptoms are often the same as not enough water with the notable exception that the plants just won’t feel dry. There are a couple of other things to watch for:
- Water puddling in your garden
- Diseases forming on plants
There’s really only one way to prevent flooding and puddling: drainage.

Drainage is why plant pots have holes in the bottom. You want soil that can hold water to some degree, but you also don’t want it to collect and never drain.
Ways to improve garden drainage:
- Minimize tilling, which can compact the soil below garden beds, creating a layer that holds water above
- Avoid stepping on your planting area, which compacts the soil and keeps it from draining
- Add organic matter to prevent compaction
- Stab the planting area with a garden fork or broadfork
- Create a raised planting surface, like a raised bed
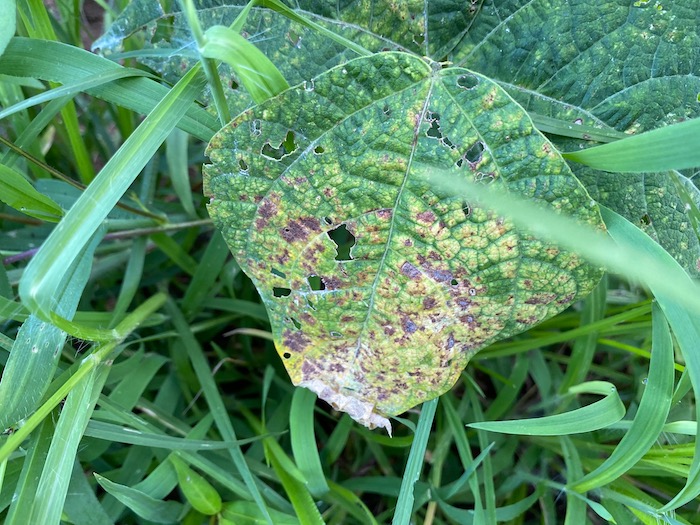
Dealing with disease
Just like people, plants can be infected by disease. The key thing to watch for is any strangely colored places, like spots or patches, though that doesn’t always indicate disease. The best way to deal with garden diseases is prevention, though that’s easier said than done.
Some tips:
- Wash your hands before touching your plants, especially if you’ve handled any tobacco products since they can contain the tobacco mosaic virus that infects nightshades like tomatoes and potatoes.
- Don’t handle plants when they’re wet.
- Water the roots, not the leaves, because moisture can breed disease. This is easier said than done. It’s also good to water early in the day to give excess water time to evaporate.
- Mulch!
- Rotate crops. Don’t plant the same thing in the same place year after year, because it gives time for diseases to flourish.
- Promptly remove and burn diseased plants. Don’t add them to your compost pile.
- Keep pests from biting your crops.
Combating pests
The most common are insects, slugs, and nematodes. But other threats to your garden can include birds, deer, raccoons, and even other people.
Insect damage is pretty easy to spot because chunks will be missing from your plants. The same goes for larger predators. A raccoon will pull down entire plants and leave the remains scattered about. Deer are a bit more subtle, but you’ll often see their telltale hoof prints.
Unfortunately, pest damage makes it easier for plants to become infected with diseases, so your garden problems can snowball.
Pests are one of the most difficult garden problems to deal with. A few methods:
Fences: The “simple” (but not cheap) answer to larger pests is fencing. Electric fences take relatively little work and can be powered by solar, but aren’t effective against smaller critters. Fishing line strung between posts can keep deer out, but not much else. Some gardeners build entire cages around their gardens to protect them.
Traps: You can trap raccoons, squirrels, and other varmints with live animal traps. Check your local laws first, though.
Noise: Blasting a radio in your garden will keep the mammalian pests away. It may also annoy your neighbors.
Physical removal: Many organic gardeners spend hours, every day, picking insect eggs and larvae off their plants to avoid using insecticide. It’s a lot of work, but it’s cheap.
Hardware cloth: Moles and voles can steal your vegetables from below ground. A layer of hardware cloth at the bottom of a raised bed can keep them out.
Netting: You can buy floating row covers that keep out insects and birds while letting in sunlight and water. Ruth Stout claimed that paper bags rubber-banded over ears of corn would keep racoons from eating them.
Organic insecticides: Diatomaceous earth is a food-safe powder that does a great job of preventing insect damage if you sprinkle it over the leaves. The downside is that you have to reapply it after every rain. Some organic gardeners swear by mixes of water, soap, and hot pepper. Neem oil is another popular organic pesticide, but it must be diluted in water and applied with a sprayer.
Pesticides: If you just can’t get your insect problem under control any other way, pesticides can solve it quickly. Sevin is a popular and effective pesticide. Sprinkle it over your plants and it will kill the bugs. However, make sure you wash your garden produce thoroughly after you harvest it. Sevin is made of a chemical called carbaryl, and Brett L. Markham said of it, “All in all, if I were to use a synthetic insecticide, I would use carbaryl in preference to the others available. And, in fact, that is what I used before switching to organic gardening.”
Managing temperature
Unexpected cold snaps can kill your plants. Other plants may not die from cool temperatures, but can be stunted, won’t germinate from seed, or won’t fruit. There are a number of tools to insulate crops from cold weather:
- Greenhouses: The ultimate in cold weather protection is a greenhouse, which is a structure covered in a material that allows light to pass through, like glass or clear plastic. You can start and raise seedlings in a greenhouse, or if it’s large enough, grow entire crops inside. Some raised-bed gardners construct small “hoop houses” out of PVC or electrical conduit for individual beds.
- Cold frames: One step smaller than a hoop house. A cold frame can be a special planting box with a glass top for cold-weather plants, or you can build a frame that covers an entire garden bed.
- Cloches: These are individual plant coverings that you can put around each plant, made out of glass or plastic. You can also use mason jars or the tops of 2-liter soda bottles.
You can use a greenhouse, cold frames, or cloches to extend your growing season as well, such as growing lettuce the middle of winter. In any case, the principle is the same: bring in solar energy and trap heat.
In a pinch, you can cover your plants with bedsheets. You’ll want to put some sort of stakes in the ground to prop up the sheets and keep them off your plants because a damp sheet touching your plants can cause frost damage.
Some plants hate the heat. For instance, if lettuce gets too hot it will start to bolt. You can make beds for them in shady areas, put up some sort of shade, or drape them in shade cloth. Extra watering and mulch also keep plants cool.
Planting seeds vs. transplanting
Sometimes gardeners plant seeds directly in the ground and sometimes they start plants indoors (or in a greenhouse) and transplant the young plants (called seedlings) into the ground.
This is one of the great gardening debates — but most gardeners do a bit of both. Here’s why gardeners usually transplant instead of direct sow:
- Extend the growing season for hot-weather plants like peppers and tomatoes
- If your soil is thick or hard, small seeds can often germinate easier in fine seed-starting mix
- You can start many more seeds than you intend to plant and then transplant only the best ones
- Seedlings in small areas need less water than they do in a full garden bed
- It aids succession planting so that you can have seedlings ready to plant when the last crop is done
With so many benefits to transplanting, why do gardeners still direct sow?
- It’s easier; stick seeds in the ground and see what comes up
- No special equipment required like seedling flats or grow lights
- Indoor seedlings have to be gradually adapted to the outdoors through a process called hardening off, while direct-sown plants don’t
- No chances of killing plants or damaging roots during the transplanting process
In short: transplanters argue it’s more efficient, while direct sowers argue that it produces stronger plants.
Generally, larger seeds like corn, beans, and squash do best when direct sown. The big, bulky seeds can easily push through dense soil. Tiny, delicate seeds, like lettuce and kale, are good candidates for transplanting. And in most of North America, you pretty much always want to start tomatoes and peppers indoors.
Common debates
Ask five gardeners for advice and you’re going to get five largely different answers. You already know there’s almost never a Single Right Answer, but these are some of the common debates and whether or not you should even consider them.
Organic vs. chemical
This is probably the single biggest split in agriculture. On one extreme, you have growers who use every technological advantage such as blasting weeds with herbicides, dumping copious amounts of chemical fertilizer on fields, and soaking their crops with insecticides to maximum yields year after year.
On the other, you have growers who only fertilize with manure/compost they’ve created from scratch and pick bugs off the plants by hand in order to avoid chemicals.
Organic agriculture was the only option for most of human history. But society got to the point where most of us are NOT farmers because modern products and methods made things far more efficient, making it possible for 2% of people to farm enough for the other 98%.
So while much of this is a personal choice based on your philosophy, there’s no denying that doing things the organic way is harder and less efficient, at least in the short term. In the long term, chemical growing can poison or deplete your soil.
Some general pros and cons:
- Using chemicals and other “unnatural” products is usually easier and more effective. Even if you really try to prevent pests and disease the natural way, for example, you’re still fighting an uphill battle and will lose some percentage of your yield.
- Organic aligns better with being self-reliant and sustainable. In theory, you can produce much of the fertilizer you need on your homestead by reusing human and animal waste, food waste, etc. If you rely on store-bought fertilizers, what happens when the store isn’t an option?
- But it takes a bit of time and raw inputs to make your own organic compost. And it’s even harder to make enough organic matter to support larger operations — your family simply won’t produce enough waste to enrich a large field.
- Organic techniques tend to build up the soil quality over time. It can be slower to get rolling compared to dropping in store-bought ‘nukes’, but once it snowballs, you’ve got a nice ecosystem to work with.
- Even if you want to be organic, it’s deceptively hard to keep contaminants out of your area. Unfortunately, certain herbicides can carry over into organic amendments like straw, hay, and manure, which can kill a garden no matter how organic you try to make it.
- Chemical fertilizers can ruin soil over time, and herbicides and pesticides can have unintended consequences, like killing off vegetables or honey bees.
Till vs. no-till
You probably have a mental image of a traditional farmer breaking up soil with a plow before planting seeds. That’s tilling, where you repeatedly break up the soil to create a loose-enough bed for plants to grow in.
No-till gardening doesn’t break up the natural ground (or does so very minimally). Instead, organic matter is piled on top of the natural soil surface to build up a planting space. No-till gardeners can get pretty religious about it. They accuse tillers of killing earthworms, destroying fungi in the soil, and releasing carbon into the atmosphere.
Some pros:
- No-till doesn’t require hard labor or heavy machinery
- It bypasses most soil complaints. (Just build your own soil!)
- Since you’re not digging up weed seeds, there are fewer weeds. (In theory.)
- No-till creates a raised planting surface that drains well
Some cons:
- No-till gardening takes a lot of organic material to build up even a small bed. It just doesn’t scale particularly well.
- It can take months before a no-till bed is ready to plant in because the organic materials need to break down enough to be hospitable to plants.
- It takes a lot of work and/or money to hunt down enough materials to make a no-till bed.
- Bringing in outside materials carries the risk of bringing in unwanted diseases or chemicals.
Plant spacing
Some experts like John Jeavons and Mel Bartholomew advocate for putting plants super close together, with the theory that more plants will produce more food and crowd out weeds. Others, like Steve Solomon, advocate putting plants farther apart so they have more water and nutrients available to them.
Neither approach is wrong. Trade offs:
- Closely spaced plants can produce great results, but also need more care, since they will be more sensitive to droughts and require more nutrients.
- Widely spaced plants can go longer without water, and may not need any irrigation at all.
- Widely spaced plants obviously won’t create as much food per square foot of garden area.
- Close spacing means your plants won’t grow as large as they otherwise would, though you may get higher yields via plant-per-square-foot.
- Empty spots in your garden give weeds room to grow.
The only way to settle this debate is to experiment with plant spacing and see what works best for you. A good starting point is whatever is recommended on the seed packet.