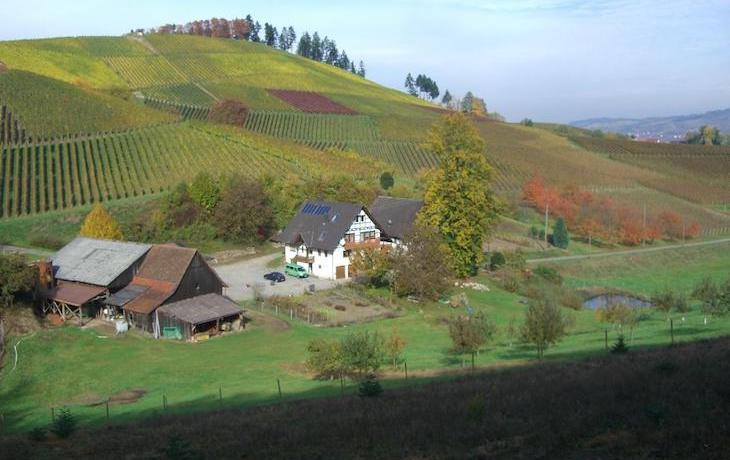
Are you planning to buy rural land to homestead? Or perhaps you already own some land and you’re trying to figure out how to best use it. The USDA maintains soil maps that rate parcels of US land to let you know how good they are for gardening.
While it’s a free resource, it’s slow and has a steep learning curve. I’ve figured it out and want to show you how to take advantage of this resource. For best results, use a desktop or laptop instead of a smartphone or tablet.
Summary:
- The USDA gives eight classifications to land, with Class 1 being the best and Class 8 being the worst for agriculture.
- There are four subclasses to classes 2 through 7: e for soil prone to erosion, w for soils with excessive moisture, s for shallow or difficult soil, and c for climate-related issues.
- You can use this data to choose between properties or decide how to best use what you have.
- For example, if you have some land that’s 3e and some land that’s 7s, the 3e land would be better suited for a garden and the 7s land would be best used for livestock.
More: Beginner’s guide to survival gardening and the best crops to grow
Accessing USDA soil maps
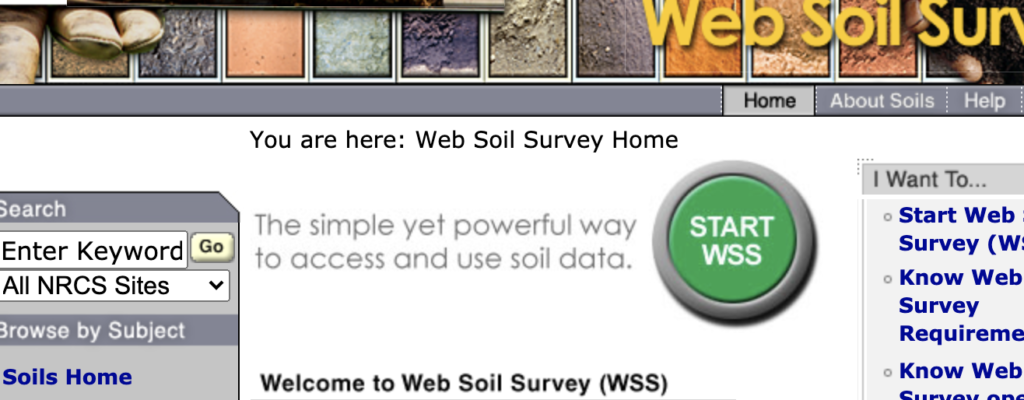
- Visit the USDA’s Web Soil Survey page.
- Click Start WSS.
That launches the Area of Interest Interactive Map. In government-speak, an Area of Interest is just a selected area you want to see a soil map of.
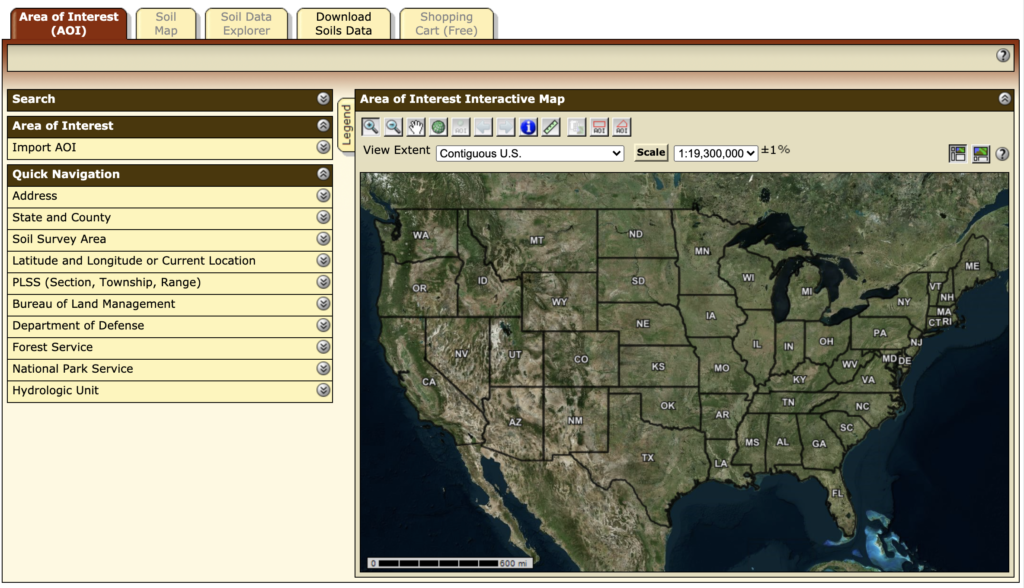
To quickly navigate to the property, click Address in the sidebar to reveal the address text field. Enter the address in the text field, all on one line, and click View. The map will move to that address and place an orange crosshair over the property.

You’ll probably need to zoom in a bit. Click the magnifying glass with the plus sign just above the map to switch to the zoom in tool, and then either click on the spot to zoom into or draw a rectangle over the area.
To zoom out, select the Zoom Out tool (magnifying glass with a subtraction sign) and click on the map. To pan around the map, click the hand icon and then click and drag on the map.
You don’t have to zoom in super close to the area, but you want the property roughly centered on the map. There are two tools to select an Area of Interest, both buttons say AOI. The first is a rectangular selection tool and the second is a polygonal selection tool.
The polygonal selection tool is finicky, so just use the rectangular selection tool to drag a box over the area. It doesn’t have to be exact, just make sure the entire area you want to see is selected. The selected area is marked by a blue box with diagonal lines.

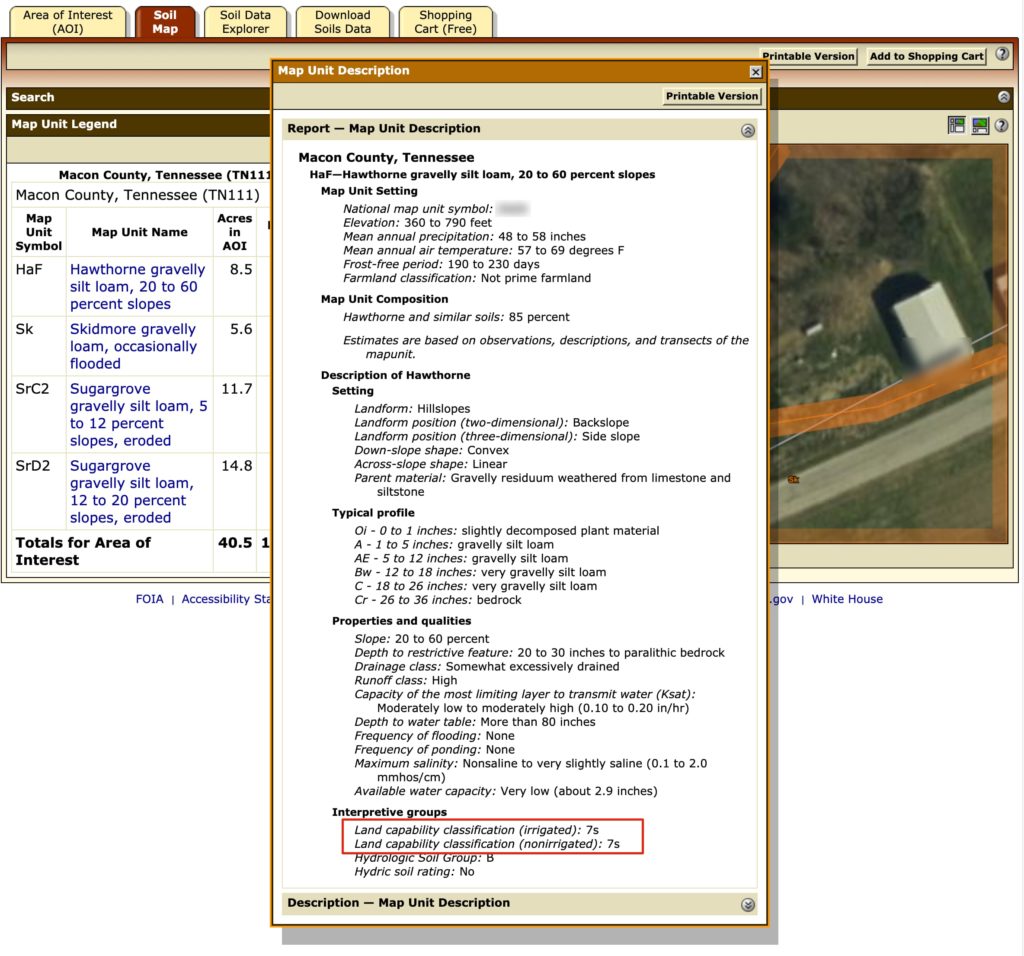
Once an area is selected, click the Soil Map tab near the top of the screen, which shows the soil map units for the given area, outlined in orange, with symbols like HaF and SrD2. A legend to the left of the map explains what each symbol means: soil composition, whether the land floods, and if the soil has eroded. You can zoom in or out as needed.
I zoomed in on the area I’ve been gardening in to learn that most of it is Hawthorne gravelly silt loam. To see more information about the section of land, click the link in the sidebar under Map Unit Name. That brings up a map unit description with detailed specifications about that bit of land.
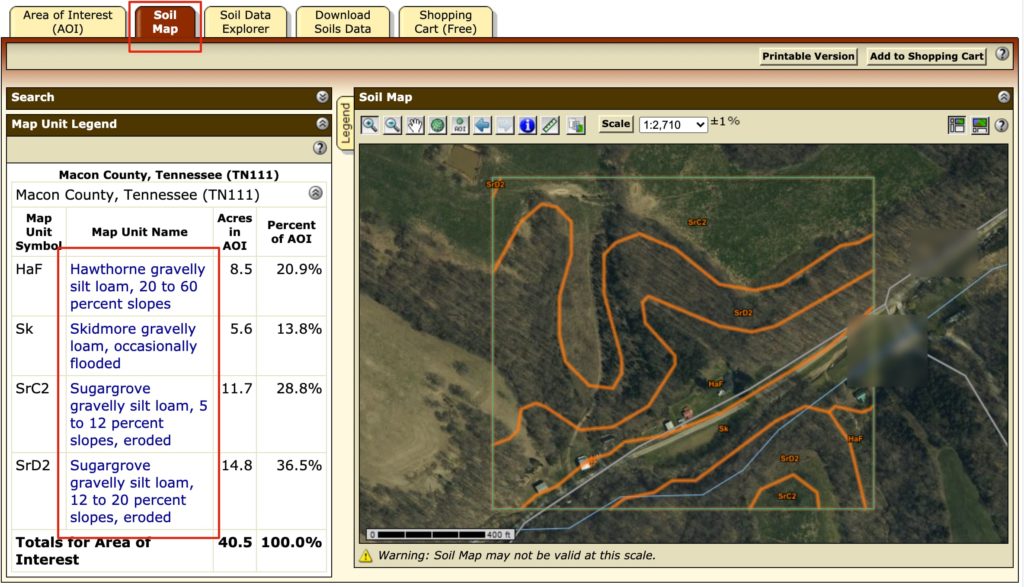
Even if you’re not a soil expert, you can quickly learn a lot from this description. For instance, on my garden plot:
- It’s not prime farmland
- It’s only 20-30 inches to bedrock
- There isn’t much water capacity, which means irrigation is a must
But the most important thing to spot is at the bottom, the land capability classification, which tells you what the USDA thinks the land is good (or not good) for. It might offer two different classifications: one for if the land is irrigated and one for if it’s not.
USDA land classifications
The USDA maintains eight land classifications:
- Class 1: Slight limitations that restrict their use.
- Class 2: Moderate limitations that “reduce plant choice” or “require moderate conservation practices.”
- Class 3: Severe limitations that further reduce plant choices and requirement of conservation practices.
- Class 4: Severe limitations.
- Class 5: This one is slightly different. Class 5 indicates no trouble with soil erosion, but other limitations that make Class 5 lands more suitable for pasture, range, forest, or wildlife habitat.
- Class 6: As bad as Class 5, but possibly has erosion trouble.
- Class 7: Severe limitations that make it best suited for grazing, forestland, or wildlife.
- Class 8: Forget it for agriculture. This is land for hunting, 4-wheeling, and camping.
There are also subclasses that inform you of the particular land limitations:
- Subclass e: Soil is susceptible to erosion.
- Subclass w: Soils with excess water from poor drainage or a high water table.
- Subclass s: Soil limitations in the rooting zone, like shallow soils, rocks, uncorrectable infertility, or saline content.
- Subclass c: Climate-based limitations like temperature or lack of moisture.
Class 1 and Class 8 do not have subclasses, as Class 1 is optional farmland and Class 8 is practically useless for agriculture.
This system is a bit oversimplified. Land can have several limitations, but they’re only assigned one subclass regardless, in order of priority from e, w, s, and c. So if your soil is 4e, erosion is the main threat, but water, shallow soil, or the climate may be other challenges.
How to apply USDA land classifications
So now that you have this information, what can you do with it? If you’re shopping for a homestead, you can compare properties you’re interested in to see which one will be the most productive.
You’ll be hard-pressed to find Class 1 land or whatever the USDA considers prime farmland. Instead, compare it to the average classification in the area you’re interested in. For instance, I looked up some perfectly serviceable farm and garden areas and found that most of them are designated as 3e, which seems pretty standard in my area.
Of course, land quality may not be your only concern when choosing a property. We bought our land now in part because we liked the house. But if you’re torn between two properties, the USDA data can make the difference or alert you to land that would make self-sufficiency hard.
If you already own land and what you’re doing isn’t working or you haven’t finalized your homestead plan yet, you can use this information to make informed decisions. For instance, the area I’ve been using as a garden plot is classified as 7s, which is not good. I knew the soil was extremely hard and rocky, and that USDA information verifies that and tells me that the soil is too shallow to grow great crops.
That doesn’t mean the land is entirely useless, though. I grew a great in-ground garden on that 7s spot last summer, but it took a lot of machinery to make it work. The information also verifies my decision to go with raised beds in that spot. With the soil being so shallow, the taller the raised bed, the better, because it gives roots more room to grow.
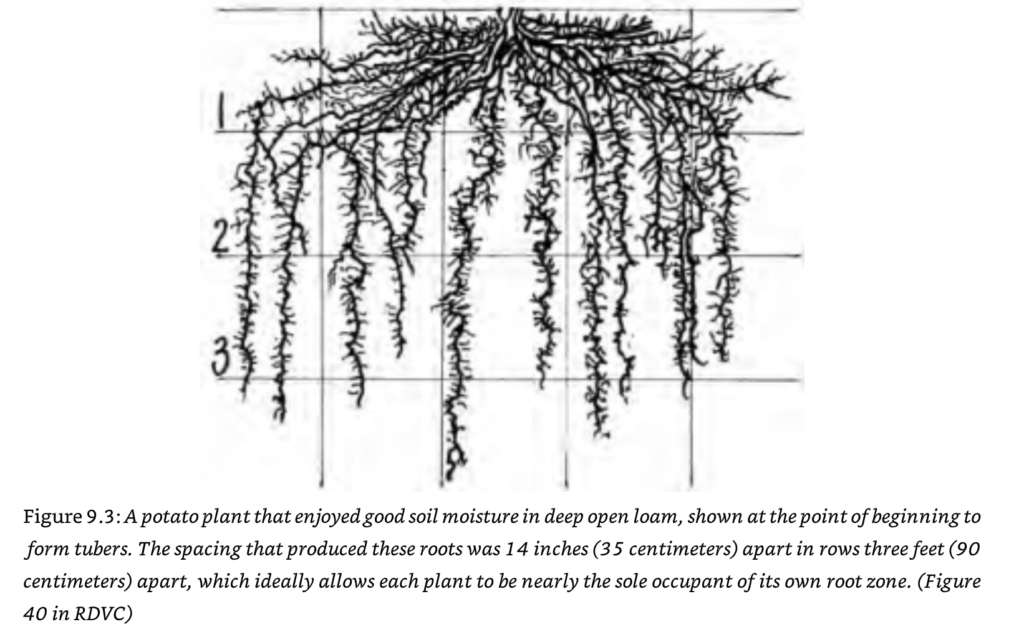
And that shallow soil might explain why I have so much trouble growing potatoes. Potatoes have an incredibly deep root system that shoots well underground. That also indicates that I’d probably have trouble growing asparagus, another plant with a deep root system.
However, the acre of open land on top of the hill behind my house, where I’ve been planting fruit and nut trees, is classified as 3e, which means it’s likely much better to grow on. That hill is tough to climb, so I was planning to put low-maintenance things up there like trees and bees, and maybe some grazing animals like goats later on. (Just to be clear, goats are not low maintenance.)
Now I’m thinking about flipping my entire setup: gardens alongside trees and bees on top of the hill and animals on the bottom.
That would suck because I’d have to scoop the compost out of my existing raised beds, haul it up the hill, and re-establish beds up there. But I would have about four more inches of water capacity, which means less irrigation, and up to about four feet more soil depth before hitting bedrock, which gives roots way more room to grow.
Not being able to look out the window at my garden would be a bummer, but that would open up the opportunity to look out the window at goats, pigs, sheep, or other animals I could put on what is now poor garden soil. If I put livestock on my hill, I’d have to climb it every day to check on them, collect milk, etc. Veggies could get by with less attention: 3-4 times per week. And I don’t have to worry about kale jumping a fence and eating my pear trees.
Hopefully, my public musings about my own farm can help you calibrate the thought processes for how to plan yours. The USDA’s soil maps can give you the information you need to make smarter decisions.
You are reporting the comment """ by on