It’s fall here in the northern hemisphere, which is a great time to be growing cabbages, radishes, and other cold-hardy vegetables. That also means winter is coming. Do you have food stored? Are you taking steps to preserve food? If you’re growing a fall garden, do you have a plan to preserve those vegetables?
One of my favorite ways to preserve vegetables is fermentation. It’s easy, takes little in the way of equipment, doesn’t require fuel, and actually makes your vegetables more nutritious. The easiest vegetable to ferment is cabbage, due to its high level of the lactic acid bacteria required for the process.
Sauerkraut is where most people start with fermentation because it’s practically foolproof: you shred cabbage, mix with salt, and stuff into a container.
But in our house, we prefer the Korean take on fermented cabbage: kimchi. Kimchi has something of a bad rap among older generations in the United States, thanks to shows like MASH that gave Americans the impression that kimchi is rotting, smelly cabbage buried in a field. That’s technically correct but misses the point, like if you described a hot dog as pig feet stuffed into an intestine.
We prefer kimchi over sauerkraut because it’s more flavorful, ferments faster, and has numerous health benefits. And many of the core ingredients are easy to grow. Kimchi is expensive in stores, but it’s cheap if you make it yourself. Kimchi may seem complex to make, but it’s no more difficult than making a salad.
Summary:
- Kimchi is typically made with cabbage, radish, garlic, onion, ginger, carrot, fish sauce, and chili flakes.
- Kimchi is made through a process called fermentation, which submerges vegetables in a salty brine that discourages pathogens while letting lactic acid bacteria ferment the food.
- To ferment vegetables, you need a glass or ceramic container, an air-permeable lid, and some sort of weight to hold the vegetables under the brine. It can be as simple as a glass jar, a piece of cloth, and a rock.
- It’s important to get the salt ratios right. You want roughly a tablespoon per cup of water, though you can adjust that slightly to your preference.
- Don’t use salt that has any anti-caking agents and don’t use chlorinated water. Both could inhibit fermentation.
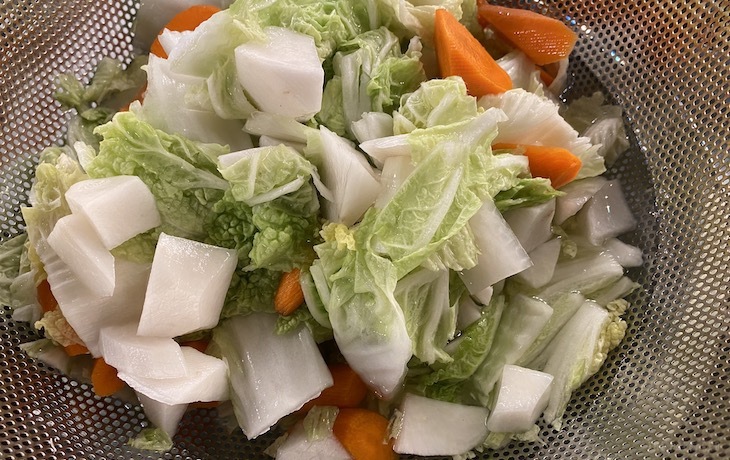
- The basics to making kimchi: soak the cabbage, radish, and carrot in salt brine. While it soaks, make a paste of the other ingredients.
- After the cabbage, radish, and carrot are sufficiently salty, drain and reserve the brine, mix the vegetables with the paste, and put them in your fermentation container.
- Kimchi takes about a week to ferment. Once it’s done, store in a cool place. The tradition is to bury it, but you can stick it in the fridge.
- You can let kimchi ferment for longer, but it will become softer and sourer over time.
Basic kimchi ingredients and health benefits
There are many varieties of kimchi. Radish kimchi (kkakdugi), fruit kimchi (nabak-kimchi), cucumber kimchi (oi sobagi), and so on. But what you’re likely familiar with is baechu, or napa cabbage kimchi, which is typically made with the following ingredients:
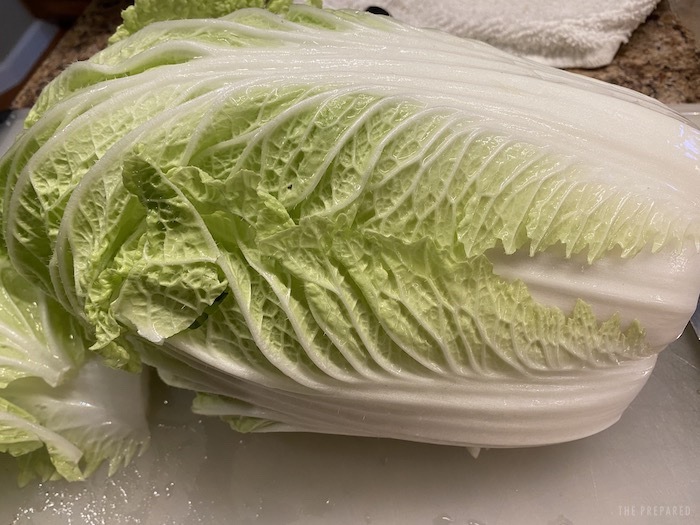
- Napa cabbage, sometimes called Chinese cabbage. Napa cabbage is taller and skinnier than a European cabbage, with more delicate leaves and a spicy kick.
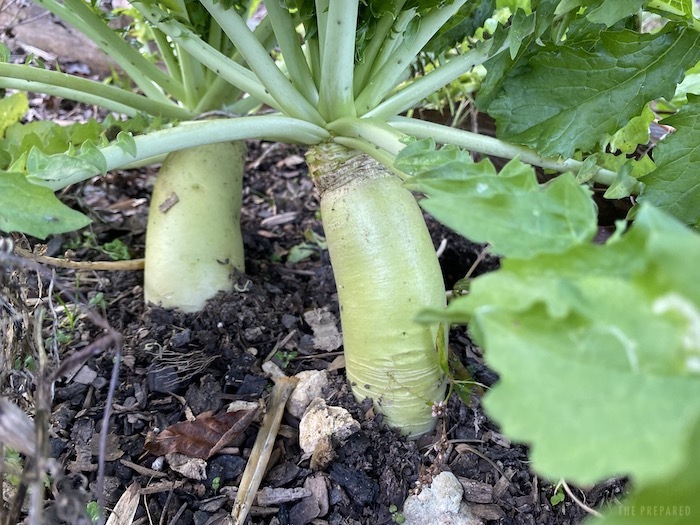
- Daikon radish, which hails from Asia and can grow quite long.
- Garlic
- Onion
- Ginger
- Carrot
- Fish sauce
- Chili flakes (traditionally Korean gochugaru, but you can use any hot chiles)
The result is a flavorful, and yes, very loud-smelling, dish that can be eaten by itself, over rice, or mixed in with any number of recipes — like anything you’d normally use sauerkraut or coleslaw for.
Kimchi is practically medicinal, and studies have indicated that it can extend life, reduce inflammation, improve your immune system, prevent yeast infections, and more. The lactobacteria is a powerful probiotic that helps digestion. Garlic is a natural antibacterial and offers many other health benefits. Ginger is also antibacterial, reduces nausea, and may help lower cholesterol. Daikon radish can help you lose weight and protect against chronic disease.
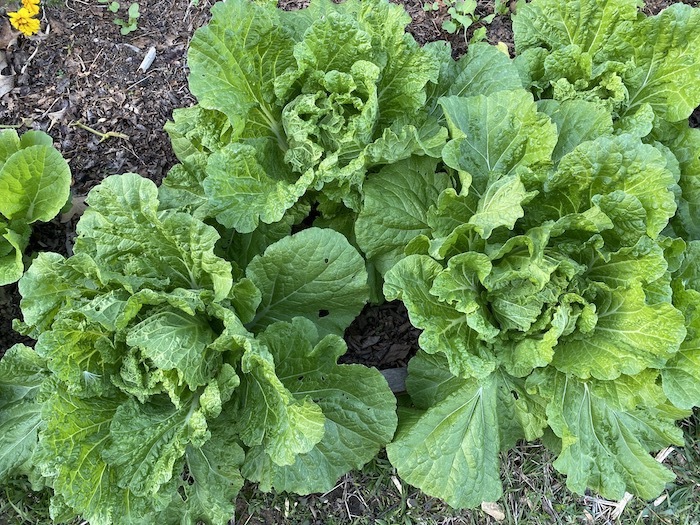
As a plus, the core ingredients — napa cabbage, daikon radish, and garlic — are easy to grow yourself, especially in cooler weather, where there’s less insect pressure and less chance of the cabbages going to seed, as they do in the heat.
Your fermentation container
To ferment, you need a container. It shouldn’t be anything reactive, like metal. Glass or ceramic is ideal. Pascal Baudar demonstrates making kimchi in a hollow log in his book Wildcrafted Fermentation. In Korea, plastic fermentation containers like the ones made by E-Jen are popular, but you don’t need a special container. A mason jar will work just fine.
You also need a permeable lid. As the vegetables ferment, they release gases. If those gases build up, they can shatter your container. Your lid can be as simple as tying a piece of cloth over the opening. I’m a fan of the Easy Fermenter lids, which fit on any wide-mouth mason jar. They let gases out and have a special opening that lets you suck out excess air, lessening the chance of spoilage.
Mason jars are pretty small. For big batches, you might want a fermentation crock. Instead of a gas-permeable lid, they have a water channel around the rim. You fill that with water and set the lid over it. The water keeps air out but lets gases escape. The trick is to keep an eye on the water channel. We had a batch of tomatoes rot because the water evaporated.
I have some pretty mixed feelings about crocks. They’re large, fragile, and take up a lot of space. I broke mine after the ruined batch of tomatoes because I dumped it out into the compost, forgetting that I still had the weights inside. Thankfully I put it back together with superglue. I recommend starting with glass jars and only investing in a crock if you want to do big batches of sauerkraut or kimchi.
The last thing you need is some sort of weight to keep the vegetables under the brine. A lot of people use a rock, boiling it first to clean it. I don’t like that because rocks have irregular shapes and even boiled rocks don’t seem that clean to me. The Easy Fermentation kits come with glass weights that are easy to clean. My crock came with ceramic weights, which work okay but they’re porous so they absorb the smell of whatever is fermenting.
If you don’t have a weight, you can use clean fingers to push your vegetables under the brine every day.
Always start with a clean container and clean weights, but they don’t have to be sterilized as in canning.
Making kimchi
I’m not going to offer an exact kimchi recipe, but more like guidelines, loosely based on Sandor Katz’s recipe in Wild Fermentation. The more I’ve studied kimchi, the more variety I’ve found. There are hundreds of kinds of kimchi, each made with different family recipes. Truly authentic kimchi is working with what you have and coming up with your own way of doing things. You can get really creative. For instance, Katz has a recipe for a Mexican kimchi with chapulines and pineapple.
The first thing you need to do is soak your cabbage and core vegetables (like carrots and radishes) in salt water. You can chop your cabbage or use whole leaves — I’ve seen both ways. If you don’t have napa cabbage, you can use a European-style cabbage instead. Whatever cabbage you use, wash it well first and take away the grungy outer leaves. Peel your carrots and radishes to leave them free of dirt.
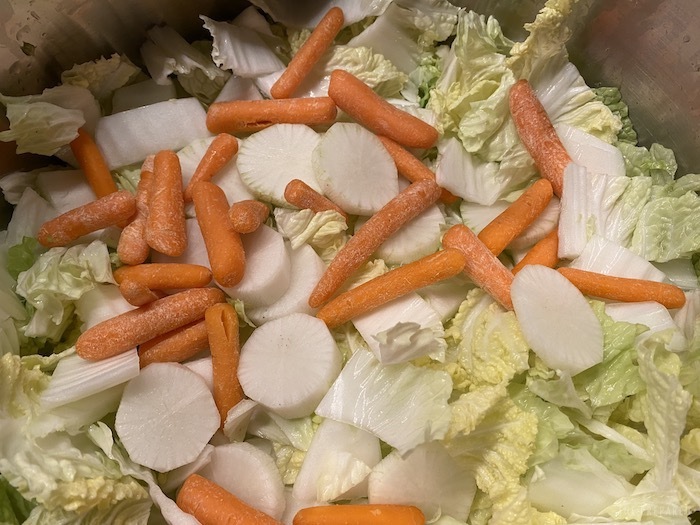
As for me, I chop up one or two napa cabbages fresh from the garden. I just do rough chops and try to leave out the hard core. Then chop up your radish and carrot. I peel mine first. It’s common to cut them into matchsticks, but round slices work too. They’ll soften up a bit as they ferment. If you want to save time, you can use baby carrots and skip chopping entirely.
Feel free to add other vegetables as well. Jerusalem artichokes, a great survival crop, are a common addition, and fermentation helps make them less gas-inducing. You could toss in mustard greens, turnip roots and greens, whatever you like.
Once your vegetables are chopped, mix up enough brine to cover the vegetables. Katz’s recipe calls for four cups of water with approximately one tablespoon of salt per cup, but I find that’s not enough brine while also too salty.
For my first batch, I used five cups of water and five tablespoons of salt, but it was just a little too salty. My second batch with two heads of cabbage used eight cups of water to about 6 tablespoons of salt.
Salt is key to fermentation because it discourages bad bacteria while letting good bacteria do their thing. Too much salt means fermentation won’t work because it’ll kill all the bacteria. Too little and molds and other pathogens will grow.
What kind of salt? You don’t want anything with anticaking agents or other additives. I’ve also found pink salt to add a bitter taste to ferments. I like canning and pickling salt. Also make sure to use filtered or bottled water, because chemicals in treated water can inhibit fermentation.
More: Why you should store salt in your pantry supplies
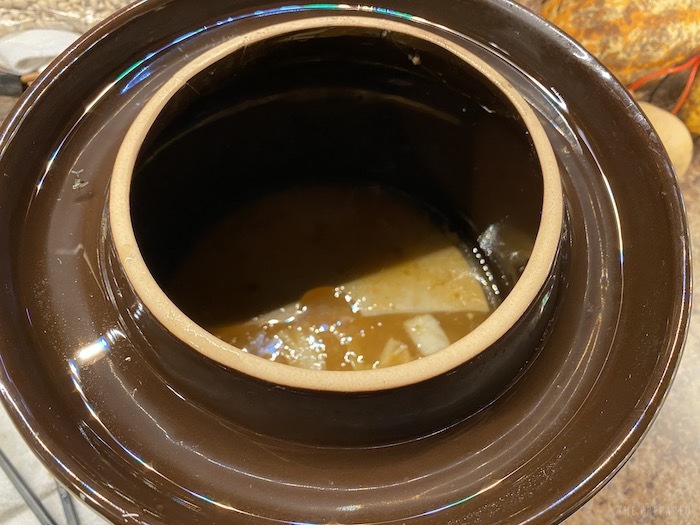
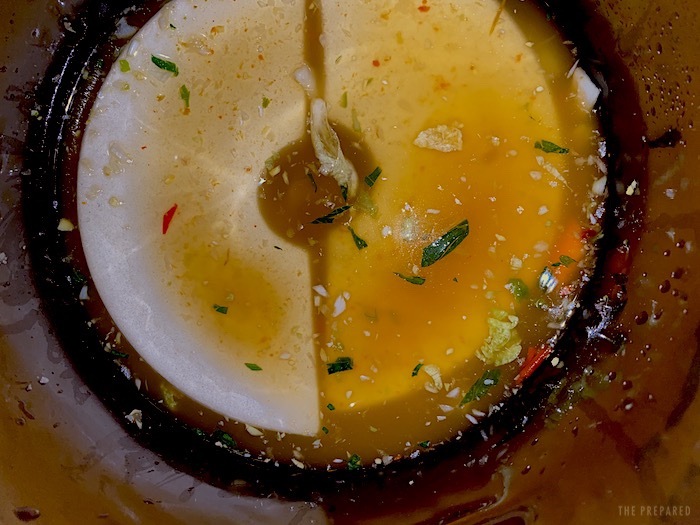
Mix up your brine, add the vegetables, and then put a plate or something over them to keep them submerged. I soak my vegetables in a five-gallon stockpot with a dinner plate on top. Soak them for at least a couple of hours, up to 24 hours. The vegetables should taste salty, but not unpleasantly so. If they get too salty you can rinse them off.
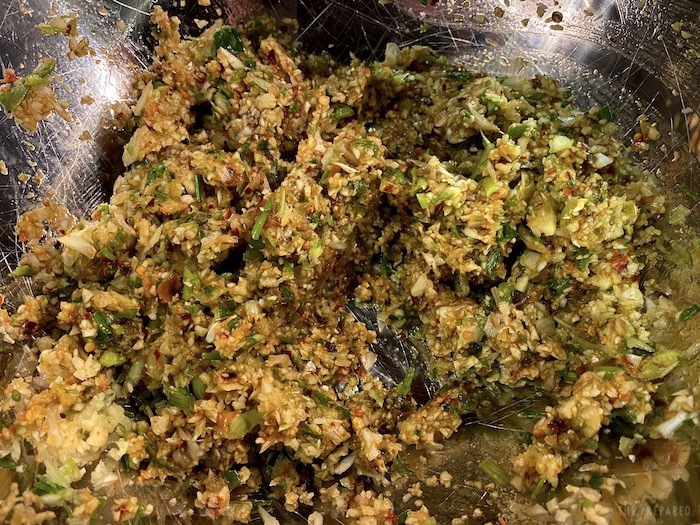
While your vegetables soak, mix up the flavoring paste for your kimchi. You do this by chopping up the other ingredients and mixing them together. I use the chopper attachment on my stick blender, but a food processor knife would work too. My rough formulation is:
- Half a yellow or white onion
- A whole bunch of green onion
- Two big pieces of peeled ginger
- A head of garlic
- 5-6 hot chiles (red, preferably)
- A quarter cup of red pepper flake
- Several dashes of fish sauce
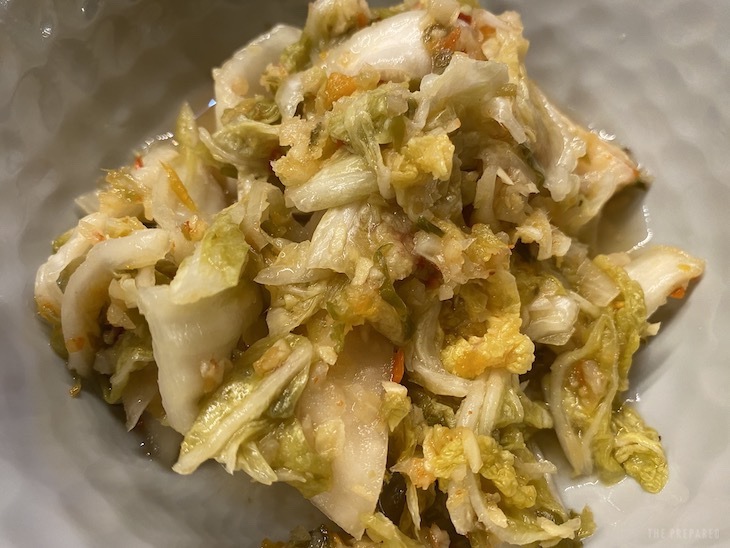
If you want to be authentic, add gochugaru, which gives kimchi its characteristic red color. I might buy some for my next batch, but I have so many hot chili peppers in my freezer that it only makes sense to use them. My kimchi isn’t red, but it’s pretty good.
Again, you can get creative here. And don’t be afraid to add much more spice, because kimchi can take quite a bit. My first batch turned out a little bland with 4 hot chili peppers and a tablespoon of red pepper flake. I could add a lot more spice to even this recipe.
Once the paste is mixed up, it can sit and mingle until your brined vegetables are ready. Just taste a piece of cabbage and if it’s decently salty it’s good to go. Once that’s done, the process is pretty straightforward:
- Drain the brined vegetables, reserving the brine.
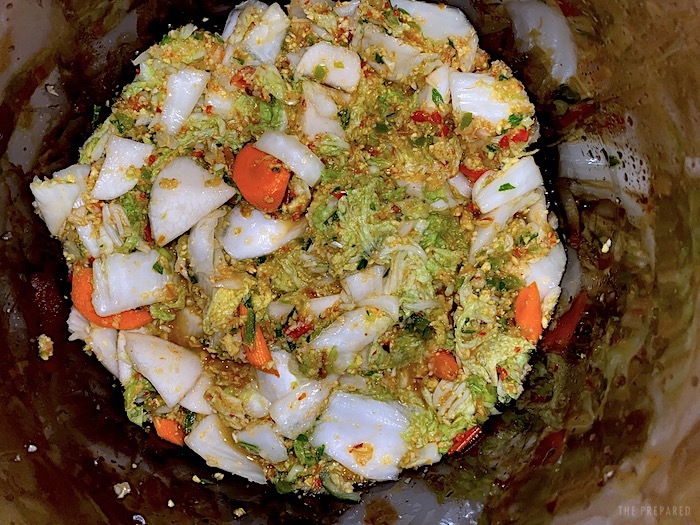
- Mix the vegetables with the paste.
- Stuff the vegetables into your container. Use a wooden spoon or something to pack them in nice and tight.
- Place your weight or weights on top of the vegetables and press the weight down.
- If the vegetables aren’t completely covered in brine, add some of the reserved brine.
- Cover your container.
Taste your kimchi every day if you can. It typically takes about a week to ferment. You could ferment it for less or more time depending on how “ripe” you like it. The longer it ferments, the softer and sourer it will be.
Preserving kimchi
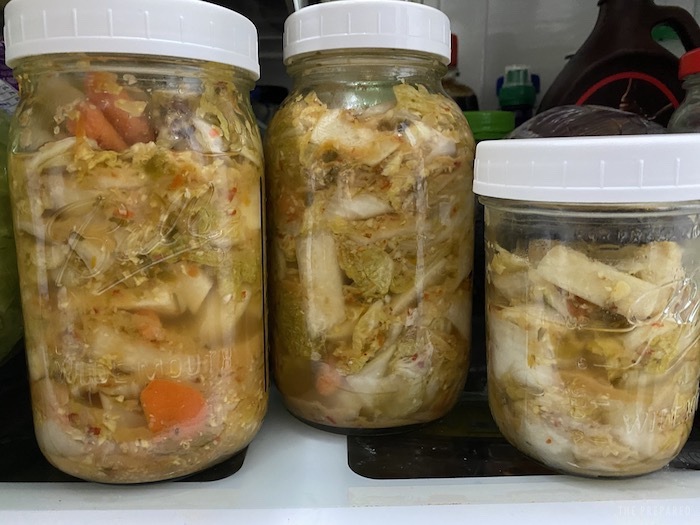
Once your kimchi is sufficiently ripe, the easiest thing to do is to put it into a jar and keep it in the fridge. You can switch to a regular lid. The fermentation will continue in the fridge, but it will happen much slower. Just open the lid every now and again to release any gasses that have built up.
Kimchi is such a big deal in Korea that LG and Samsung make special kimchi refrigerators.
But what if you don’t have a refrigerator? Or if the power is out? An easy solution is to let it keep fermenting. It will keep unless it gets moldy, and it shouldn’t spoil as long as you keep the vegetables under the brine. You may get some white gunk on top called kahm yeast. It’s harmless and can be spooned out. However, if it gets other colors in it, that’s mold and the whole batch should be tossed.
As kimchi continues to ripen, it will become less crisp. Eventually, it may get so soggy that it’s unpleasant to eat on its own. There are some traditional Korean dishes that use this super-ripe kimchi, such as kimchi-jjigae and budae-jjigae, an American-inspired stew that uses Spam, ramen noodles, and other storable foods.
More: Add Hawaiian flavor to your survival pantry with spam musubi
But if you want to slow fermentation without a refrigerator, you have a lot of options in the cold months. The traditional Korean method is to bury it in the ground in earthen pots called onggi.
If you’re fresh out of onggi, you can put your kimchi in a mason jar and put it in one of these places as long as it’s cold out:
- A root cellar
- A trash can buried in the ground
- An unheated outbuilding
- A hole in a garden bed (cover it to protect it from the sun)