Many people have this mental image that if a major SHTF event happens, they’ll become hunters and live off the meat. That’s probably not going to work for long, since the populations of animals like deer, elk, and hog are not found in every location and their numbers can’t handle a sudden surge of millions of hungry folks.
Fishing, on the other hand, is easier to pick up and possible in almost every location around the world. And although the commercial industry is overfishing the planet to the point of extinction, there’s still a good chance that you’ll be successful at the individual level.
Once you’ve practiced the basics, it’s reasonable to think you can catch at least 1,500 calories a day with a few hours of effort. That’s enough to keep you alive indefinitely. And unlike other meat sources like rabbits, which don’t have enough fat, you can usually survive only on fish because they have the right mix of nutrients — after all, the Mediterranean diet is based heavily on fish and considered the healthiest diet in the world.
Summary:
- You can become a decent fisher with just a little bit of money and practice. But don’t expect to just drop a line in the water and feed your big family.
- Consider both active and passive fishing, eg. casting a rod vs. setting up a net or trotline.
- Passive fishing is illegal in many areas. Check your local laws and get a fishing license.
- Most people start with a basic set of rod, reel, and lures. Adding a net is a worthy second step.
- Morning and evening are the best times of the day to try because that’s when fish are eating.
- Almost any natural body of water will have fish, but it’s worth prepping ahead of time to find out where the best bodies are in your area.
- Within a body of water, look for places that give fish protective cover, such as a dock or rock formation.
- Look for spots where the water movement is unusual compared to the rest of the water body — frothy spots in still bodies or calm spots in fast-moving rivers.
- Be patient when you get a nibble. The fish will often slip away if you yank too quickly.
- Always try to cook your fish, but if needed, saltwater fish can be eaten raw because the salt lowers the chances of parasites.
- You’ll want to preserve the meat if you don’t cook it shortly after catching it. Or you can use/make a holding tank to keep the fish alive in the meantime.
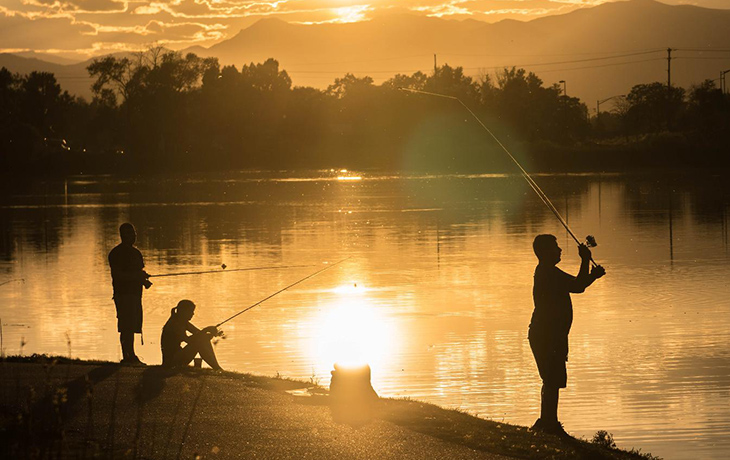
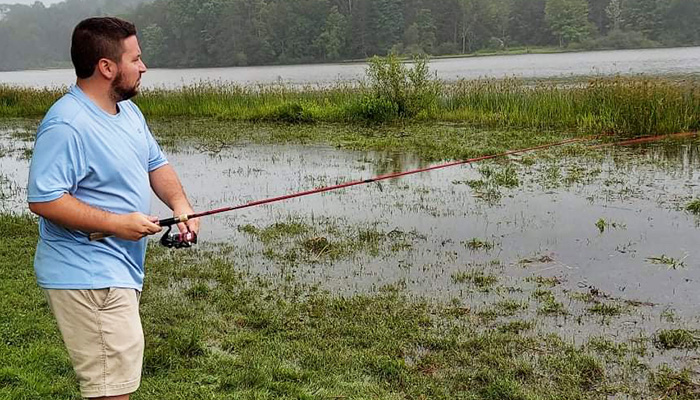
Active vs. passive fishing
Much of this guide is split up based on how you fish:
- Active fishing is the classic image of sitting on a dock or boat while casting a rod, then reeling in the line when a fish bites. Also includes spears or bare hands.
- Passive fishing works while you’re off doing something else. Set up a net, trotline, or trap, then come back later to collect the bounty.
There’s obvious pros and cons to each. Active fishing requires more of your time — you might spend half a day by the water only to end up with nothing. Although it’s not an athletic event, you’ll still be spending your potentially limited energy and water on the activity. There’s also more of a finesse or ‘art’ to active fishing, such as how you move the lure through the water.
Many survivalists focus on passive fishing in order to optimize their limited resources of time and energy. If successful, passive fishing can also result in a bigger bounty, such as a net across a moving river that captures 30 fish.
That’s why many places outlaw passive methods to prevent one person from pulling out tons of fish. So check your local laws. If you have to do it to survive, obviously the law doesn’t matter, but it’s worth being able to practice before SHTF.
But there’s a role for both in survival fishing. Nets are hard to improvise and too bulky for a go-bag, for example, while there are small fishing kits the size of an Altoid tin or you can DIY one with trash and worms found on the ground.
How many fish and calories will I get?
Assuming you’ve practiced the basics and have store-bought gear, a rule of thumb for active methods is catching around 1-2 fish per hour in a freshwater scenario.
Each fish provides two filets. If you fished for four hours and caught eight fish total, some calorie estimates:
- Bass: 1,552 calories
- Bluegill: 1,552 calories
- Catfish: 2,416 calories
- Perch: 1,232 calories
If the effort isn’t going well, you can see how it’s possible to spend many hours only to end up with a few hundred calories.
Although you can certainly improvise gear, in practice many people find that store-bought gear simply performs better, increasing your yield.
It’s impossible to give a rule of thumb for passive methods. But if you have the right gear and a fortunate spot, it’s possible to catch more fish than you immediately need and then have to rely on preservation.
Time and money needed
Fishing is one of those skills where a little bit of practice goes a long way. You might get lucky if you buy some gear and use it for the first time when an emergency hits — but you greatly improve your chances with about a week of practice during normal life.
Estimated amount of practice time to go from scratch to proficient:
- Basic rod and reel fishing with live bait: 12 hours
- Advanced rod and reel fishing with lures: 20 hours
- Basic trapping with nets: 5 hours
- Advanced trapping: 12 hours
- Spearfishing: 28 hours
- Noodling (hand fishing): 28 hours
Common budgets:
- $0-100: Some passive methods, such as building a trap with scrap wood, cost next to nothing. You can get a cheap rod and reel with all the basic trimmings for around $100. You won’t have many backups though, such as extra line, hooks, and lures.
- $200-500: You can get a large drift net or gill net, and/or a better rod and reel (around $200) with plenty of spare parts.
- >$500: Premium rod and reels, with plenty of extra parts, hundreds of hooks, and enough lures to last at least a few years. And/or multiple passive nets.
Some people adjust their budget based on how much they plan to rely on fishing. If you already have a survival garden and know how to trap small animals that are abundant in your area, for example, you probably don’t need premium fishing gear with lots of backups.
Basic fishing gear
If you’re starting from scratch, here’s an example shopping list for around $100:
- Spinning rod
- Spinning reel
- Straight hooks
- Monofilament line (4-8 lb test)
- Soft plastic worms
- Jig heads
- Single-tail grubs
- Bobbers
You will also (likely) need a fishing license. In the US, this is handled by each state. The license is cheap and easy to get, while the penalties can be stiff. Buy them online, from Walmart or a local fishing store, etc. While you’re doing this, get your state’s fishing guide, which explains things like limits on how many fish you can keep per day.
As you’re learning active fishing, you’ll also want to watch up on making trotlines, stone weirs, “M” traps, and funnel traps. But these don’t require you to purchase any additional gear.
As you move through the basics, common next purchases are:
- Large gill net (at least $300)
- Assorted lures: spinnerbaits, frogs, and crankbaits
- Boat or kayak for getting off shore ($300-800 is common)
Improvised fishing gear
Whether your proper gear breaks or you simply find yourself without it, there are ways to make your own that work decently enough in a pinch.
It’s typically easier to find or improvise the pole compared to the line. Fishing line isn’t just any type of string, since a struggling fish can load all kinds of forces onto that line and cause it to break. Paracord is the best alternative among the gear you’d likely have in a go-bag — and some paracord even has a fishing line hidden inside that you can use in a pinch!
You could use something as simple as a length of line/string/rope with something sharp on the end. Just dip it in the water with the other end wrapped around your hand (so you’ve got some grip), then yank when you have a bite.
Or you could fashion a “pole” out of a sturdy branch, 2 x 2 lumber, PVC pipe, or any other type of object. Try for a length that’s as tall as your body or a little bit bigger. It doesn’t have to bend the way a real pole would, but the bend can help deal with stronger fish.
It’s certainly possible to attach a store-bought reel to something improvised, like a PVC “pole.”

Hooks can be anything sharp and similar. A common survival meme is using the tab from a soda can, for example.
Choosing bait
There’s an overwhelming amount of bait available to buy, with a lot of b.s. marketing about magical solutions that make fish jump out of the water and into your mouth.
The goal is simple, though: find something a fish will want to eat and put it on a hook. But that doesn’t mean it has to be organic or tasty — it may just come down to being shiny enough to attract attention under water.
Keeping it simple, you should start off with basic soft plastic worms like Berkley Gulp! or Yamamoto Senko. They are easy to rig, have tons of options, and are the most flexible lures than you can use in a variety of environments.
Although you make a choice between using live or fake lures on a given cast, it’s worth knowing how to use both. Fake lures are obviously easier to store in your long-term prep supplies and you don’t run the risk of needing to find something live. And if you compost or garden, you already have a built-in supply of worms and other grubs. Some advanced preppers that rely on fishing will grow their own worms just for this use.
Other common live bait types are crawfish, tadpoles, other smaller fish, or even salamanders.
To find live bait out in the field, start by flipping over rocks near the water, or look for moist ground that you can easily dig into.
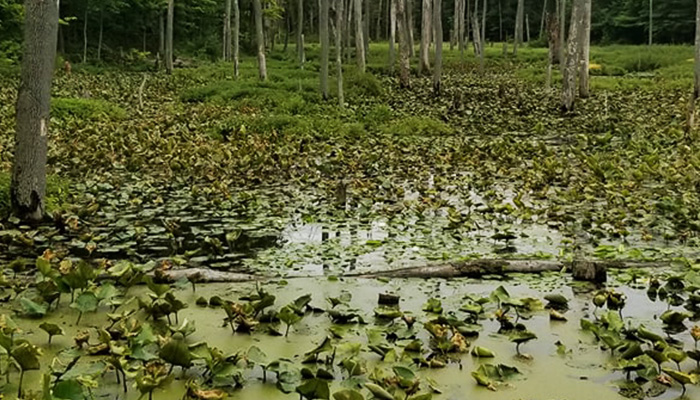
Finding water to fish in
The good news is that almost all natural bodies of water across places like the US and Canada will have some fish in them. The question is how many and how accessible they are to you, especially if you’re bound to the shore.
Artificial bodies can have fish, too. Some local governments will intentionally stock artificial lakes with fish to help balance the ecology, clean the water, mitigate pests like mosquitoes that breed around the shore, or even to provide a source of food for the needy.
The best way to judge whether a body of water is worth fishing — other than actually trying — is to watch the surface around evening / dusk. As bugs like mosquitoes become active, fish will try to eat them near the surface, creating noticeable splashes or bubbles.
Take the time (before SHTF!) to understand your local area. It’s not hard to do and you’ll remove a lot of risk/anxiety by at least knowing the general direction to try. Search online, go to a local tackle shop and ask, find a local fishing group/association, etc. If you live in Arizona, for example, you’ll learn that higher elevations feature fish like trout and pike while the lower elevations will bring bass and panfish.
Chances are best during dawn and dusk
You’re most likely to entice a fish to bite on your bait when they’re already hungry and eating. That’s usually at dawn and dusk, when the food fish eat is most active.
Fish will also get dormant during the day because they’re trying to save energy when the water gets hot.
Know where to cast by looking for cover and water changes
You’ve found a good pond or river. But where do you focus? The main signals fisherman look for are:
- Structure
- Cover
- Changes in the water
Like many animals, fish prefer to hang out in places where they are protected from the elements and predators. That often means overhead cover.
Structure refers to hard objects that fish hide near, such as a boat dock or downed tree, while cover is anything natural, such as a lily pad. But they all serve the same purpose for the fish — places to hide, sleep, and build their breeding nests.
Some fishers look for color changes in the water, but the better recommendation is to look for movement (or the lack of it) that stands out compared to the rest of the area. That means looking for agitated spots in otherwise still water or calm spots in rivers or streams.
Very still water can become stagnant, lacking in oxygen. Imagine there’s a large still lake, but it’s fed by a stream that has some “waterfall” agitation right where it comes into the lake. That agitation puts more oxygen into the water. So that area stands out as unusual water movement in an otherwise calm area.
Vice versa, fish don’t want to burn tons of energy staying in one spot within a fast-flowing river. So they look for calm spots to hang out, such as a natural rock formation that creates a protected pocket. That’s where you’d look first.
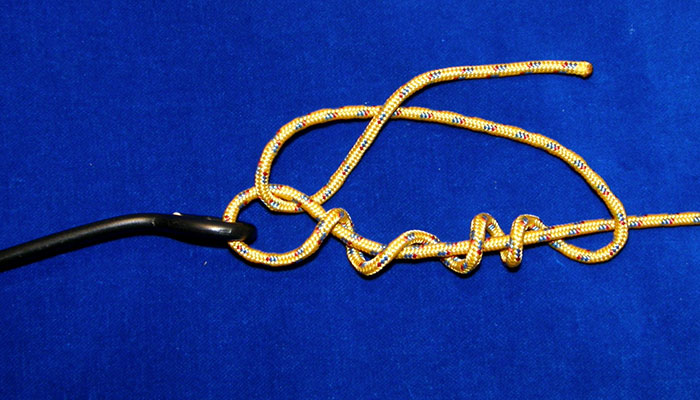
Bait rigging and knots
A common failure point is where the hook is attached to the line, which can get a lot of force applied to it while the hooked fish is kicking around.
Common knots that work on both monofilament (“normal” fishing line) and braided line:
- Clinch or Fishermans
- Palomar
- Duncan loop
Basic lure techniques
Now that you’ve put your bait in the water, you (usually) don’t just let it sit there. This is the cat-and-mouse game, where you’re trying to put the right ‘meal’ in front of the right fish at the right time, enticing them to bite.
The design of the lure is one thing, but how it moves through the water can make or break whether a fish thinks it’s something alive and tasty.
Different ways you can “present” the bait:
- Straight is the most basic. You simply reel the lure in via a straight line, holding steady pace and direction. This works well when testing a location to see if it’s worth the time at all, and when you want to cover a lot of water at once.
- Jigging is essentially skipping along the bottom. Cast, then let the bait drop until it stops because it hit the bottom. Do a short burst of reeling in, which brings the bait back up off the floor and towards you. Then let it sink again. Repeat.
- Twitching is exactly what it sounds like. Once the bait is in the water, you move the rod around in short twitchy bursts. This creates an erratic presentation, makes a lot of noise, and draws a lot of attention to your lure.
- Jerking is the same as twitching, except you use longer slower movements. Keep sweeping your rod back and forth while slowly reeling in.
There is a more static type of active fishing, where you have a floating bobber attached to the line some distance above the actual bait and hook. So the bob floats on the surface with the lure hanging directly beneath it.
That method only works when using live bait because it wiggles around on its own. If you had a fake lure just sitting there as if it were dead, that doesn’t look like an appetizing meal to the fish.
Don’t be too quick when you feel a nibble
When a fish sees something it’s considering eating, it doesn’t just swim full speed and swallow the bait whole in one gulp. The fish will often do a test bite.
Thus a common newbie mistake is overreacting to the first feel of a nibble, which jerks the hook right out of the fish’s mouth before they have a chance to really bite down.
When you feel a nibble:
- Wait a second to see if you feel another nibble.
- If you do, reel in the lure a little bit as if the bait is scared and trying to flee.
- At this point the fish will either fully strike or back off.
- If you feel something more than a nibble at any point, give the rod a good jerk, pulling the rod tip up and backwards.
- You’ll pretty quickly know whether there is a fish on there or if it was a false alarm.
It’s normal for a nibble to not result in a full bite. If that happens, just cast out and start again. Fish memories aren’t that long, so it’s better to go where you know there are hungry fish instead of going somewhere new — it’s not like they’re going to think “wait a second, I remember this was fake a few minutes ago!”
Reeling in
Reeling in the catch can be harder than expected, especially with large fish that create a lot of force as they try to escape. Some large ocean fish can take hours to reel in.
Just be patient and keep control of your rod at all times — a survival situation is the last time you want to lose a rod because of being sloppy.
Try to anchor the pole against something sturdy, such as a rock crevice or your upper thigh / hips.
Instead of only using the reel to crank the fish towards you, you should also use the rod itself as a sort of lever. It becomes a natural rhythm that you repeat again and again until the catch is in:
- Without turning the reel, pull the rod tip up and back towards you. This drags the fish a little ways.
- Quickly lower the rod tip from above your head down towards the water.
- During that window when the rod tip is falling, crank the reel. There will be less resistance on the reel because you’re taking up the slack you just created in the line, rather than directly fighting the fish.
Passive fishing with nets and traps
Four common passive methods:
- Basket funnel trap
- Trotline
- Gill nets
- Rock weir
How to kill and clean a fish
The best way to treat a fish with respect is to bonk it on the head until it passes out:
- Find a blunt object, such as a rock. You don’t want something too pointy since the idea is more of a punch than a poke.
- Place the fish on a sturdy backing, such as flat ground.
- If it’s flopping about, use your non-dominant hand to hold the body flat against the surface for stability.
- Use the blunt object in your dominant hand to forcefully strike right above the eyes, where the brain is.
- This ‘stuns’ the fish, making them instantly unable to sense anything.
- Repeat until stunned — although this usually only takes 1-2 blows.
It’s possible to put live fish in icy water, but this isn’t considered humane. An alternative humane method is to use a spike or similar skewer to puncture through the brain, left to right, in the same spot above the eyes.
Once the fish is dead, try to wash off the exterior with cool water. This helps prevent outside gunk from contaminating your meat once opened.
What you do from here could change based on how you plan to cook or preserve the catch. The common way:
- Remove the scale using your field knife or other sharp object. Go against the grain, scraping off as many scales as you can.
- Your goal is to remove the two filets, one on each side of the body, while avoiding the digestive system that could have fish poop and other nasties.
- With the fish laying flat on its side, insert the tip of a knife into the belly near the anus, then slice along the spine towards the head. (You can also start at the head if you want.)
- Be careful not to cut too closely to the midline / spine of the fish, as you’re more likely to nick the intestines.
- Once the filet is removed from the body, you can choose to leave the skin side on or use the same knife method to slice the skin away.
Storing and preserving fish
Ideally, you keep fish alive until you’re ready to cook. But that’s easier said than done in many survival scenarios — especially in situations where you caught a lot via passive fishing and feel like you shouldn’t waste/release any of them.
There are five main methods:
- Freezing
- Canning
- Smoking
- Salting
- Pickling
Learn more about food preservation basics and the pros/cons between methods.
Pickling implements the same strategy as canning because you will can the fish in the pickling process. The only difference is that you don’t need to worry as much about ensuring that everything is super airtight because the acidity is what actually breaks down and preserves the fish. Pickling doesn’t offer as long of a shelf life as canning, though.
Smoking is a great method in the wild, but the shelf life is limited to a month or so. Smoking fish involves suspending them over an open flame and allowing them to reach almost a mummified state.
Salting is similar to smoking, but instead you will cover the entire fish with salt, wrap them up in something like a big leaf or paper, and bury them beneath the fire. The salt and heat creates the same effect as smoking. And the salt does provide a nice flavor to the fish.
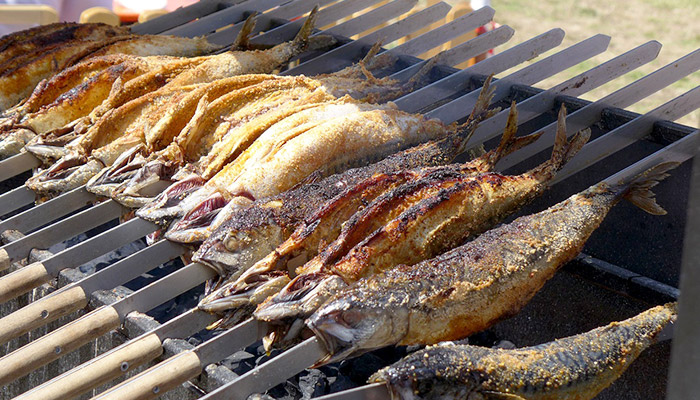
Easy ways to cook fish
Freshwater fish such as bass and trout should never be eaten raw — the chance of parasites or other contamination is too high.
Saltwater fish like salmon and tarpon can be eaten raw. After all, those fish are often used in sushi. The salt water provides some natural protection against parasites, but it’s not perfect — you can still get parasites in saltwater fish, but they are visible to the naked eye, so just pay attention to the meat. (Sushi fish is often flash-frozen before shipping, which kills the parasites.)
Regardless, it’s better to err on the side of caution and cook your fish if you can. You just need to get the internal temperature to 145 F (63 C). Some common ways:
- You can place fish (whole or filets) directly onto a hot flat surface, such as a cooktop or flat stone you heated up in a fire.
- Broiling is suspending the fish directly above the flame of an open fire.
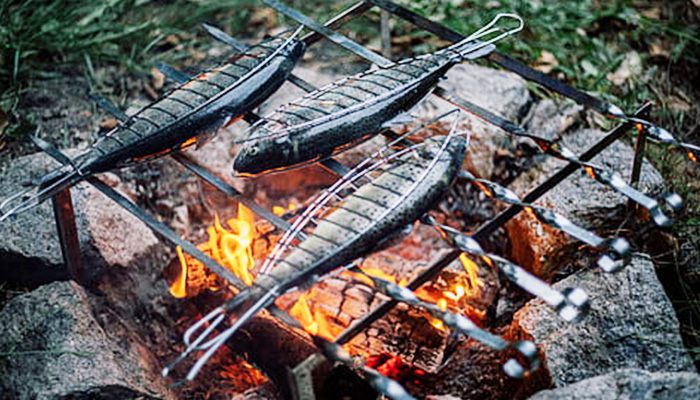
- Spit cooking involves impaling the fish with a skewer and rotating it over a heat source.
- Ash cooking involves wrapping the fish and burying it beneath a fire.