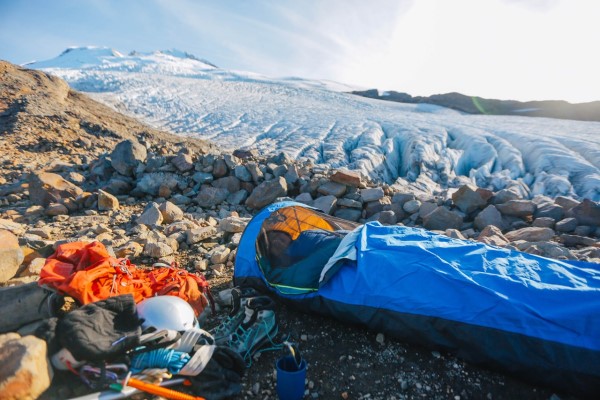
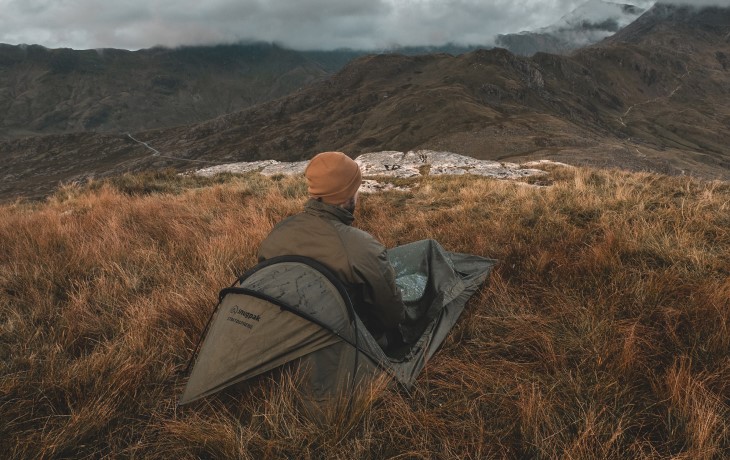
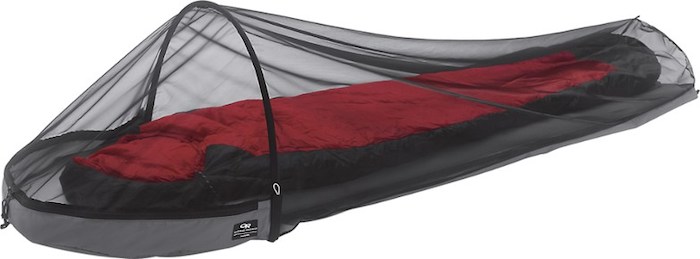
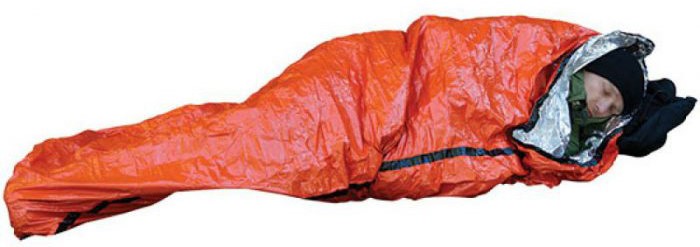
They’re most commonly used by backcountry adventurers who want the smallest, lightest, and fastest-to-deploy shelter option possible (without ‘cowboy camping’ under the stars), and by preppers when they want to avoid a tent when building their bug out bag.
That said, experts generally recommend going with a one- or two-person tent for your main go-bags, assuming you have the physical ability to carry one. They aren’t that much bigger than a bivy and the pros vs. cons of both styles generally work out in favor of tents.
For example, bivies are extremely tight on space — even if you have extra room inside, it might only be enough for a water bottle and shoes. Not much else.
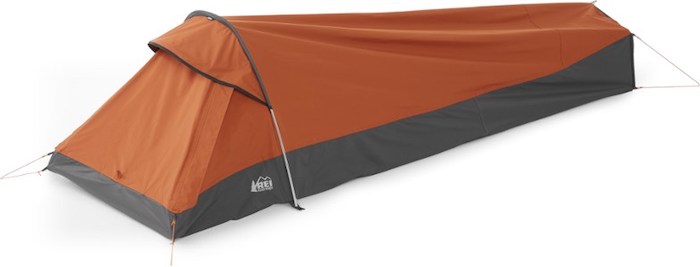
Tents do require a little more time and effort to set up, while some bivies are as simple as unrolling them from the package and throwing them on the ground. Although some models try to create a little extra interior room around your face by using a single tent pole to hold up a ‘ceiling.’
Bivies can also squeeze into places tents won’t fit, like rocky outcroppings or rough terrain.
Due to their waterproof nature, bivy sacks tend to hold a lot of condensation that naturally occurs from your breath and sweat. That makes material choice important, and some models come with vents and flaps over your mouth to minimize the problem.
You might run across so-called “emergency bivies” — which are usually nothing more than a mylar sleeping bag that you can slip into when you have no other way to keep warm. They compress down into a pretty small and lightweight package. But these are only appropriate as a nice-to-have backup or as something to keep in a vehicle for those “I don’t have my main kit with me” situations.
Summary:
- Most bivies weigh between 10 ounces and 1 pound 12 ounces, saving you about 1-3 pounds over a comparable tent.
- Ignoring the single-use emergency types, recommended bivies compress down to a package roughly 6” x 12”.
- Like other shelter gear, their climate protection is rated as 2-, 3-, or 4-seasons. Most people will be fine with a 3-season, but you might go with a 4-season if you live very far north.
- Even if you choose a bivy over a tent, it’s still worth having a sleeping pad and sleeping bag.
- If you build your bug out bag in a way where a bivvy is your main shelter, be sure to also carry a tarp and cordage, which can supplement the weaknesses of a bivvy.
- Because bivy sacks are prone to holding condensation, they pair best with synthetic sleeping bags which can dry out more efficiently when compared to down sleeping bags. Synthetic sleeping bags will also insulate when wet.
- Bivy sacks insulate better than most tents because there’s less air volume inside.
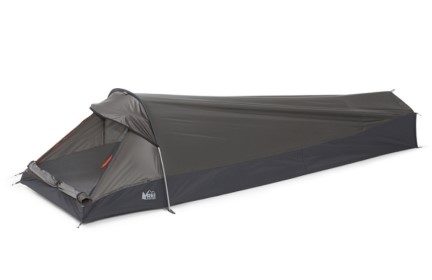
Best for most:
REI Co-op Superlight Bivy
The REI Co-op Superlight Bivy offers premium features found on more expensive bivy sacks. This 3-season bivy weighs a paltry 1 pound 6 ounces and is made of waterproof, breathable Pertex nylon and has a ripstop nylon floor. The REI Co-op Superlight bivy also has a small series of tent poles that expands the bivy section around your face and chest to allow for more room and airflow. A mesh panel enables you to enjoy the stars and decrease condensation while keeping out bugs. Corner guyouts allow for expansion of the bivy as a whole and the ability to stake it to the ground. This bivy costs around $150 which is a fair price considering its features.
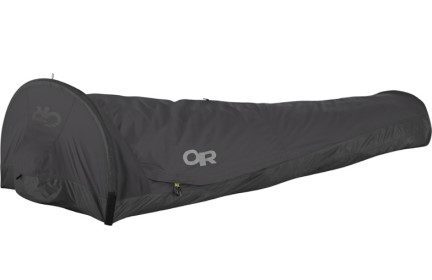
State-of-the-art material:
Outdoor Research Interstellar Bivy
If you want a premium bivy, consider the Outdoor Research Interstellar Bivy. The Interstellar weighs 1 pound 3.9 ounces and is made from Outdoor Research’s AscentShell material, which is both breathable and waterproof. Outdoor Research uses this fabric on their jackets and pants, too. The Interstellar is a “3 to 4 season” tent which means that it can be used in most weather types and seasons.
A single pole will expand the shoulder area, increasing the interior room. A guyline loop on the bivy exterior allows you to run a rope to extend the bivy like a conventional tent, and stake loops allow you to stake the bivy down. The mesh face panel decreases condensation and keeps the bugs out. The Interstellar Bivy costs $275, but it is a premium product with state-of-the-art material.
Contenders
Although not currently top picks, these models are worth a look if you want more shopping options:
- Black Diamond Bipod Bivy
- MSR E-Bivy
- MSR Pro Bivy
- Outdoor Research Bug Bivy
- Outdoor Research Helium Bivy
- Outdoor Research Wilderness Cover Bivy
- REI Co-op All Season Bivy
- REI Co-op Shell Bivy
- REI Co-op Superlight Bivy
- Sierra Designs Backcountry Bivy
Emergency bivy sacks — not true bivy sleep sacks, but in case you want a backup / for your car:
- Outdoor Research Helium Emergency Bivy
- Rab Survival Zone Lite Bivi
- SOL Emergency Bivy
- SOL Thermal Bivy
Be prepared. Don’t be a victim.
Want more great content and giveaways? Sign up for The Prepared’s free newsletter and get the best prepping content straight to your inbox. 1-2 emails a month, 0% spam.
Types of bivy sacks
The four main types of bivies you’ll find on the market:
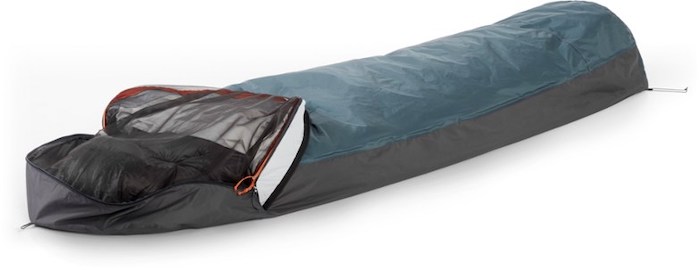
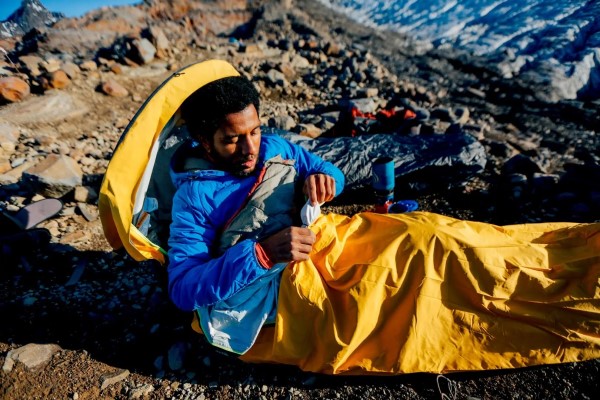
Bivy Sack: The most standard sort of bivy, a sack that fits you and your sleeping bag, usually with a drawstring opening to breathe through. They’re super convenient—just throw it on the ground and slide in.
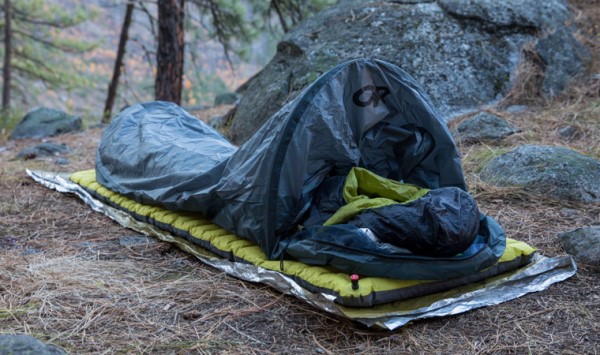
Bivy shelter: A bivy shelter has poles that make it a little harder to set up, but keeps the bivy off your face. Instead of a face hole, a bivy shelter has a zip-open flap with a mesh covering like a tent. The tent poles give you a little bit of room for essential gear.
Bug bivy: This is a variant of the bivy shelter that’s covered in mesh. It won’t protect you from the elements but will shield you from mosquitoes and other insects. Great for summertime, or warm dry climates. You can improvise a rainfly with a tarp.
Emergency bivy: These are called bivies, but aren’t really bivies, because they usually don’t cover your entire body. They’re more like single-use sleeping bags. Most of them are made of mylar, which makes them good for retaining body heat, but they can get wet with condensation. They also tend to be rather thin and aren’t intended for regular, vigorous use.
Emergency bivies are pretty cheap — the highest-end ones cost about $40 — lightweight, and compress well. It’s not a bad idea to keep one in your vehicle or get-home bag in case you find yourself stranded. Emergency bivies are not a sleep solution, but exist primarily for emergency scenarios.
You might see a few other novel bivy designs on the market, like bivies that double as a poncho.
Selecting the right amount of insulation
Bivys come in 2, 3, and 4 season varieties:
- 2-season bivy sacks are great for mild summer weather but are not ideal for wind, and snow.
- A 3-season bivy will stand up to everything except extreme wind and snow. 3 season bivy sacks are lightweight and breathable. For most, a 3 season bivy will work great.
- 4-season bivy sacks are made for extreme wind and snow conditions. A 4-season bivy is only optimal for extreme conditions, and you will get too hot if you are not in an extreme environment.
Most people will want a 3-season bivy. Even in colder environments, proper site selection can cut down on wind chill, and a sleeping pad underneath can keep you warm. 4-season bivies are too hot and heavy for most situations. And if you’re going to be in extreme situations for an extended period, you’re better off with a proper tent.
Bivy materials
The single most important consideration when choosing a bivy is the material. Bivies don’t offer a lot of breathing room, so condensation from your body can easily get trapped in cheap nylon, soaking your body and making you susceptible to hypothermia.
You want a bivy made from a breathable fabric that lets moisture out without letting it in. The gold standard in breathable materials are Gore-Tex, ToddTex, eVent, and Pertex.
Bivy sacks are typically composed of 2 to 3 layers of material. The outer layer being the most water resistant. Unless it is purely a bug bivy, expect the opening to have both a waterproof layer and a mesh layer to keep out the bugs and allow you to open it for ventilation, or just enjoy a view of the stars.
Features you want
Let’s look at some of the other considerations when choosing a bivy, or if you’re decided whether to choose a bivy over a tent:
- Cost: You might assume a bivy is less expensive than a tent. But counterintuitively, a good bivy will cost just as much or more. Because of the condensation issue, material selection is less forgiving for bivies than tents.
- Weight: When you pick a bivy over a tent, you’re giving up a lot of creature comforts for the sake of portability, but some bivies weigh as much as a small tent. If you’re waffling between a bivy or a tent, compare the weights of some bivies against the weight of a few 1- or 2-person tents.
- Size: Measure your height to make sure the bivy will fit you comfortably. Also consider the bivy’s packed size to see how well it’ll fit in your pack, which is especially important if you’re wanting a minimalist setup.
- Quality zippers: Here’s a tip that applies to so much gear: manufacturers who invest in high quality for a little (but crucial) thing like a zipper tend to make excellent products. YKK makes the best zippers, and we’ve never used a bad piece of gear that has them.
- Multiple zippers: Hopefully the bivy has at least one zipper so you can get in or out, but bonus points if it has zippers to let you create armholes so you can do other camp things while covered, like cook or sort gear. More zippers also offer more ventilation options.
- Sealed seams: While you can seal the seams yourself to ensure that water stays out (just like on a tent), it saves a lot of trouble if they come pre-sealed from the factory.
- Layers: Get a bivy with 2-3 layers. The outer top layers will be made of a breathable waterproof material, while the underside will be made of a ripstop nylon. Look for a mesh net layer near where your head and shoulders will be that is underneath a waterproof layer that can be zipped away, just leaving the mesh section.
Tips
If you choose to carry a bivy as a shelter solution here are some tips:
- Open your bivy near your face to allow your breath to escape the bivy. This will cut down on condensation. To keep your face warm, wear a face wrap or a balaclava.
- If your clothing is wet or damp, change into dry clothing before crawling into your bivy.
- When not in use, turn your bivy inside out to let it dry.
- Store essential gear inside the foot of your bivy sick. This will keep it secure and not impede getting out of the bivy in an emergency.
