How to set up a new axe for first use
Even if you buy a quality axe, it’s very unlikely it will arrive from the factory ready for first use. Here are my tips for preparing the handle and sharpening the blade on a Council Tool Boy’s Axe, a gift from my wife that she found from TP’s best survival axes roundup.
Unlike the cheap axes you tend to find in hardware stores, the Council Tool axe is made in America with quality materials and is well hung. A lot of times, you can pick up an axe in a hardware store and the head is already loose, which is unacceptable. The Council Tool Boy’s Axe is an incredible bargain at well under $100.
Summary:
- The handle has a factory varnish finish, which you’ll want to scrape off and replace.
- After scraping the handle, sand it to get it silky smooth.
- Oil finishes are usually preferred for tool handles.
- Raw linseed oil is safer than boiled linseed oil and works great.
- Apply multiple thin coats of oil on a warm, sunny day.
- Linseed oil can combust. Lay oil-soaked rags flat when not in use and soak them in water before disposing.
- Once the handle can’t accept any more oil, sharpen the blade.
- A Lansky sharpening puck is a convenient sharpening tool for axes.
- Buy a good sheath to protect the axe blade (and yourself).
More: Want to become a sharpening pro, especially with limited tools? Check out TP’s video lesson.
A boy’s axe is enough for a man
When looking at axes, you may be tempted to pick a big, heavy axe. I also made that mistake. Yes, a heavier axe can more-easily cleave through wood with less applied force, but when you’re using an ax, you’re going to be swinging it. Over and over again. A heavy axe will tire you out quickly while you can swing a lighter axe for much longer. A heavy axe is also harder to pack into the woods unless you’re car camping.
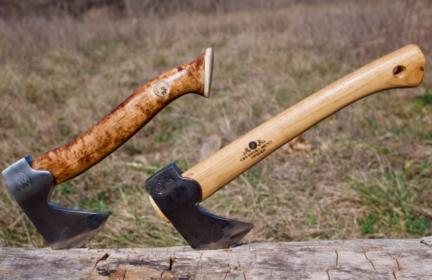
A boy’s axe, with a head weight of about 2.25 pounds and a 28-inch handle, is the best general-purpose axe for most people. It’s just heavy enough to handle most tasks, but light enough to be easy to carry.
You can also manipulate an axe of this size for basic wood shaping (think holding near the head and doing fine-control work). You also want a poll or single-bit axe. A double-bit axe can be handy, but having a cutting edge on both ends of the head adds extra risks. Plus the flat poll is handy for driving in wedges and smashing things in a pinch.
If you become a serious woodsman, you’ll likely assemble a collection of axes. If you split a lot of wood you may want a full-size axe with a duller blade. And hatchets are handy for bugging out, camping, and dispatching roosters. But the boy’s axe is a good starting point.
Preparing the handle
If you have an axe with a factory handle, or the next time you pick one up in a store, feel along the handle. Most axe handles come from the factory covered in a rough varnish. Those spots may not feel rough as sandpaper, but imagine the handle sliding along your palm hundreds of times. You want your handle to be as smooth as possible.
The first step is removing the varnish, which takes only a few minutes. Take a knife (not one of your fancier ones) and scrape it at a 90-degree angle across the handle to scrape off the varnish. You could also use a cabinet scraper if you have one around. Don’t cut into the handle, just scrape the surface.
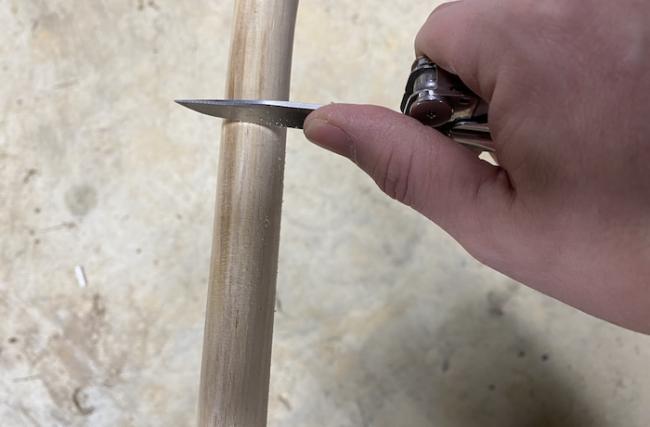
The finished result should look like bare, pale wood.
Next, smooth the handle with some sandpaper. A lot of people use 250-grit sandpaper for this, but I had finer 800-grit so that’s what I used. Fold the sandpaper on itself like an accordion to make it easier to grip. Then wrap the sandpaper around the handle and lightly move it up and down. You’re not trying to remove a lot of material here, just smoothing out the surface.

You’ll probably find that it’s hard to move the sandpaper up to where the handle wides. So when you finish with the narrower part of the handle, unwrap the sandpaper and lightly sand the wider bits.
Run your fingers along the handle, feeling for any rough spots. Sand them down. When the handle is smooth, wipe the wood dust off with a rag.
Choosing a finish
You can’t use a bare wood handle because moisture will soak into the wood and it will eventually rot. So you need to apply a finish.
Wood finishing is a complex topic and I could go on at length about various pros and cons. For our purposes, there are two types of finish: exterior coatings (varnish) and finishes that soak into the wood (oils).
The problem with exterior coats like varnish is that they only cover the surface of the wood. When they inevitably flake off, it exposes the wood to the elements. They’re tricky to apply correctly, and even trickier to repair — you basically have to strip the wood and apply varnish again.
Many woodsmen like oil finishes, which penetrate and soak the wood to repel water from the inside out. They’re easy to apply and maintaining the finish is as easy as applying more oil. You have to apply the oil more often than you’d have to redo varnish, but the application takes just a minute.
There are two types of oils: drying oils like linseed and tung, and non-drying oils like coconut and tallow. You want a drying oil for tool handles, which will polymerize so that it won’t be slick. If you soak a handle in something like coconut oil, you could be dealing with a greasy handle for a long time.
The often-recommended oil for this is boiled linseed oil (BLO), which is cheap, quick-drying, and makes for a nice finish. The problem is BLO is a misnomer, as the oil isn’t actually boiled. Instead it’s mixed with solvents and heavy metals like lead to speed up drying time. You don’t want that stuff in contact with your hands, which is why I avoided the handles when I treated my scythe snath with BLO and turpentine.
A better choice is raw linseed oil, which allegedly takes a bit longer to dry but is all-natural and non-toxic. However, I found that it dried as quickly as BLO without toxicity concerns.
Properly oiling a tool handle
It takes a long time to get the first layers of linseed oil in a handle. You won’t want to slather on a thick coat all at once, because it will dry into a tacky mess that’s a pain to remove. You want to apply multiple thin coats to let it soak into the wood.
Check the weather forecast and pick a couple of warm, sunny days for this project. The warmer the better, as heat helps the oil penetrate deeper in the wood, and sunlight will help speed up drying.
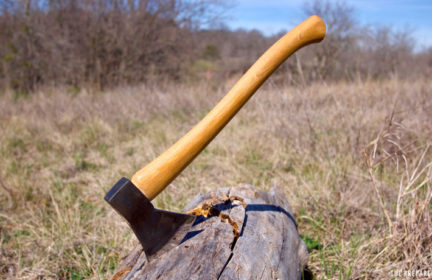
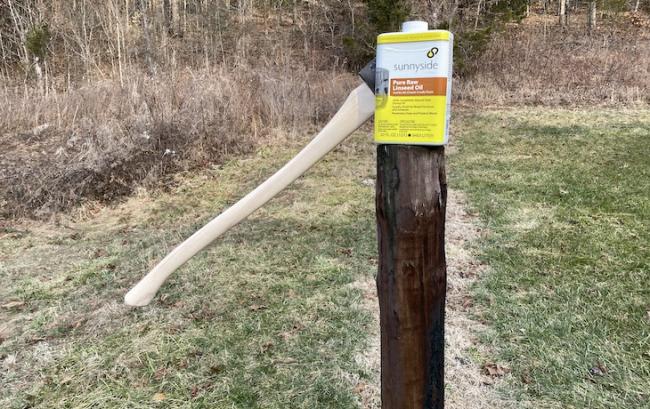
Pick a spot that gets good sun that has a stump or fence post to drive the blade into. I used a fence post in a sunny spot. Chop into your wood so the axe is firmly in place and won’t fall off. That will give you a safe, stable base to work from.
Pour a little linseed oil onto a clean rag and wipe the handle down with it. Wipe it thoroughly to keep a thin, even coat. And don’t forget both ends of the handle — the end grain is extra absorbent. While you’re at it, wipe down the blade on your first pass to protect the steel from the elements.
Wait 10-15 minutes to let oil soak into the wood and then wipe off the excess with a clean rag. If you’re busy and can’t go out that often, wipe down the initial coat with a clean rag to thin it out a bit more.
Warning: Linseed oil can spontaneously combust when soaked into wadded-up rags. Lay your oily rag flat outside and put a rock on it to keep the wind from blowing it away. When you’re finished with it, soak it in water before throwing it away.
Give it an hour or so, feel the handle to see if the oil has soaked in, and if it has, do the same thing again.
Expect this to take a couple of days. Take the axe inside at night to protect it from the dew.
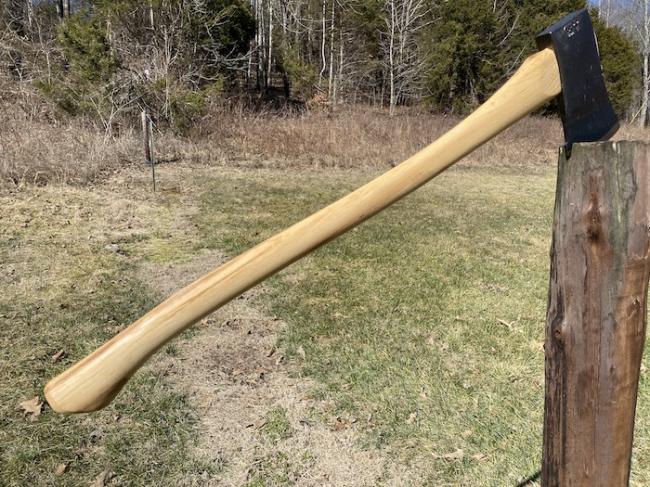
I applied seven coats total: five on the first day and two on the second. You want to repeat this process until the oil is no longer soaking into the wood.
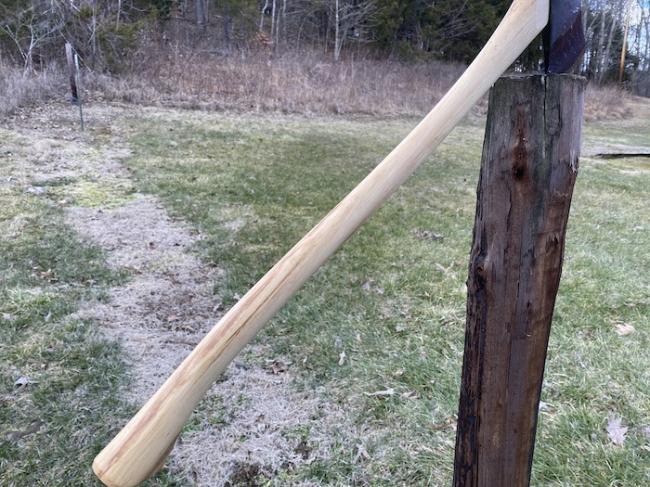
After a day of applying oil, the finish already looks richer.
You can keep repeating this process over time. Consider oiling it once a week or so until the finish gets dark enough for you. I plan to do a second round of oiling this summer when the temperatures are much warmer and the oil can soak in better.
Sharpening the Council Tool Boy’s axe
The factory edge of the Council Tool Boy’s axe is okay, but not especially sharp. More experienced axemen might want to reprofile the head with a file, but I didn’t feel it was necessary.
There are many tools for sharpening axes. Even a simple bastard file works. But I’m a big fan of the Lansky sharpening puck, which is cheap, easy to transport, and made for axes.
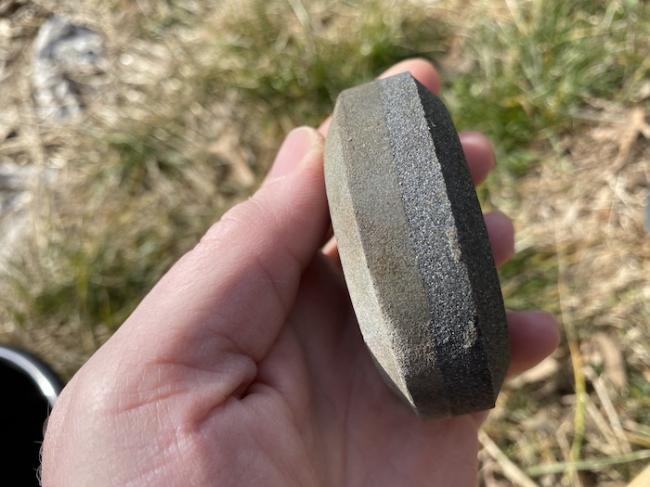
You want some sort of lubrication. Many people put oil on their stones, but I’m not a fan of oil for two reasons: once you oil a stone you have to keep using oil and oil makes a thick layer between the steel and stone, making it cut less effectively. Some recommend kerosene or diesel, but I like plain water and keep a bucket nearby when I’m sharpening. Water is safe and can be found just about everywhere. You can spit on the stone if you need to.
You want a stable sharpening surface. Putting the axe in a vice would be the best, but I wanted to simulate field conditions. I sat down with my stone and bucket and laid the axe across my knees, with the head on one knee, facing away from me.

I dunked the puck in the bucket and then using the fine side of the puck, ran it in a circular motion up and down the blade’s bevel. When that side was done, I’d switch sides (and knees). But that’s an oversimplification.
Sharpening is intimidating when you’re new at it, which is why TP offers a whole course dedicated to it. Part of the learning process is getting a feel for the blade. That starts with carefully running your finger across the blade edge to feel for the “burr,” which is a rough spot in the edge.
You want to work that burr to smooth it out, which then folds the burr over to the other side of the blade. Then you work on that side to smooth the burr out. You keep repeating this process with progressively lighter stone grits and pressures until you end up with both sides of the blade meeting in a sharp, smooth edge.
Don’t run the stone across the entire blade unless you’re planning to reshape it. You want to put the puck on the bevel (the end of the sharp edge of the blade) and angle it so that it “catches” the bevel. That takes some experience. The key is trying to maintain an even angle across the bevel.

After about 30 minutes of light sharpening, I had an edge sharp enough to shave hair off my arm.
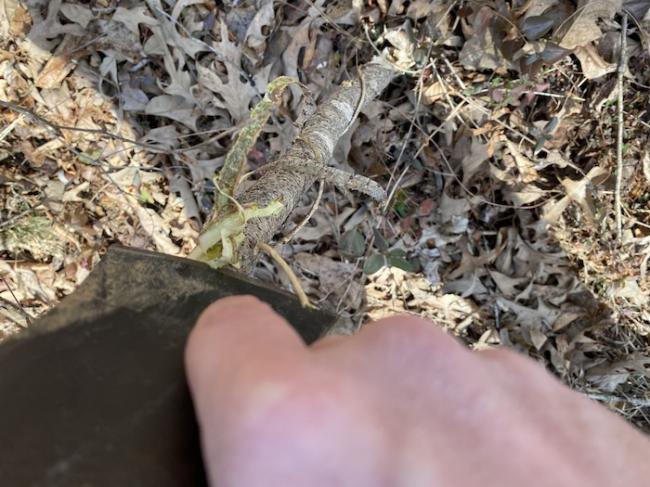
I decided to take the axe for a test run. I hacked down a couple of annoying saplings in the edge of the woods near my house, and tested the edge by peeling bark from them.
Once your axe is good and sharp, you want to be careful with the edge, not only to prevent injuries but to avoid damaging the edge. You definitely want some sort of sheath to carry it around in. I like leather because it plays nicely with oil. In the meantime, you can hang it up in a safe place.
-
Comments (15)
-