How I build raised beds
I recently wrote about how I’m switching to raised beds for my survival garden. I currently have six beds, and I thought I’d share how I build them.
Step one: Decide how to fill them
Before deciding on how to build the bed, it’s helpful to have a plan for filling them. Here are some options:
Bagged topsoil: The standard option. Easy, but expensive and possibly contaminated with aminopyralid.
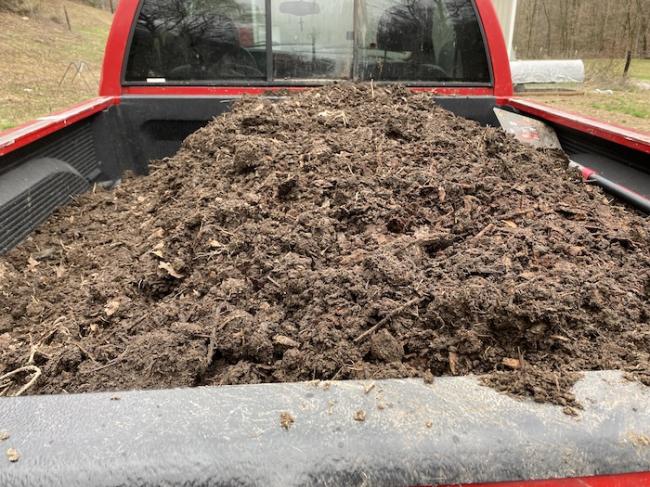
Compost: Ideally homegrown, but you might get it from local organic farms or even your municipality. I get it for $75 a scoop from a local organic farmer who I know won’t have aminopyralid contamination.
Native soil: The cheapest option is to use the soil you already have. You can dig out soil around the bed area and throw it in or you could double dig a plot and then put a frame around it. I cover double digging in our garden guide.
Wood: If you have a lot of rotting sticks and logs on your property, you can borrow from the practice of hügelkultur and use them to fill the bottom third of your bed. The wood absorbs water and slowly releases it over time, and as the wood rots it will enrich your soil.
Your materials and construction option will determine how deep your beds should be. Generally, you want beds to be 6 inches high, and ideally 12 inches. However, if you double dig a bed, you should have two feet of prepped soil, so the frame can be 4-6 inches high.
If you prep no-till beds in the fall for spring planting, the organic material on top will soften the soil over winter and even if the bed isn’t that tall, you’ll have a good, deep layer of loose soil for roots to grow into. It helps to stab the ground with a fork to loosen it up.

If you don’t want to dig (and I don’t blame you), compost and bagged soil can be expensive, especially for taller beds. You can fill the bottom third with rotten wood, leaves, grass clippings, and other organic scraps.
A general rule of thumb for no-till beds: put crappy stuff on the bottom, whether that’s organic matter that sucks nutrients out of the soil, like wood, or stuff that’s too “hot” for plants to handle, like chicken manure. A good fill for a no-till bed, from bottom to top:
- Wood, grass clippings, blood meal, chicken manure, leaves. The blood meal and chicken manure are high in nitrogen and help the wood break down.
- Chunky compost
- Sifted compost or fine topsoil (lighter soil to make it easier for seeds to germinate)

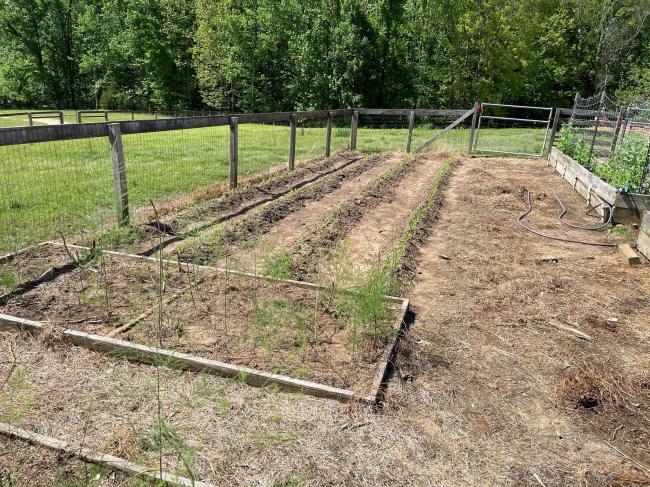
Here are how I’ve filled the six raised beds I have going now:
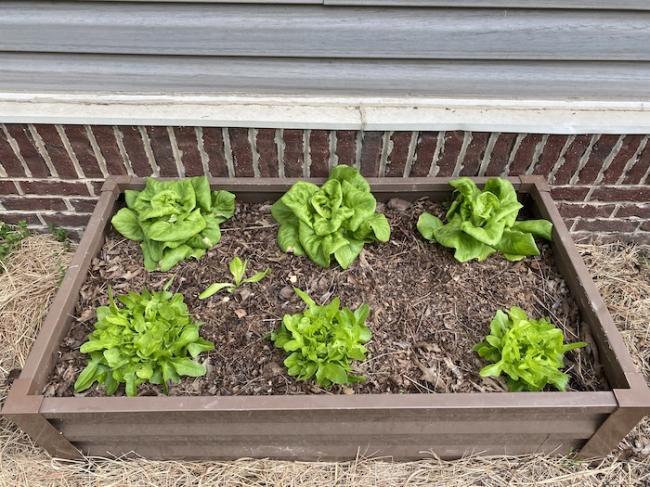
Bed 1: Rotten wood, scraps, and leaves in the bottom, Miracle-Gro topsoil on top. I’ve been growing lettuce in this one.
Bed 2: Rotten wood covered with blood meal on the bottom, Miracle-Gro topsoil on top. It’s mostly for herbs.
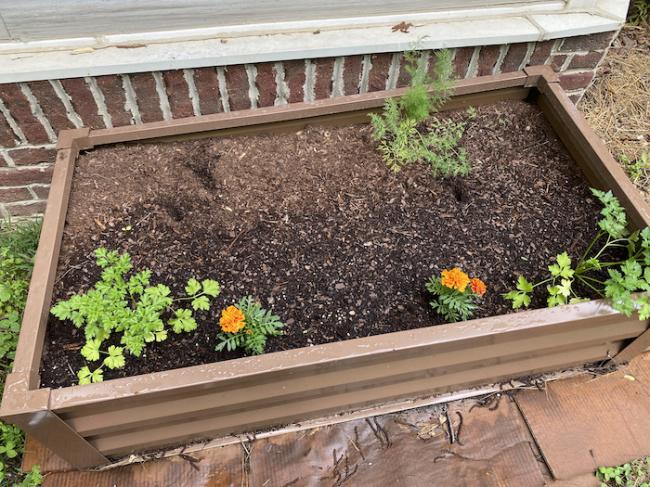
Bed 3: Rotten wood and blood meal on bottom, compost for the rest, a bag of Miracle Grow topsoil on top. It’s growing peppers, pole beans, and marigolds.
Bed 4: Started as a frame-less no-till bed in the fall, with cardboard, leaves, wood chips, and compost. The ground underneath got nice and soft, but the wood chips suck too much nitrogen for plants to grow, so I put a frame over it and filled it with compost. It has cucumbers, peppers, and marigolds.
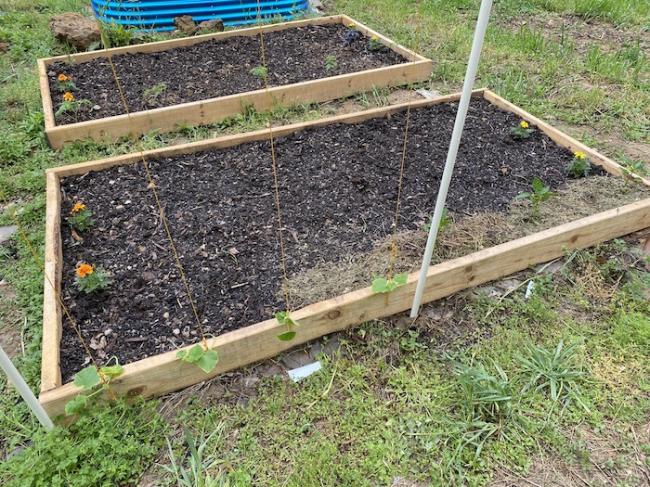
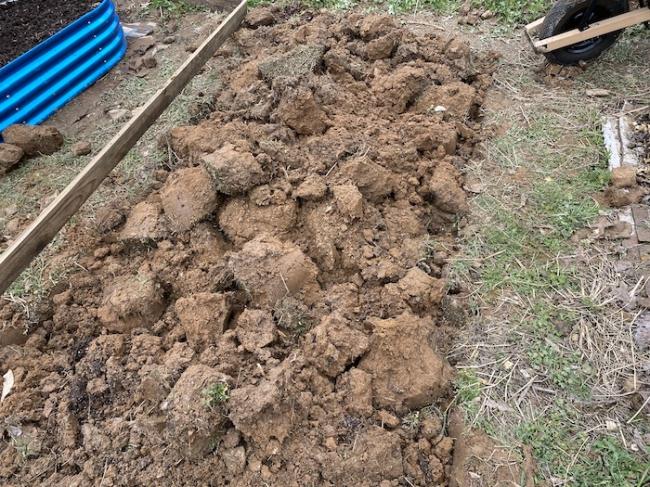
Bed 5: I double dug this bed, but was frustrated by the huge clods of dirt. I raked them out and topped it off with compost and some bagged soil. This is my deepest bed, so it’s where I transplanted my tomato starts. I also put some marigolds and onion starts in the bed.

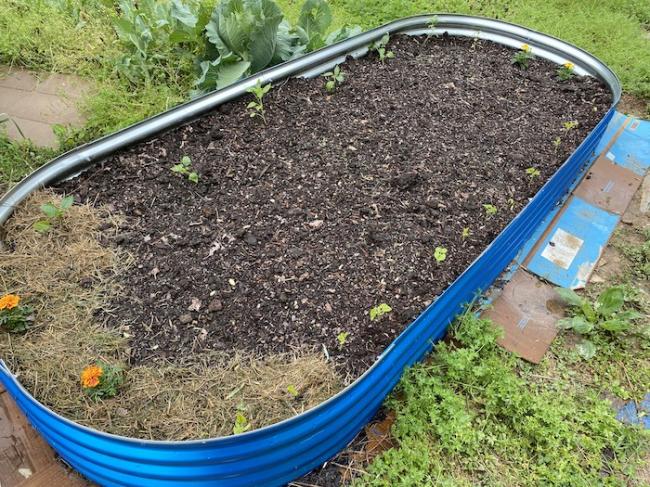
Bed 6: A 3×7 metal bed filled entirely with compost. I plan to grow sweet potatoes in it this season so I wanted it to be nice and loose. It’s growing spinach and lettuce for now.

It’s still early, so I haven’t filled them out entirely yet.
Once you have an idea of how you’d like to fill your beds, decide how you want to frame them.
Step two: decide on materials
Next, decide what you’ll frame your raised beds with:
Nothing: Many expert gardeners, like John Jeavons, Steve Solomon, and David the Good create raised beds without any sort of frame, just by piling up soil or compost. No-till gardener Charles Dowding usually goes without a frame, but will use one to shape the materials initially. Definitely a cheap option and makes for easier weeding, but I like protection around my beds.
Wood: Wood is the standard option, but lumber prices are at all-times highs. You can build a 4×8 bed with three 8-foot boards, anywhere from 4-12 inches tall. Wood rots, though you can treat it with various things. There is a debate over whether pressure-treated wood is safe. Until 2003, pressure-treated wood was treated with arsenic, but now they’re treated primarily with copper, which is a soil micronutrient. I don’t use pressure-treated wood, but I haven’t completely ruled it out.
Metal: Quality metal beds like those from Australian supplier Birdie are much more expensive than wood: $150-250 a bed, but tend to last for years. Plus, they come ready to assemble.
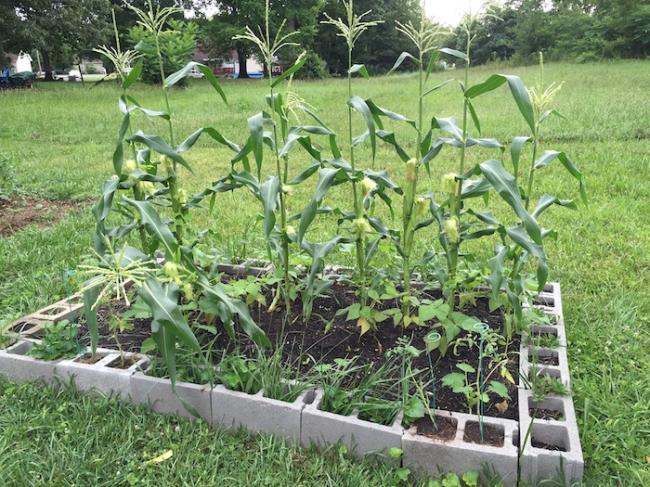
Cinder blocks: Cinder blocks are dirt cheap and last forever, but take up a lot of space and are ugly. Since they’re porous, they tend to dry out quickly, especially if you have gaps between blocks. If you don’t level the soil first your beds will look cockamamie. Some people plant in the hollows of the blocks, but it gets too hot here in the summer for plants to survive in those holes.
Stone: There are a number of flat stones or architectural blocks you can build raised beds from. Many of the same pros and cons as cinder blocks, but they look better.
Four of my beds are metal. Nothing fancy as Birdie, two of them from TSC, two from Amazon, all different sizes. Two are constructed from non-pressure-treated 2×6 dimensional lumber.
You can get creative with materials. I’ve seen raised beds made from plastic boards, kiddie pools, logs, old refrigerators, etc. You can also mix materials. A lot of people build wooden frames and then use metal roofing to fill in the sides, reducing lumber costs. Or you could do a layer of stone with lumber on top.
Step three: build the bed (wood or metal)
There are many ways to build raised beds, this is just how I did it.
I like to keep my wooden beds simple. If you make them over eight feet long, they need some kind of posts in the ground for support, which I don’t like doing because my soil is hard and rocky.
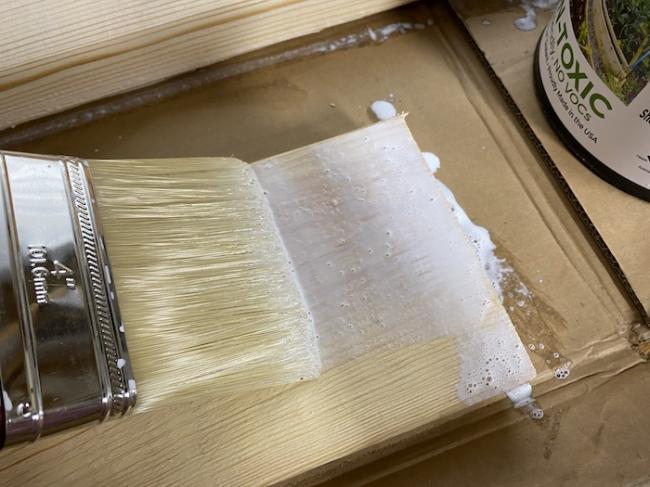
For each bed, I used three 2×6 boards. I cut one board in half so I had two four-foot boards. To prevent rot, I used a product called Garden-Seal, which is supposed to be non-toxic. It’s akin to watered-down Elmer’s glue, it dries clear, and isn’t very messy. I’ll let you know in a few years how it worked out.
You need to figure out how to attach the boards together. Here are some options:
- Screws and butt joints: You can just screw the boards together with wood screws, but it creates a fairly weak joint that can split the wood. I prefer the self-driving screws that take a star bit.
- Planter wall blocks: These planter wall blocks are amazing. You cut your boards and then insert them into slots on the blocks. No joinery required, and you can remove boards as needed. I don’t use them because my garden space is very narrow, but they’re a great option.
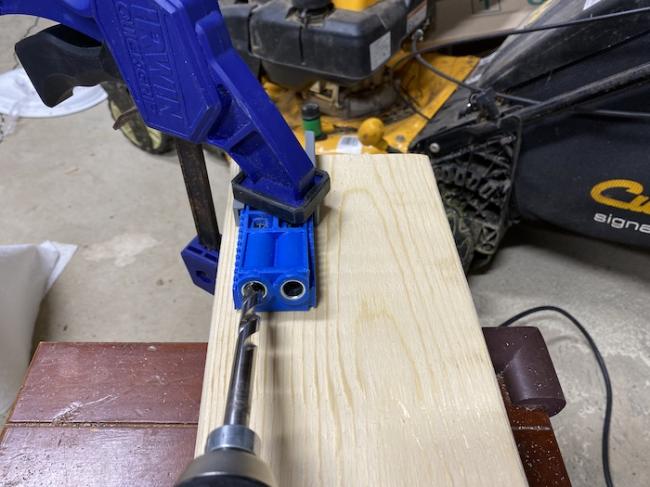
- Pocket screws: To use these, you need a Kreg Jig and special screws. You use the jig and an included drill bit to drill angled holes into the end of your board before attaching the two boards with screws. It’s a bit of a pain, but they make very strong joints.
- Brackets: You can get simple corner brackets and use wood screws to join them to each corner. Another good option that makes strong joints.
For the wood beds I constructed this year, I opted for pocket screws, since I have a Kreg jig and requisite screws laying around. A Kreg jig isn’t a bad thing to have in your workshop anyway, since it creates much stronger wood joints than regular screws. You first drill angled holes in one piece of wood, put your two pieces together, and then put screws into the slanted holes into the other piece.
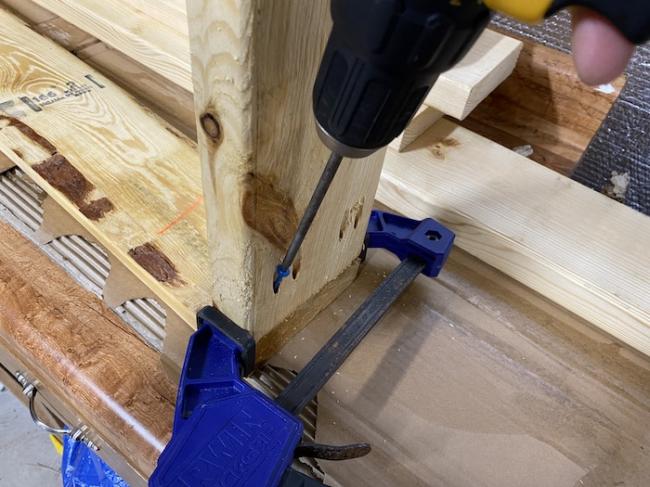
I had a corner of one bed that didn’t want to come together, so I just put a regular wood screw through the adjoining pieces to draw them together. Besides that, pocket screws take a lot of abuse. I used them to construct my first chicken tractor, and it’s been dragged all over my field for four years and is holding strong.
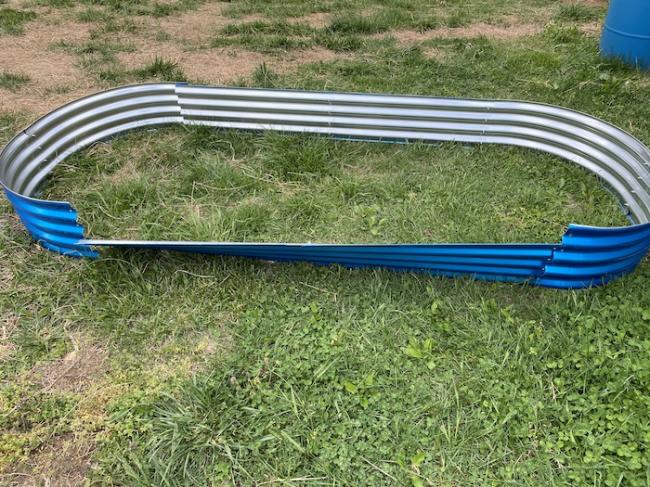
For ready-to-assemble metal beds, assembly is pretty easy. For my smaller TSC beds, the sides just slid together, though it was a lot more frustrating than it sounds. My Amazon beds had overlapping panels where I lined the holes up and secured them with a bolt, washer, and nut.
The Amazon beds were covered in blue plastic, which is frustrating to remove. I removed the plastic only from the inside, so it wouldn’t leech into the soil, but left it on the outside to protect it from the elements and I like the nice blue color.
If you’re doing a stone bed, you should prep the bed area before laying down the stones.
Step four: prep the bed area
Here’s my process for preparing the spot to put my raised bed:
- Use a string trimmer to cut away all the grass and weeds
- Use a broadfork to piece and crack the ground where the bed will go. This loosens the ground beneath and improves drainage. Needless to say, if you double-dig the bed, there’s no reason for this.
- Put down overlapping layers of cardboard over the area so as to not have any holes for weeds to creep through. The cardboard kills the weeds underneath and then rots away, giving your plant roots access to the ground below.
- Put my bed on top of the area. You want cardboard to extend out the sides of the bed to prevent weeds.
You may want to consider leveling the ground first. I don’t do much of this because my ground is hard as concrete. I’ll lay my bed frame down, check it with a level, and knock down high spots with a hoe. If the bed is really out of level, I’ll put bricks or stones under one end to raise it. I don’t worry too much about small gaps between the bed and ground.
If you’re doing stone, you’ll want the ground as level as possible, especially if you plan to use mortar. You might consider heavy machinery to break up the ground and smooth it out.
Step five: fill the bed
Here’s the simple part: fill the bed with whatever material you chose. A wheelbarrow helps here. For most of my beds, I start with random chunks of wood found around my property, followed by compost, and then maybe some bagged soil if I have it around. Try to keep things even as you fill the bed.
I don’t worry about gaps between the bed and ground. Whatever compost or dirt spills out will fill the gap and everything works out.
Step six: mulch around the beds
This step is optional and you don’t have to do it right away. But if you don’t want to have to cut grass between beds and worry about weeds creeping into them, some mulch is a good call.
You have a multitude of mulch options. Friends of mine put gravel between their cinder-block raised beds. It’s ugly, but it works, and they don’t have to worry about slipping in the mud.
My plan is to put wood chips between my beds. The downside is that they’ll eventually rot. But the upside is that as they rot, they’ll enrich the soil around the beds, similar in principle to the Back to Eden method, where you dump wood chips over a garden and plant into them.
Why would I care about enriching the soil in the pathways? Because my beds won’t last forever, and rich soil in the entire area gives me more options in the future. If I decide to do rows or simple in-ground beds in the future, I’ll have an entire plot of rich soil to work with.
In future posts, I’ll discuss planting, trellising, and hoops. But this should be enough to get you going. Don’t forget to test your soil and amend it before planting!
-
Comments (10)
-