
I love the idea of waxed canvas clothing. It’s waterproof, rugged, and fire-resistant — but it’s also expensive. So I instead settled on a Carhartt Bartlett jacket in charcoal gray, which has plain duck cloth and no waxing.
However, I quickly realized during a snow shoveling session that Carhartts were not very waterproof. Sure the duck cloth weave is tight and is more water repellent than a looser weave, but it still is made out of cotton.
So I decided to try waxing the Carhartt myself to see if it could get close to a store-bought waxed canvas jacket without the store-bought premium.
Summary:
- DIY waxing is easy, it just takes some patience (about four hours for my medium jacket) and arm strength.
- The key is to use a hairdryer or heat gun to keep the fabric warm so the wax melts into the fibers.
- The jacket was more water-resistant in the end, but I wouldn’t depend on it in more than a light rain or snow.
- Between the $130 jacket and $110 spent on wax, I didn’t save a lot of money over the store-bought options.
- If I did it again, I’d buy cheaper bar wax like C4X wax or Otter Wax, which would probably make the process less messy and make the money savings worth it.
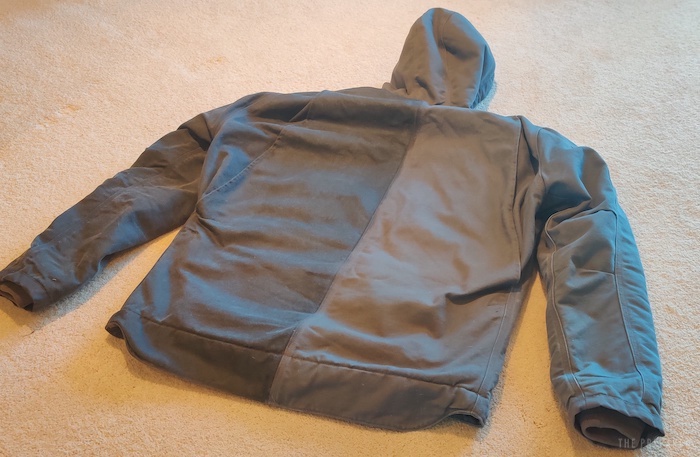
In this test video, the darker portion on the right has been treated while the lighter parts haven’t. You can see how the untreated parts absorb more of the water:
I tried DWR spray first, and it failed
Although I wanted to improve water resistance, I was a little hesitant to jump right into waxing — I was worried waxing would unexpectedly change the fabric appearance (I couldn’t find many successful examples to look at online), take a lot of work, and make the jacket too heavy and hot.
After watching YouTube videos and asking questions on Carhartt forums, I decided to try some DWR waterproofing spray.
But after the entire can was applied, the material was maybe only 5% more waterproof. Seemed like a total waste of money to me.
After researching some more, I came to the conclusion that if I wanted to waterproof this jacket, I would have to take the plunge and wax it.
Buying wax
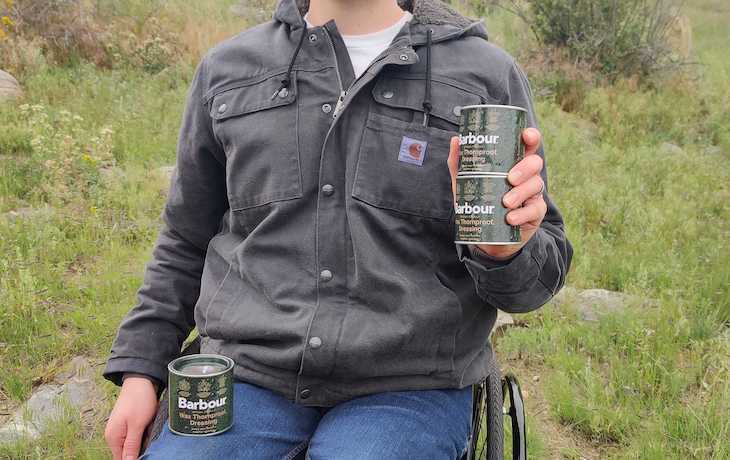
Taking a cue from Jon Stokes’s post on his favorite waxed canvas clothing, I decided to invest in Barbour wax from England. It was a bit more expensive than the American version called Filson wax or the bar waxes.
If I was going to go down this road, I wanted to do it once with the best product I could. I tried reaching out to Barbour to see if they had any advice on how to wax a Carhartt duck cloth jacket and they responded with:
Unfortunately I cannot properly advise you in your task. Our tins of wax are made to reapply a thin layer back onto a Barbour waxed jacket. We cannot and do not advise using our wax on non-Barbour products.
I cannot advise you on how much wax to use, as I cannot say how our wax will react with the fabrics or if it will soak through to the lining.
So I was on my own to figure it out.
Preparation
You will need:
- Two cans of wax
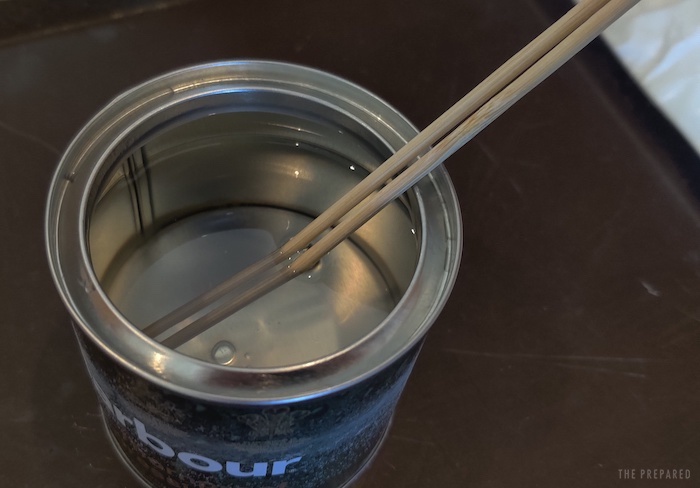
- Stirring stick like a bamboo kebab skewer
- Pot and stove to boil water on
- Piece of cardboard or plastic to work on so you don’t get wax everywhere
- Disposable gloves
- Hairdryer
- Foam paintbrush or bone sponge
- Cotton rag cloth to wipe up excess
- Heat gun (optional)
The Barbour wax comes in a steel container that can be heated up to melt the soft white wax which is similar in color and texture to coconut oil.
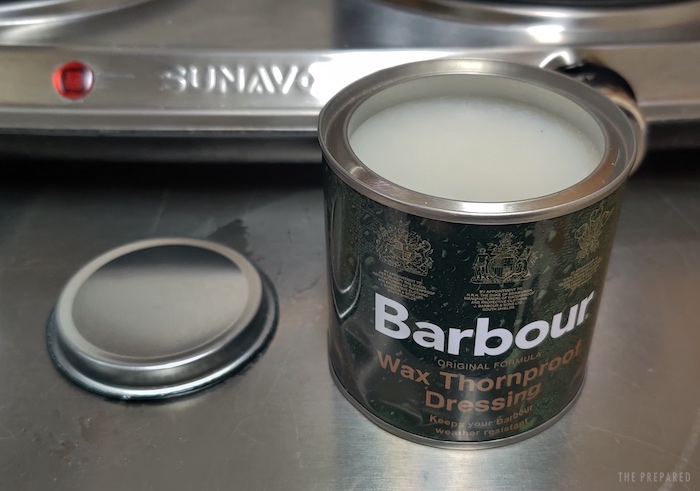
Place your can of wax in a pot of hot (but not boiling) water on the stove. It can help to tilt the can so that air bubbles trapped at the bottom can escape, which allows the heat to spread uniformly.
In about 10-15 minutes the wax inside the can will melt into a clear liquid state that looks like water. I used a bamboo kebab skewer to stir and break up chunks of solid wax during the melting process to speed things along.
The clothing you’re going to wax should be as clean as possible, otherwise junk can get sealed in with the wax.
Application
Many people use bone sponges, but I had a cheap foam brush on hand.
I quickly learned that applying the wax is not a delicate process. You really need to work the wax into the fabric and press hard from multiple angles. I had to choke up on my foam brush handle, essentially holding it like a bone sponge so that I had enough directed force to get the job done.
Remember: You do not want a distinct layer of wax sitting on top of the fabric. You do want the wax to be impregnated into the fabric as much as possible.
This is where the hairdryer comes in. If the fabric is cold, the wax will dry too quickly, creating a thick milky mess that doesn’t work its way down into the fibers. My preferred method was to use a hairdryer in my off-hand to keep things warm while applying with my dominant hand.
When applying, the wax on your fabric will be shiny and wet in appearance. The shine and color will change as you work in the wax and it settles.
As you’re keeping the fabric hot and working the wax into the fibers, use the rag or old sock to wipe away obvious excess.
There’s no rule on how many coats of wax to apply. But I found that by going back a second time, that reheating process would melt some of the wax even further down into the fibers than I could do the first time.
The can of wax will cool and solidify before you’re able to finish. You can go back and forth to the hot water, but I used a heat gun to keep the wax melted. The hair dryer wasn’t hot enough to do that job, and vice versa, the heat gun made the fabric too hot. Thus the two different heaters.
The first coat of the entire jacket took three cans of wax. Once the thirsty cotton had received its first coat of wax, however, I was able to apply an entire second coat with just half a can.
Hang your article of clothing in a warm area overnight and you now have a waxed piece of clothing!
The results
After three and a half cans of wax costing about $110, the jacket was 1.7 pounds (770 grams) heavier, darker and shinier in appearance, stiffer, noisier when brushing your arms back and forth — but it also feels more durable than before.
The water resistance seems to be quite a bit better, but not perfect. I can tell it’s repelling more water than before, but I can still feel some dampness in the fabric after wiping off surface water with a towel. So it will help with a light rain or snow, but won’t be at the level of something like Gore-tex.
In the following video, the left side had one coat of wax applied, the middle section was untreated, and the right side had two coats of wax.
There wasn’t a significant increase of water repellency with an additional coat, but when you are able to apply an entire second coat with just half a can of wax, it’s worth the little bit of gain.
You are reporting the comment """ by on